

Welcome to The Kester House & Garden Project!
This site has been created to document our rather in-depth home renovation project. Friends and family ask about the status from time to time, so this will serve as a place to keep track of our progress. I also use the site as a place to store photos, plans, and technical information (like paint colors, etc.) so I can find that information when I need it.
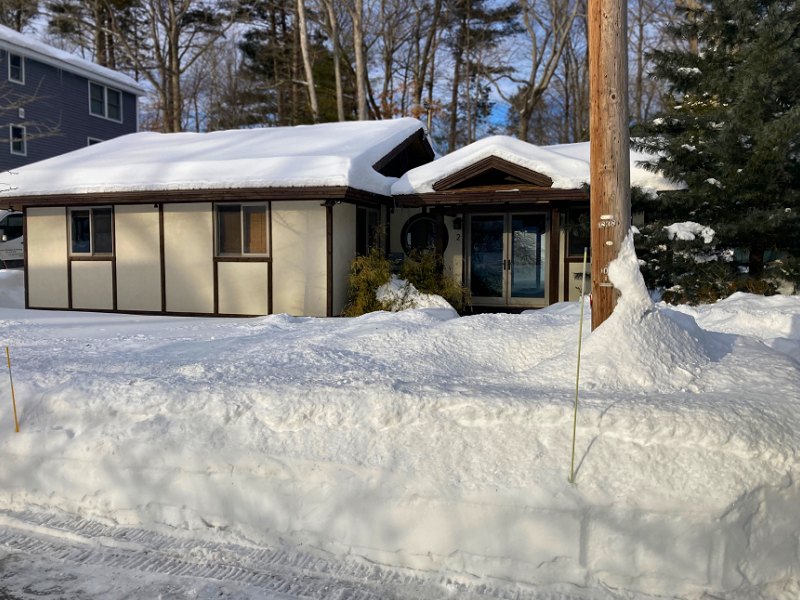
This was a pretty brutal Winter (1 photo).
If you're visiting the site for the first time, after having a look at this Welcome page I recommend reading the House and Inspiration sections before you dive right in, so you'll have an idea of what we started with and what we're hoping to end up with. I've been writing about the project in the order we've been working on it, so the Garden sections would be next, followed by the Exterior sections and finally the Interior sections.
I often add new information or photos to various sections, so the News section below will always have links to the latest updates. There's also a Table of Contents at the bottom of this page with a brief description of every page on the site. Additionally, if you're looking for information about a particular project, you may find the table available on the Project Timeline useful, since you may click on the project name to go directly to the information regarding that specific work.
 News
News
2026.03.30
The House: So yeah – it's been over three months since our last update, and there really hasn't been much of anything
going on as far as progress on the living room plaster work where we were just before last Christmas (although I have been pickin' away at getting a few
more coats of joint compound applied every few days lately). There have been a few projects to occupy my time between our big snowstorms throughout
January and February, but those were more maintenance type tasks than actual project work.
In January I spent some time removing our old Toto® S300 Washlet® and installing their new
S7A auto-flush washlet (which took a while to complete as I had to wait for extra parts that Santa didn't supply when we got the new one for Christmas).
That went in without too much trouble, then the lovely bride took off for Hawaii for a couple weeks in February to do some volunteer work building houses
for the folks that lost theirs in the Lahaina fire a couple years ago (including a new place for her cousin). While she was away doing that, I
spent most of the month taking care of something I've been needin' to do for a while now…
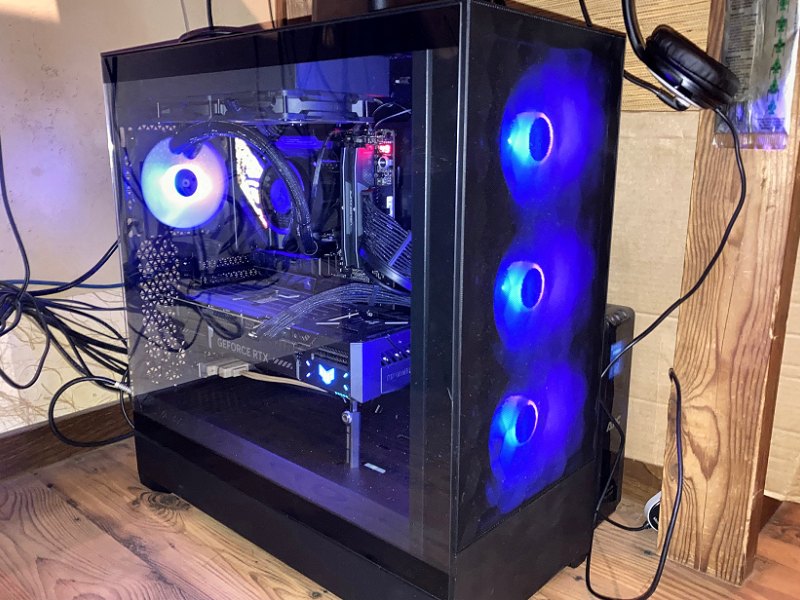 The New Computer: The last time I upgraded my home computer was back in 2012, when for the first time I just bought a
pre-built system, rather then getting all the components and a case then building it myself. That was an HP Pavilion H8-1240t, and I did a few upgrades
at the time of purchase to "customize" it with bigger discs, an nVidia graphics card, more memory, and an HP 25" LCD monitor. It also came
with Windows 7 and some other software, and it's served me well enough for many years. I'd upgraded to Windows 10 with a few SATA SSDs a while ago, and
also upgraded the video card a few times, but that's about it.
The New Computer: The last time I upgraded my home computer was back in 2012, when for the first time I just bought a
pre-built system, rather then getting all the components and a case then building it myself. That was an HP Pavilion H8-1240t, and I did a few upgrades
at the time of purchase to "customize" it with bigger discs, an nVidia graphics card, more memory, and an HP 25" LCD monitor. It also came
with Windows 7 and some other software, and it's served me well enough for many years. I'd upgraded to Windows 10 with a few SATA SSDs a while ago, and
also upgraded the video card a few times, but that's about it.
With Windows 10 reaching the end-of-life last year, I started considering a new system (since the old one couldn't run Windows 11). Things got
started with a friend I've been online gaming with for many years that really enjoys building gaming rigs (and whom I helped with some plumbing layout
work for the liquid cooling on his latest rig not too long ago). He offered to build a new system for me back in late 2024, and we'd discuss my options
occasionally from time to time. Last Fall I finally decided the time had come to get serious about a new system, so we started picking components and working
on the logistics of getting the thing built (he lives up in Québec, which added a bit of a wrinkle for shipping parts back and forth). We
determined the new system would start with an ASUS® RoG STRIX Z890-e Gaming WiFi motherboard, an Intel®
Core Ultra 7 265KF processor, and an Arctic® Liquid Freezer III Pro All-In-One liquid cooling radiator unit, along with a
pair of 16GB Corsair® Vengeance DDR5 6,000 MHz, CL28 RAM sticks, and then a Lian-Li® Edge
Series 1,000W Platinum power supply. He picked up the processor up in Canada, and I bought everything else through Amazon and had it shipped to him
for assembly in a spare case he had on hand. I then ordered myself an ASUS® TUF Gaming GeForce RTX 5070 with 12 GB of
memory, an ASUS® TUF Gaming 31.5" 1440P curved monitor, and a few Samsung® NVMe
SSDs to take care of my storage needs (a 1TB 990 PRO "system" drive, a 2TB 990 EVO Plus "data" drive, and a 4TB 990 EVO Plus
"internal back-up" drive). I had the drives and video stuff shipped here, then waited for the case to come from Canada.
The case arrived in early December (although he couldn't find the original side panels for it before he shipped it), then I just sorta piled
up all the boxes of stuff in my office until after Christmas before diggin' into it. I then spent a lot of time throughout February getting the thing
all working the way I wanted (lots of drive cloning stuff from my old SATA SSDs to the new NVMe SSDs), then finally did the upgrade to
Windows 11. The last thing was to then find a new case (and there's not a lot of options for old farts like me that want to keep a DVD writer and
Blu-Ray player in the system). I ended up with a Fractal Design® Pop XL Air case that has plenty of room for the
graphics card (which is huge), excellent air flow for cooling, and space for two optical drives. The new system is running very well, and will
likely be the last computer I ever own.
While I was at it I also upgraded one of my old HP ProLiant N40L MicroServers with a handful of bigger disks, since those are quite inexpensive now.
It's now running a pair of Western Digital® 2TB WD Blue® drives as the BIOS-controlled RAID 1
array for the system and server folders, then after a custom BIOS update to run larger GPT disks, I added another pair of 6TB WD Blue®
drives as a Windows "dynamic disk" mirrored set for the client back-up drive. That old thing's still chuggin' away just fine runnin' WHS 2011.
The Boiler Room Leak: While working on the computers in my office throughout most of February, I was greeted one morning by a
dripping noise from the boiler room. It first appeared as if one of the pump flanges was leaking, but it was a very slow drip so I put a bucket under it
and tried to finish the computer upgrade work. The next day the drip had turned into a huge mess with water spraying out of the back of the pump
housing, so I shut the system down, and went to HD for a new pump. The cast iron flange had rusted through over the last five years since the last time
this happened, so the new pump went in without difficulty and the system's keeping the house comfy once more.
The Vanagon: So the other thing I had to deal with in January before getting into the new computer build was the Vanagon.
I've learned over the last couple years that I should never, ever go to the grocery store on New Year's Eve. In 2024 when we did that I blew a cooling
hose on the way home. For New Year's Eve 2025, as we left the parking lot of the grocery store the thing "stumbled" a bit, then died. I tried
re-starting it but no joy. A couple guys from a nearby apartment complex were pulling out to the road where it had stalled, and kindly offered to help me
push it into their parking lot so I could see what was going on. I got into the engine compartment and checked the coil wire for spark while TLB cranked
the thing, but there was nothing doing. After a couple weeks of occasionally working on it in the snowy driveway, I installed a new ignition coil and it's
running better than ever.
The Site: Aside from this very lengthy news update, I haven't done too much to the rest of the site this time around. I did
add a couple paragraphs and a few photos regarding the details of the
new S7A Washlet® install to the Bathroom page of the
Interior section. I also added the 2026 projects listing to the Project Timeline page
of the Specifications section, that has linked listings for most of what I already covered above. That'll do for now, as I get back
into taking care of the living room walls finish work.
2025.12.23
The House: Just a quick update to wish everyone a safe and happy holiday! We've finished most of the plaster work for the
living room walls, as I said we'd try to get to in our last update, then we managed to get our Christmas decorations up over the last few days. Now
it's time for a little break to celebrate Christmas and the New Year. We're looking forward to 2026 as we hope to finish the last few interior
renovation projects for the house, and perhaps even start working on a garage!
The Site: Other than this little holiday greeting to wrap up 2025, I also added a small section to the
Living Room page of the Interior with some discussion and pictures of the
Living Room Plaster Work. That new section has also been added as the last item for 2025 to the
Project Timeline page of the Specifications section, along with a final search
index refresh.
2025.12.15
The House: The interior renovation goal for 2025 has been achieved – The GWB installation for the living room is
done, and after over 15 years of looking at stud walls with insulation and plastic sheeting on them, we can finally enjoy a Christmas holiday with
actual walls in our living room! I'm still going to put in a couple days of plaster work to at least tape the corners and cover all the fasteners, but
then we'll put up our holiday decorations and take a little work break for Christmas. I even managed to get rid of the remaining few pieces of extra GWB
with our rubbish pick-up last Friday, and I'm now quite happy that all that stuff is finally gone. No more drywall installation work – What a relief!
The Site: Despite the significance of being done with GWB work, this is a fairly small update with just a few paragraphs
added to the Living Room page of the Interior section about the
Living Room GWB work. That new sections has also been added to the Project
Timeline page of the Specifications section, along with a search index refresh, as usual. That's all for now.
2025.12.09
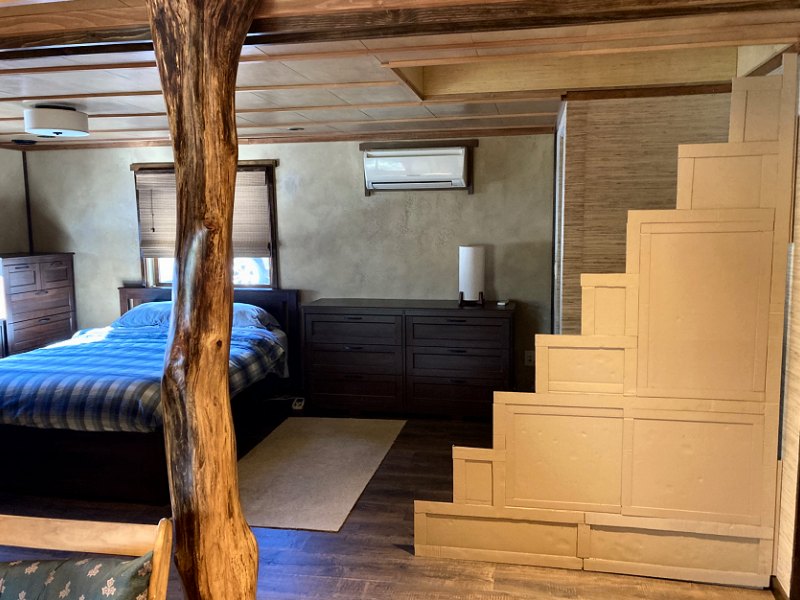
The House: The results of the last couple weeks of work on the bedroom are pretty impressive, if I do say so myself. All
the bedroom furniture has been assembled and arranged, and we've been trying to get used to dealing with a nearly completed living space after all
this time of walking around furniture boxes and storage bins. The bedroom will still need some trim work on couple of doorways, but after that it'll
just be matter of a few more pieces of furniture (a couple rugs, a bedroom chair, then the wardrobes for the closet/laundry room) and
the space will be complete. I also decided to make a little progress on the kaidan dansu (step tansu) that'll eventually
be built to provide attic access – I didn't actually start makin' the thing, but instead built a cardboard mock-up of how it will look (this
is referred to as "CAD" work by us old-timers, as in "Cardboard Aided Design") to set up as a "placeholder" where we intend
to install the thing so we can get used to the space it will occupy. I had a stack of empty furniture boxes to cut up, so why not?
However, as mentioned a couple months ago, the goal for this Fall/early Winter is to get the Gypsum Wall Board (GWB) installed in the living
room, so the rest of the bedroom trim work will have to wait until next year. And now with all the bedroom furniture boxes out of the living room and
gone, it's time for that GWB work to commence. I picked up the final four sheets of GWB late last week, and I'm expecting to have all that installed
over the next few days.
The Vanagon: The shop called last week to let my know they finally received the new anti-sway bar links, so I spent
an afternoon in Salem getting those installed, then made the Home Depot run for the GWB. I'd still like to get the old fog lights installed
and wire in the relays for the headlights and high beams, but the weather has been pretty chilly lately so I don't know if that will happen
anytime soon. The thing is running well enough, although I also purchased the new throttle valve assembly from GoWesty during their Thanksgiving
sale to hopefully address that minor idling issue. Installation of that thing may also be delayed until Spring, based on the weather.
The Site: I added a couple more paragraphs to the Bedroom page of the Interior
section with a brief discussion and photos of the Bedroom Dresser Drawers assembly work, as well as some stuff
about the New Bed Assembly. Those new sections have also been added to the
Project Timeline page of the Specifications section, along with the
usual search index refresh. I also added a fair amount to the main Interior page with a new section that provides an
overview of the Interior Renovation Work that has occurred so far (now that a lot of the
interior work is getting done). That page may also get more updates when the time comes for building the attic hatch and the step tansu as
well, since those projects aren't really in the bedroom or the living room.

2025.11.23
The House: It's a little hard for us to get our heads around, but the bedroom is actually starting to look like a normal room
after all these years! Over the last couple weeks I took care of the baseboard trim work then, at long last, I started the assembly work for our
IKEA® bedroom furniture, with the three, 6-drawer dressers assembled and put in place, along with a load of fiddlin'
with little wood bits to make spacers for all the feet to ensure the stuff is level. I'll do my best to get all the drawers put together this coming week,
and we'll finally be able to get some of our clothes properly put away in the bedroom, instead of keeping everything in plastic bins in the closet/laundry
room and attic. Progress!
The Site: A short section about More Bedroom Trim Work has been added to
the Bedroom page of the Interior section, as well as new section with discussion and photos of the
Bedroom Dresser Assembly work. That stuff has also been added to the
Project Timeline page of the Specifications section, along with a search index refresh.
2025.11.07
The House: Another week or so, and another quick update. After putting away the tools used for all the recent trim work
in the bedroom and cleaning up the shop a bit, it was finally time to tackle the finished flooring work for the bedroom. We made a Home Depot run with
the Vanagon to pick-up the 11 cases of Pergo® Outlast+ "Cocoa Walters Oak" 12mm laminate flooring
(and at 35 lbs. per case, getting all that stuff into the house was a bit of a chore), then got together the tools I'd assembled when working
on the closet/laundry room floor back in March to get the flooring project underway. After just over a week of work, the new flooring was
installed!
At long last, we can break into that stack of IKEA® bedroom furniture boxes that have been kickin' around for years
and finally build our bedroom furniture. I'll still need to mill, finish, and install the bedroom floor trim, but I think I can work on that
in between furniture assembly work. I'd like to get the baseboard trim installed before each piece of furniture is placed, so we'll see how that goes.
Exciting stuff!
The Site: Discussion and photos of the Bedroom Floor Installation work has been
added to the Bedroom page of the Interior section, along with an update to the
Project Timeline page of the Specifications section, and the usual search index refresh.

2025.10.26
The House: That's right – after a couple months of no updates, I'm adding another one after only a week or so.
As I mentioned I might do last update, I went ahead and took care of the trim work for the living room side of the fusuma
door header. That also required I get the mawaribuchi perimter trim installed along the header (so I'd have something to
which I could attach the door header trim), which meant I had to cut some notches in the top of the daikokubashira for
that stuff. As long as I was chiselin' away at the top of that pillar, I proceeded with fitting the first couple pieces of saobuchi
for the living room ceiling as well. This finish carpentry stuff just seems to snowball, but with the door header trim done, I am stopping for now.
I've got to get after that bedroom floor.
The Site: I added a new section to the Living Room page of the Interior
section, with a few paragraphs and photos about the Living Room Ceiling Trim Work, and that's it.
I did still update the Project Timeline page of the Specifications section
and refreshed the search index, as usual.

2025.10.19
The House: Yes, I see it's been (almost exactly) a couple months since the last update, but there's been
good progress on the finish carpentry work for the bedroom, with all of the window & ceiling trim work completed yesterday — and it
came out better than expected. Next up is to finally tackle the bedroom floor work, and I still need to get the flooring for that to get
started. I may take a little time first to work on the ceiling trim in the living room along the door header, as I'm still kinda in "finish
carpentry mode". It's nice to be able to work with stain outside while the weather is mild, so I don't stink up the house with stacks
of freshly stained trim stock. Still, the goal is to get the wallboard done in the living room before the holidays, so I'll need to get the
bedroom furniture boxes out of there (and that means there needs to be a finished floor in the bedroom for all the new furniture).
There's certainly plenty of stuff to keep me busy before cold weather arrives.
The Vanagon: The clutch hydraulics were replaced as mentioned last update, but when they were working on the front
C.V. boot, they managed to snap one of the front anti-sway bar links while prying on the front control arm to get at the end of the axle.
They were supposed to order a new link and bushings (I asked them to just go ahead and get all new bushings from GoWesty as long as
they had to take the thing apart), but that seems to be taking way longer than it should. Other than that, I haven't spent much time
working on the vehicle as I'm trying to stay focused on the house.
The Site: I wrote a few new sections for the Bedroom page of the
Interior section (which is getting really long), with a new entry for the
Bedroom Window Finish & Trim Work. Once that was work done, I could take care of the
Bedroom Window Shades, and then get after More Bedroom Ceiling Trim Work
with trimming out the bedroom side of the fusuma door header, then completing the mawaribuchi
ceiling perimeter trim. With all those updates, the Project Timeline page of the
Specifications section got a few new entries, and the search index has been updated as well. That'll do for now.
2025.08.18
The House: So after lots of yard work to make a little progress on getting caught up with the annual pruning tasks
(which I haven't done for years), weeding, and leaf collection, I've gotten back to doing some work on the interior at long last. As
I mentioned in the recent news updates, I took care of staining and clear coat work on the stack of saobuchi ceiling trim,
so getting that installed was the next project to address for the bedroom ceiling. That work is now finished as of today, so next up is milling
more trim stock for window trim and baseboards, then I got some 5/4 stock to use for the mawaribuchi ceiling perimeter
trim that'll need to be cut to size and then get finish work to keep things going in there.
The Vanagon: The Vanagon was taken to the shop early last week to have them finally put in the clutch master & slave
cylinder that they got back when I took delivery last year. I also noticed one of the front, outer C.V. joint boots was torn, so I asked them to
replace that as well. I then asked them about doing some nearly impossible work, which is to remove and replace the four bottom cylinder head
exhaust flange bolts, which are just little rusted nubs at this point (the exhaust system is all stainless steel, but when they
installed that on the motor when it was in the old Vanagon, apparently they just used regular steel fasteners to attach everything and there's
not much left of those things now). My old motor was missing the pair of push rod tub covers that go below the cylinder heads on each side
of the engine, and while I've gotten a set of good used replacements now, those four bolts need to come out to install the covers. Hopefully
they can make some progress on those things and not break anything.
The Site: I added a new entry to the Bedroom page of the Interior section
with a few paragraphs and photos for the Bedroom Ceiling Trim Work, with the information about the
saobuchi installation. I also got myself a new (very old) hand plane for the first time in many years, which is a
Stanley No. 105 "Liberty Bell" steel plane, so a photo of that was added to the Vintage Tool Gallery
in the Et Cetera section, along with the pertinent info within the Vintage Hand Tool Data
page of the Specifications section. Finally getting some actual updates pushed out means I also refreshed the search index,
and added some info to the Project Timeline.
2025.07.06
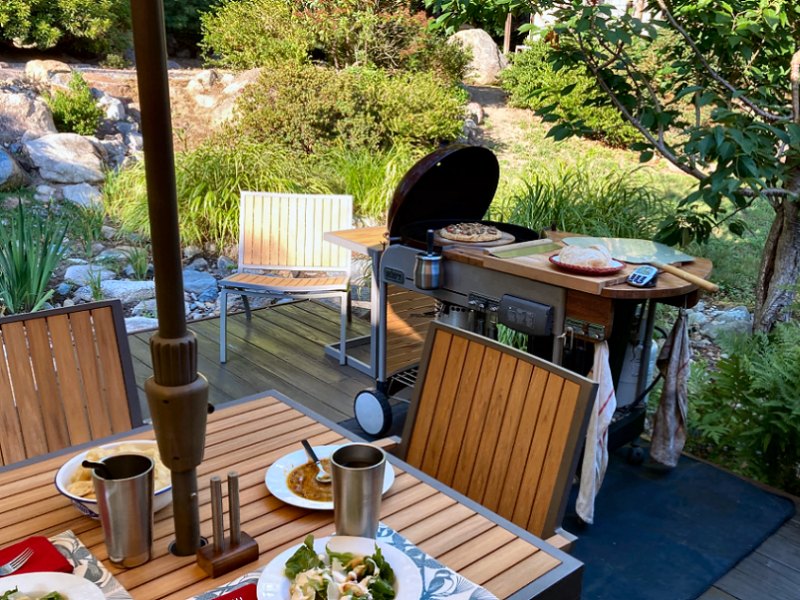
The House: Another quick update just to say we hope you've enjoyed a nice 4th of July weekend!
We usually try to have a cookout for the 4th, but we also usually enjoy a pizza for dinner on Fridays, so… pizza
on the grill, of course! The new double pizza stone worked great (which is actually five years old, but we've only used it one other
time) — our old stone cracked when we tried to grill with it, but this new thing is a double-stone with an interlocking edge
that creates an air-gap between the stone directly over the fire, and the upper stone where the pizza is placed. No cracking and the crust was
perfect.
As for work on the house, I've not really done much for the last couple weeks, other than tinker around with the yard work a little (but I have
decent excuse… ). So, a while back I cracked a tooth (my lower, rear, right molar, or #31) and pretty much ignored it as it
wasn't causing any pain. Then a couple months ago the old filling from that tooth came loose, and it was started to hurt from time to time. After
a few weeks of occasional pain, it really started to hurt constantly (as in, can't sleep with my mouth throbbing kinda hurt), so I finally called
the dentist to have him have a looksee. He took an x-ray and confirmed that the remains of the tooth was gonna hafta go, and that it was abscessed, which
is what was causing the pain. He prescribed a round of antibiotics and gave me a referral for an oral surgeon to get a root canal or have the thing
extracted (apparently the roots were pretty twisted around, so he didn't want to work on it himself). After a few days of the antibiotics
the pain stopped, so I called the oral surgeon to make an appointment. I said my dentist referred me for a root canal, and they said "we don't
do root canals". Great, so my dentist won't work on it and said you guys need to do it, so they recommended I come in for a "consultation"
to figure out what's going on and made an appointment for last Wednesday. When I got there, the assistant took new x-rays, then the surgeon came
in and basically said it's got to go. He then recommended we pack the holes from the roots with "bone dust" so the jaw will fuse with
the new bone dust, then they can put in a post and have the dentist make a replacement crown. The bone fusion typically takes three or four months
to reach full strength, then we can decide whether or not to install the post and crown, or just leave it empty (the dentist had said I likely
wouldn't miss it, so I doubt I'll do the crown thing when the time comes). I then asked how soon they could extract the tooth, and he said
"We can do it right now!" So after a couple shots of pain killer to my lower jaw, last Wednesday at 4 p.m. my tooth #31 went away.
Since then I've been on another round of antibiotics, along with a combo of 600mg of Ibuprofin and 500mg of Acetaminophen every seven hours for
the pain (and there really isn't any, unless I neglect to take those horse pills at the right time). Bottom line: I'm taking it pretty slow
for a few days at least, since I'm a little out of it with these drugs in me and a new hole in my head.
The Vanagon: Nothing new to report on the vehicle – it's still runnin' fine and gettin' me around (although
I have noticed when I fill it with fuel the gas gauge only goes up to just over half-a-tank, so the sender's going to have to get a little tweak
at some point).
The Site: Once again, no new content this time around other than this health report.

2025.06.22
The House: The last few weeks of work have mostly been dedicated to projects in the yard and garden, since as I think I've
mentioned before, I haven't done much of anything out there for a couple seasons after getting the bamboo containment project finally completed. There
has been a lot of pruning to take care of on the shrubs out back (of which I've perhaps taken care of about a third so far), and I've also been
working on getting the irrigation system running again (and that's needed two of the four control valves replaced so far). The old leaf
chipper/shredder/vacuum engine could not be saved, so rather than try to get a new engine (for which Briggs & Stratton said they
no longer make a direct replacement unit when I asked them about it), we decided to just replacement the thing with a new one from Home Depot
(which is here, but still in the box waiting for me to put it together). So many little projects!
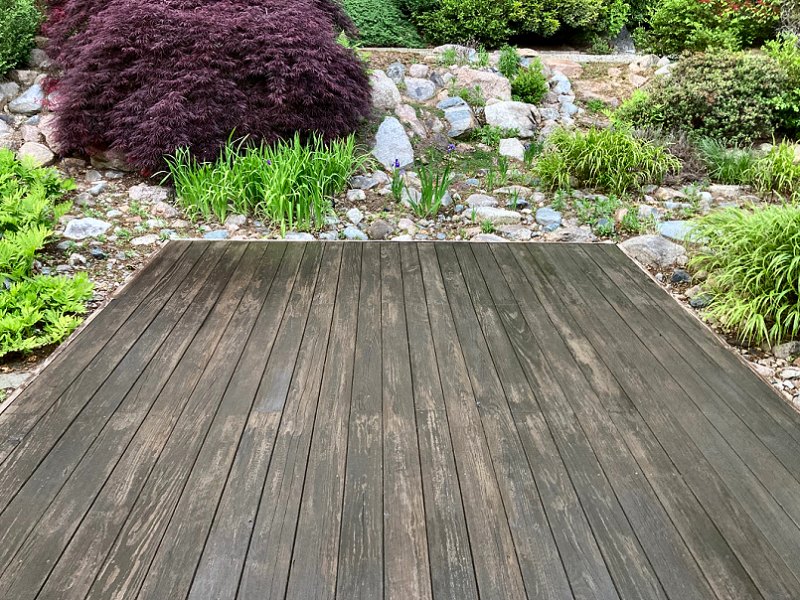
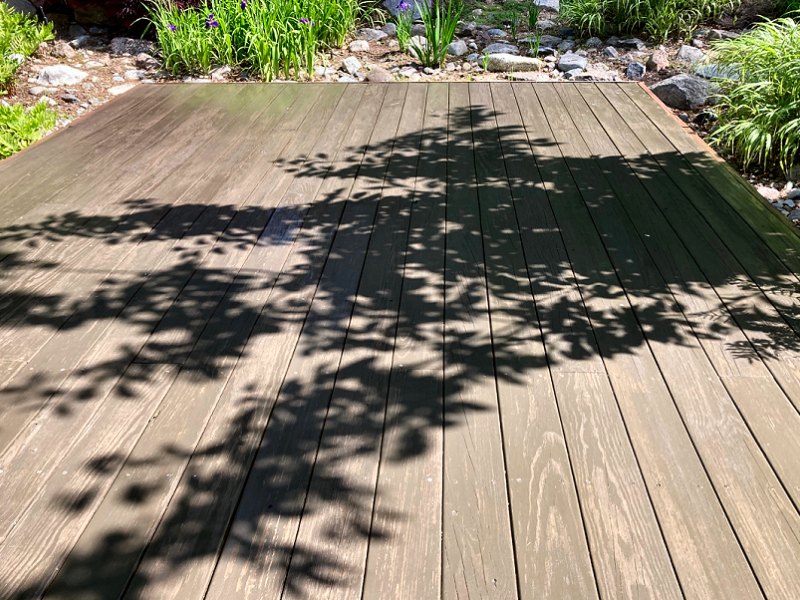
I did manage to get a couple things taken care of that I mentioned in the last news update: the cleaning and re-staining of the
tsukimi-dai decking is finished and the thing is lookin' good again. I also got the new control cables for the lawn mower
installed and after sharpening the blade, have already put that to use a couple of times. I also made time to get a couple coats of semi-gloss
clear on the saobuchi ceiling trim, so that will start getting installed soon.
The Vanagon: The thing has been running just fine since the last update, and we've been using it for grocery shopping
and a few other errands with no problems. I still need to take a day to have the shop put in the new clutch hydraulics, but that will likely wait
a week or more since our weather for the next few days is supposed to be quite hot (we may get above 100° F, which is pretty rare for these
parts). The oil pressure warning issue has not returned, so that's certainly good news.
The Site: Like my last update, I didn't add any new content to the rest of the site other than this status update.
I did take care of cleaning up this page a bit by creating the new 2024 News Archives page and getting all of last
years status updates moved over to that, which also warranted updating the search index this time around. That's it for now – Stay cool
and enjoy the start of Summer!

2025.05.21
The House: It's somewhat hard to believe how fast Spring seems to be going by as I'm making very slow progress on
getting more work done on the interior renovation work. I haven't really done any more work on the living room ceiling light, although all the
ribs are glued up and waiting for me to spend a day on them with a hand plane. I've also gone through that heap of saobuchi
ceiling trim and given it all a light sanding, then stained it with two colors to closely match the ceiling panels. Clear-coat on that stuff is
next to move things along inside (when the weather is a bit more cooperative – lots of rain and high humidity lately).
The good news is that we're actually making some progress taking care of the garden, as that was pretty much neglected for the last couple of
seasons while dealing with the bamboo containment project. The lovely bride's been doing an outstanding job of collecting leaves, and I've been
trying to get our outdoor power equipment up to snuff for another year (the lawn mower needs a new throttle cable and control cable, which
I have and need to install. The leaf vacuum/shredder thing hasn't run for years, and I've had to do a new pull starter, coil, and now a
carburetor to see if I can save it). I also intend to get after a lot of pruning that needs to be done out back, as well as clean &
re-stain the tsukimi-dai deck.
The Vanagon: I've finally managed to get the Vanagon into decent running condition after lots of tinkerin'. With the
new Oxygen sensor installed, I was able to get the idle mixture adjusted to that happy place of 0.4VDC average output after lots of adjusting of the mixture
set screw and idle speed setting, and that output is consistent at idle, 1,000RPM, 2,000RPM, and 3,000RPM (which means it's correct).
I didn't need to fiddle with the wiper arms or spring tension in the air flow meter (which is sometimes required to keep the mixture correct
at those higher RPMs), so I was also able to seal the AFM cover back into place as well. I also installed a new throttle cable, since the old
one had lost the sealing boot at the engine end of the cable and that allowed water to get into the cable sleeve and cause issues in the Winter when
it would freeze. I then finally replaced the idle control valve (which is supposed to "vibrate" when powered on, and did not), and
that's now humming along as it should. I got a spare idle control unit from my mechanic, so I'll likely send that out for a rebuild to ensure it's
working properly. When I took it for a quick test drive after finishing up in the engine compartment, I was presented with a lovely oil pressure
warning light & alarm (the above-2,000RPM buzzer and blinky light warning, as opposed to the below-2,000RPM light only warning), so
I limped it home at low revs and ordered more stuff to deal with that. After a new proper MANN W719/12 oil filter, five quarts of Castrol 20W50
high-mileage motor oil, and a replacement high-RPM oil pressure switch, there was no more oil pressure warning. More than likely it was caused by
the improper fuel mixture setting (it had been running very rich, which can thin the oil significantly and cause that oil pressure
warning – the engine already has a replacement GoWesty 30mm high-volume oil pump, so I'm confident is was just thinned oil that was the
problem, and it hasn't re-occured after the oil change).
There's still plenty of projects I'd like to take care of on the Vanagon (the upgraded wiring and relays for the headlights, installation of
the fog, driving, and auxiliary back-up lights, replacement of the bearings for the sliding door, addition of the third brake light, and
more), and I also need to get it back to the shop for them to install the new clutch master and slave cylinders. For now, it's running and driving
quite well, so I'm just enjoying the ability to run errands for supplies without issues while we try to get caught up on yard work.
The Site: Other than this rather lengthy status update, I didn't add anything to the rest of the site this
time around. That is all.

2025.04.02
The House: We've actually gotten one of our interior rooms finished! Well, it still needs some proper wardrobes for
the cloths, but I consider that in the category of "furnishing" the space and am happy to call the "renovation work" for that room
completed. We often find ourselves just walking to the closet doorway to look over the space, letting the fact sink in that something's actually
done. Progress!
The Vanagon: As I was workin' on idle issues, I decided to replace the Oxygen sensor so got a new, Bosch 3-wire unit
(as opposed to the single-wire things that need to be spliced to the existing harness, and rarely does the job correctly). I installed a
complete stainless-steel exhaust system a few years ago, so I was hoping the thing would come out without too much difficulty. Wrong! I instantly
rounded off the existing sensor while trying to un-screw it with a 22mm wrench, then tried vise-grips and it wouldn't budge. I ended up trying to
break it loose with a hammer and sharp cold chisel, which resulted in just tearing the sensor's mounting flange off the side of the catalytic converter.
So, after I dropped the cat with the muffler and tailpipe, I then chiseled out the old sensor at the bench. Joy. I took the cat to the shop
and they re-welded the flange (so that saved a few hundred bucks for a new cat), and they even ran a tap through the threads of the old
flange so the new sensor should go in fine. Just waiting now for the new cat and muffler exhaust gaskets, as well as new stainless-steel hardware
to put everything back together, then we'll see if the new sensor allows me to properly adjust the idle mixture.
The Site: The Bedroom page of the Interior section got a few new
paragraphs and photos to cover the Closet/Laundry Room Flooring Installation work for that space.
That also led to the usual update for the search index, and a new entry to the Project Timeline.
2025.03.03
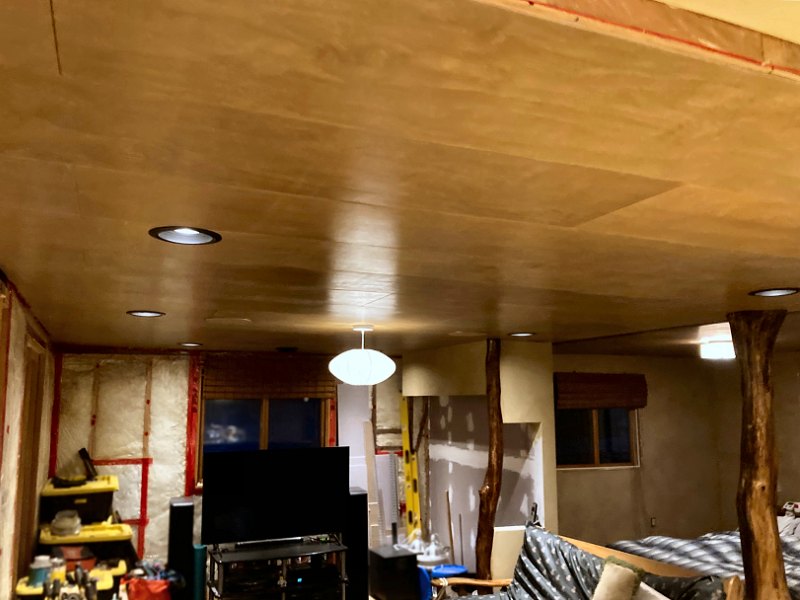
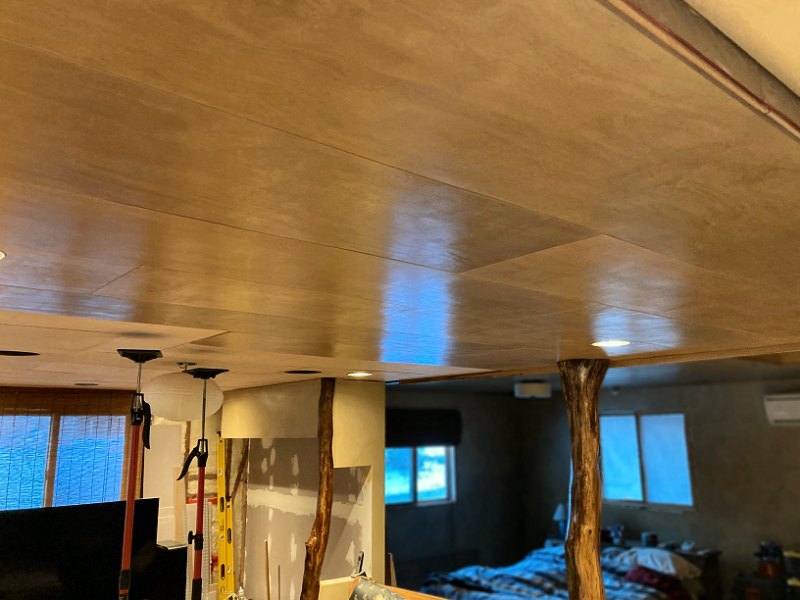
The House: I'm pleased to report that the finished ceiling panel (tenjou-ita)
installation work for the living room has been completed, and I've even managed to save a few 2-foot lengths of the ceiling panel stock to
use for the attic hatch when the time comes to work on that thing. I also got together with my friend with the pick-up truck last
weekend for a Home Depot run and then spent some shop time at his place. We got all the stock for the bedroom and living room ceiling trim (the
saobuchi) milled to size, and that stock is now waiting for finish to get applied once the weather gets a little nicer.
I then spent a few days taking care of the last few details for the living room ceiling work with the painting & installation of the recessed
light trim rings and the in-ceiling speaker grills, and then installed the last interconnected smoke/CO detector between the bedroom and kitchen
on the new living room ceiling. The final little "side project" for the living room ceiling is to make a new pendant light fixture for the
space, which I started working on last week (but we replcaed the paper lamp shade with a better looking pendant fixture for
now).
Next up is to get started on finished flooring installation in the closet/laundry room and bedroom (so I can get all those IKEA®
boxes of bedroom furniture out of the living room and finish the GWB work in there). Unfortunately, Lumber Liquidators no longer sells the
laminate flooring we originally selected (and already installed in our offices off the genkan), so a new search for
flooring began in earnest a couple weeks ago (we figured out our flooring was no longer available back when the flooring underlayment work got started
a couple years ago, so I've been doing a little browsing for new flooring for a while now). We ordered a few color samples of various
Pergo® Outlast+ laminate flooring to get a better look at the stuff, and decided to go with their "Cocoa Walters
Oak" 12mm stuff with attached underlayment. We picked up a few boxes when we got the ceiling trim stock, and I plan to order the remainder to do the
rest of the house soon, since HD has free shipping on this fairly heavy material (oh – I also recommend if you plan on buying flooring from HD,
certainly order a couple samples for $3 ea., as they come with a 10% off flooring coupon).
The Vanagon: I got the Vanagon Synchro cooling system and engine compartment work taken care over the last few weeks
(when we weren't getting dumped on with snow and ice). It's running again, although I'm not thrilled about how it idles and haven't really
been driving it much. I've done a little trouble shooting to try to eliminate what could be causing the problems (temp sensor II and air-flow meter
are relatively new and tested properly), so I'll likely need to replace a couple pricey items to really make it right (like the idle speed
control valve & control unit – which is made of unobtanium so that'll be a pain, and probably a new throttle body unit from GoWesty).
As the weather continues to become more tolerable to work outside, I'll keep pickin' away it the thing.
The Site: Once again the Living Room page of the Interior section
got a couple more paragraphs and photos added to the Finish Ceiling Panel Installation section to wrap up
what went into that project, then I started a new section on the construction of the Main Ceiling Light
that I'm working on now. I've also updated the search index, and the Project Timeline to include the most
recent changes.
2025.01.29
The House: While I've been pickin' at the work on the new Vanagon over the last couple weeks while waiting for parts
to arrive (and finding more stuff to take care of, then waiting for more parts to arrive), I did finally manage to get back to doing some
work on the house once again. I got the daikokubashira stained, and re-stained the tokobashira, then got
a few coats of Minwax® Antique Oil Finish applied to both pillars. I also determined I needed to add a piece of trim
to the bottom of the fusuma door header so the living room ceiling panels would have something to butt against to get them
all aligned properly. With that I've been able to make some progress on the finished ceiling panel installation work for the living room, so things
are moving along on interior renovation work once more.
The Vanagon: As far as the vehicle goes, as mentioned above, that work is still ongoing. I'm taking care of alot of
little things in the engine compartment that I wasn't thrilled about – lots of clean-up, some wiring repairs, and then the cooling system fixes
that started it all a few weeks ago. The last couple parts should be here this week, so it should be back on the road in early February.
The Site: The Living Room page of the Interior section got a couple new
paragraphs and photos to address the Finish Ceiling Panel Installation work for that room (which I'll likely
expand as the work continues). I've also added some more detailed information about what I'm doing to the
new Vanagon Synchro within the Old Volkswagens section of the Et Cetera page. As usual, I've also
updated the search index, and added new links for 2025 to the Project Timeline.

2025.01.12
The Vanagon Status: Not really a site update (since this has nothing to do with the house)…
Did you know that most automobiles have basically four hoses for the cooling system? There's a couple big ones that
go from the engine to the radiator and back again, then a couple small ones that go from the engine to the heater core (although one of the heater
hoses has a heat control valve somewhere in its run, so I suppose it should be five hoses). The 2.1l VW Vanagon Synchro,
on the other hand, has over 20 hoses for the cooling system, along with another six metal pipes, and a big 4-way junction block to feed another
half-a-dozen hoses for supply and return to the front and rear heater systems. An "average" modern vehicle has a coolant capacity of between three
and seven liters, while the 2.1l Vanagon holds 17.5 liters. So why am I blatherin' on about the Vanagon cooling
system? On New Year's Eve we were on our way back from the local grocer when I noticed a lot of steam/smoke in the rear view mirror — that's
gotta be a coolant leak. The store's less than 10 miles from the house, so I decided to try and make it home rather than pull over and wait for a tow.
I did my best to keep the revs low and let it coast when I could, all the while keepin' a close eye on the temp. gauge. Not too hot, and no blinky red
light (which starts up when the coolant reservoir is low) and we were more than half-way home. Slow & steady… now into our neighborhood…
Temp's startin' to climb but still no blinky red light. Made the final turn onto our street and the light started, so I just turned it off and rolled down the
hill then into our driveway.
So my chilly New Year's Day was spent takin' apart stuff in my engine compartment to get a look at the cooling hoses I haven't already replaced (all
but three of the big hoses were replaced with $ilicone hoses from VanCafe, and the metal connector pipes were replaced with $tainless
$teel units from GoWesty when the engine was in the old Vanagon). My suspicion was that something for the oil cooler had popped – either
one of those four little hoses split, or one of the little connector pipes finally gave up. I removed the A/C compressor to see the lines below it,
then poured in a gallon of water and connected a pressure tester to the system to pump it up and see where it was leaking. Despite the crusty lookin'
steel oil cooler pipes, it was actually a tiny hole in the elbow of the "peace pipe" hose that was sprayin' water on to the cylinder head when
pressurized. Luckily, VanCafe still had all their silicone hoses on sale for the holiday, so I ordered a new "peace pipe" hose and the set of
four oil cooler hoses from them that afternoon. I also ordered one of the stainless steel oil cooler pipes from GoWesty (the other was out-of-stock
at both GoWesty and VanCafe, but I found one at Van-Again so I can replace 'em both while I'm in there with the system drained). Now I just need to
wait for everything to arrive, then it'll be time for fun with cooling system work… in the driveway in the middle of Winter. That is all.
For past chronological updates, please see the following pages:
2008 News Archives.
2009 News Archives.
2010 News Archives.
2011 News Archives.
2012 News Archives.
2013 News Archives.
2014 News Archives.
2015 News Archives.
2016 News Archives.
2017 News Archives.
2018-21 News Archives.
2022 News Archives.
2023 News Archives.
2024 News Archives.
Using the Site
Visitors should check this page to determine the most recent updates, or browse the sections listed in the navigation menu on the left. I'll try to always have a picture of the most recent project or the house itself on this page too.
Navigating the Site
The navigation menu will expand when you hover your curser over an item with a down arrow (↓) in the name.
The section you are currently visiting will display in a different color than the rest of the menu so you hopefully won't get lost.
There's an up arrow (↑) near the bottom of each page that will return you to the top of the page when clicked.
Links in the body text will display in a different color than the rest of the text.
All internal links (links in the body text or nav menu sections) will replace the contents of your browser's current window with the target's content
when clicked, so you may navigate using the 'forward' or 'back' controls of your browser.
External links (links to other sites) are in the footer and will open in a new browser window (or tab) when clicked.
If an external link is placed in the body of the page, it will be indicated with an icon: ![]() .
.
Receiving Updates
If you click the RSS feed icon ( ![]() )
in the News section above, your browser will open the news feed page that I usually update whenever I update the site. In order to have it display in
your browser, it simply runs a little code to allow it to show up, but no longer provides a means of subscribing to the feed. In order to automatically
receive updates, you'll need to use a dedicated RSS News Reader application (or browser "add-on"), then copy & paste in the address of our feed:
http://kesterhouse.com/rss/kesterhouse.xml into that reader. If Google Chrome and Microsoft Edge get their
"Collections" and "Follow" stuff worked out, perhaps I can get rid of the code and go back to just loading the XML in the browser.
)
in the News section above, your browser will open the news feed page that I usually update whenever I update the site. In order to have it display in
your browser, it simply runs a little code to allow it to show up, but no longer provides a means of subscribing to the feed. In order to automatically
receive updates, you'll need to use a dedicated RSS News Reader application (or browser "add-on"), then copy & paste in the address of our feed:
http://kesterhouse.com/rss/kesterhouse.xml into that reader. If Google Chrome and Microsoft Edge get their
"Collections" and "Follow" stuff worked out, perhaps I can get rid of the code and go back to just loading the XML in the browser.
Searching the Site
When you click the 'SEARCH' item in the nav menu you'll be presented with a search box to enter the keyword(s) you'd like to find.
Hit your 'enter' key or click the little magnifying glass and your browser will load the search results page with your search terms highlighted.
When you navigate to a page from the link provided in the search results, the search terms will also highlight in the new page to make them easier to find.
'Lightbox' Image Viewing
When you click on a photo it will enlarge in the browser window and the background around the image will darken to allow better viewing of the image.
If there are additional photos on the particular subject, you will find controls to view those additional photos below the bottom-right corner of the image.
You may also hover your curser over the image to use the Next and Previous buttons when there's more than one photo in the group you're viewing,
or view the set as a slide show by using the Play and Pause buttons below the image. To open an individual photo in a new window (in case
you wish to bookmark the image, or copy it for appropriate use), click the small Expand icon in the top-right corner of the photo. To
return to the normal page view, click the small X below the image, or click anywhere on the background around the photo.
The Footer
The footer contains a link to send us an e-mail if you'd like to make a comment or suggestion.
It also contains external links (they all open in a new window) to other sites I enjoy.
Creating the Site & Compatibility
I've created the site entirely with a text editor, since I'm still a member of the 'old-fart school' of web design.
I'm using a lot of Cascading Style Sheet design controls, as well as a fair amount of Javascript to make the page do what I want it
to do - some written by me, but mostly I'm using the wonderful jQuery library with plug-ins I've found here and there.
If you've got Javascript disabled in your browser, the site should degrade gracefully and remain functional, although it's not going to look very nice.
I check the site occasionally for functionality with a smart phone or tablet, although I generally write everything in anticipation of having it read on a laptop or workstation. I have the latest versions of most Windows 10 browsers installed and have verified the pages display correctly with those. As stated above, Microsoft Edge is currently having issues with RSS feeds as they implement some new news reader features, so I'll tweak the XML as needed when and if they get it all worked out.
What's in the Sections
Here's a description of what's included in the sections - some are more complete than others but it's all getting there.- Welcome This page
- 2008 News Archive contains the updates from the News section for 2008.
- 2009 News Archive contains the updates from the News section for 2009.
- 2010 News Archive contains the updates from the News section for 2010.
- 2011 News Archive contains the updates from the News section for 2011.
- 2012 News Archive contains the updates from the News section for 2012.
- 2013 News Archive contains the updates from the News section for 2013.
- 2014 News Archive contains the updates from the News section for 2014.
- 2015 News Archive contains the updates from the News section for 2015.
- 2016 News Archive contains the updates from the News section for 2016.
- 2017 News Archive contains the updates from the News section for 2017.
- 2018-21 News Archive contains the updates from the News section for 2016 through 2021.
- 2022 News Archive contains the updates from the News section for 2022.
- 2023 News Archive contains the updates from the News section for 2023.
- 2024 News Archive contains the updates from the News section for 2024.
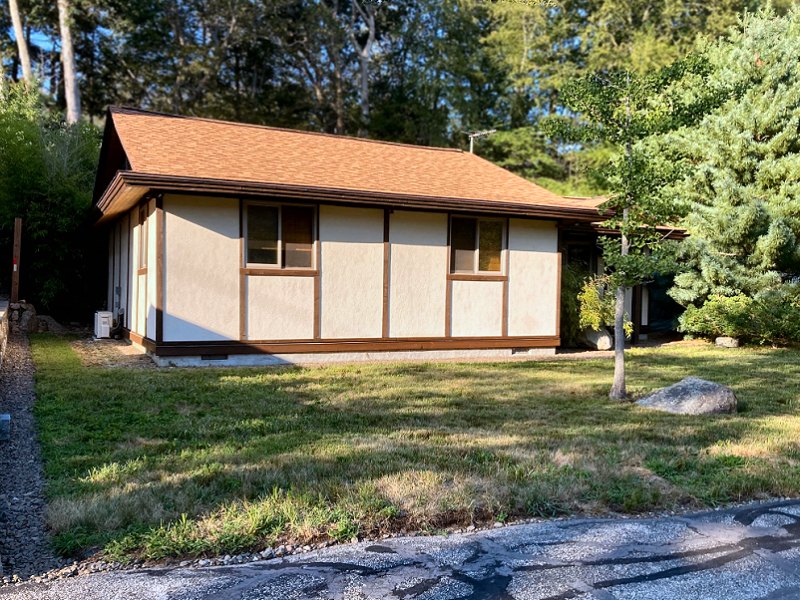
- The House is about the original structure, the purchase, the installation of (and recent repairs to) the new septic system, and lots of major tree work.
- The Garden is about the garden renovation, with information on the lot, initial landscaping, front yard, the irrigation system, Pine pruning, and dealing with Bamboo containment.
- Design addresses the decisions about the garden design and construction, including a complete plant list and details of the construction of our stone lanterns.
- Pond showcases our goldfish pond.
- Bonsai is about our (failed) attempts to get some bonsai started.
- Garden Shed is about the construction of the prettiest tool shed ever.
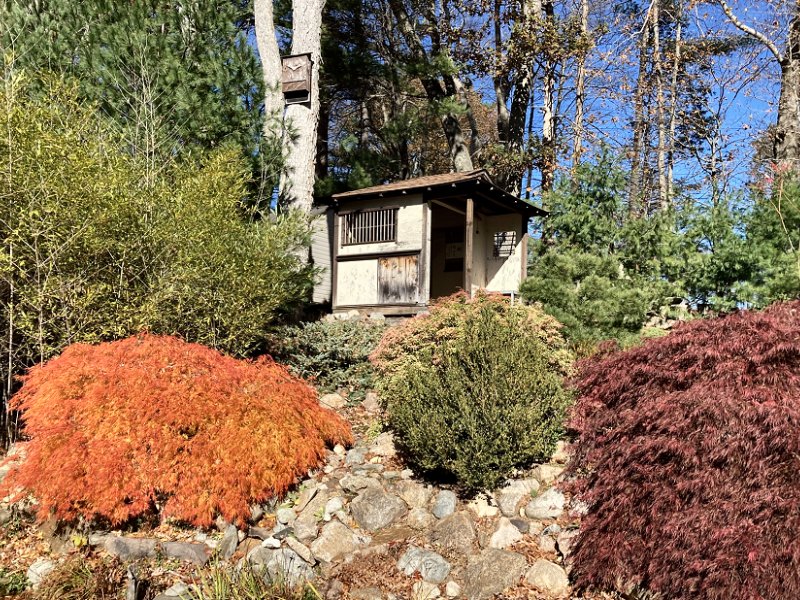
- Teahouse is about the construction of our Japanese-style tea house.
- Exterior introduces the exterior projects of the renovation.
- Foundation is about repairs made to the foundation.
- Roof is about the new roof design and replacement.
- Windows & Doors shows the installation of these units.
- Siding & Trim covers the siding and trim work, including gable ends and soffits.
- Engawa & Tsukimi-dai pertains to the planning and construction of the decks.
- Garage design and building is still on the drawing board.
- Interior introduces the interior projects of the renovation
- Genkan is about the new foyer.
- Kitchen is about the kitchen remodel.
- Bathroom is about the bathroom makeover.
- Living Room is about the living room remodel.
- Bedroom contains the bedroom and walk-in closet.
- Mechanical introduces the guts of the house renovation
- Wiring covers the replacing the original wiring and service panel, along with stand-by power systems and recent "smart home" device additions (lighting for each area is covered in the Interior sections above).
- Plumbing explains the water supply systems (fixtures are covered in the Interior sections above).
- HVAC is about the heating, ventilation and air conditioning systems (and recent repairs) used in the renovation.
- Energy Efficiency covers steps we're taking regarding weatherization, insulation, and reducing energy costs (including upgrading to LEDs).
- Inspiration attempts to address why we decided to build a Japanese style house, and why we're doing it ourselves.
- Specifications contains reference information regarding the house and equipment, plans, supplier information, etc.
- Color Palette has all color chips and color codes for finishes.
- Timeline is a chronological list of renovation projects and tasks, with links to the appropriate sections of the site.
- Hand Tools contains a list of vintage hand tool data, as well as catalogs and reference books regarding my ever-growing collection.
- Power Tools is a list of power tool data with PDF documentation for most tools.
- Et cetera contains my ramblings on this or that, not specific to the house renovation.
Currently the page contains some information regarding our sailing dinghies and vintage outboard motor, as well as a new section about
our old Volkswagens and my time at GreenWheels Electric Car Company.
- Hand Planes details the restoration and tuning of vintage metal hand planes.
- Joiner's Bench addresses the design and building of an English style joiners bench.
- Shop Equipment has information about bench vises and other shop equipment that'll end up in the garage eventually.
- Vintage Tools contains images of all my hand planes and other vintage hand tools.
↑