

What's a Genkan ?
 A genkan in the Nagamachi samurai district of Kanazawa.
I mentioned in the Exterior and Windows & Doors sections that we did quite a bit of work removing the old entryway and installing new doors when re-building the old screen porch. As I said, I've never cared for the Western residential house design practice of having the front door open directly into the living room (among many other things that make no sense about Western home design, which I suppose is part of the reason we're building a Japanese style house). When faced with making design decisions regarding our home renovation, we were looking forward to creating a proper entryway, or genkan .
Simply put, a genkan is the entrance of a home or business, like a foyer or vestibule, although the term really isn't interchangeable with the typical "front door and stoop" of American suburbia. The word genkan was originally applied to the entrance of the main hall, guest hall or high priest's living quarters of a Zen temple (translated as "gateway to profound knowledge"), and first appeared in the 14th century plans of Kenchouji in Kanagawa prefecture. Over the next few centuries, the genkan appeared as a formal guest entrance on all manner of temples as well as the homes of high ranking warriors and shoguns. More than a simple shelter from adverse weather, the genkan served as an important transitional space from the exterior to the interior of a residence, as well as a symbol of high social status (possession of a genkan was actually restricted to members of the warrior class, the aristocracy and leading religious figures throughout most of the Edo period). As residential architecture style became less formal in the late Edo period with what we now call the Sukiya style, the familiar genkan consisting of a paved stone or packed earth floor and shikidai wide plank step leading to a pair of fusuma sliding doors and the interior of tatami mat covered floors was fairly common in residential buildings and merchant shops.
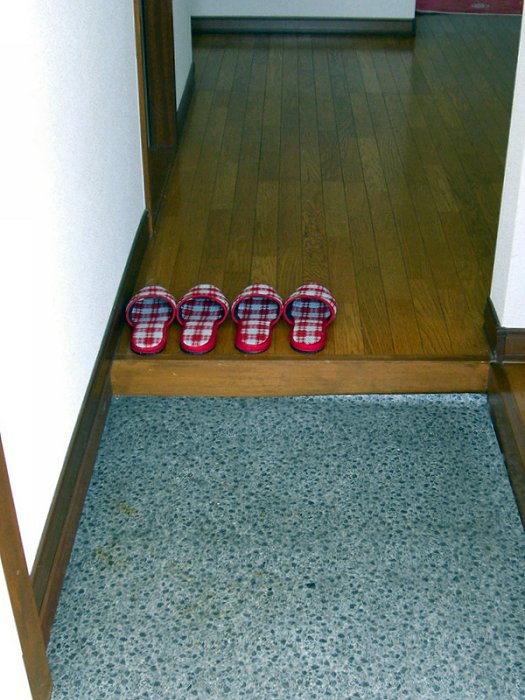 Typical genkan of a modern Japanese home.
While no longer considered a "gateway to profound knowledge", the genkan (which is still found in almost every modern home in Japan) serves an important function as the interface between private home and public space. Perhaps the shedding of coat, hat and shoes in the genkan symbolizes shedding the stress and worries of "the real world" before entering the peace of the home. Since the genkan is where guests are received, it is usually decorated with some manner of artwork or flower arrangement to make a good first impression of the home on the guests as well. When a guest is greeted in the genkan and invited into the home, they must remove their shoes before stepping up to the shikidai or main floor of the home. In addition to the multi-level floor, the genkan usually contains a getabako shoe cabinet where the residents keep their shoes, although guests don't place their shoes in the getabako and instead turn them around so the toes face the entrance, allowing them to step into them from the main floor when leaving the home.
They had me at "must remove shoes…", but as I learned more about correct genkan etiquette, I knew this was something we'd need to get right. I liked the whole notion of a greeting area for guests, as well as creating a transitional area from public to private space. This was the perfect solution to the "open the door into the living room" problem, and we were set on including a genkan in one form or another in the overall house design.
Genkan Design
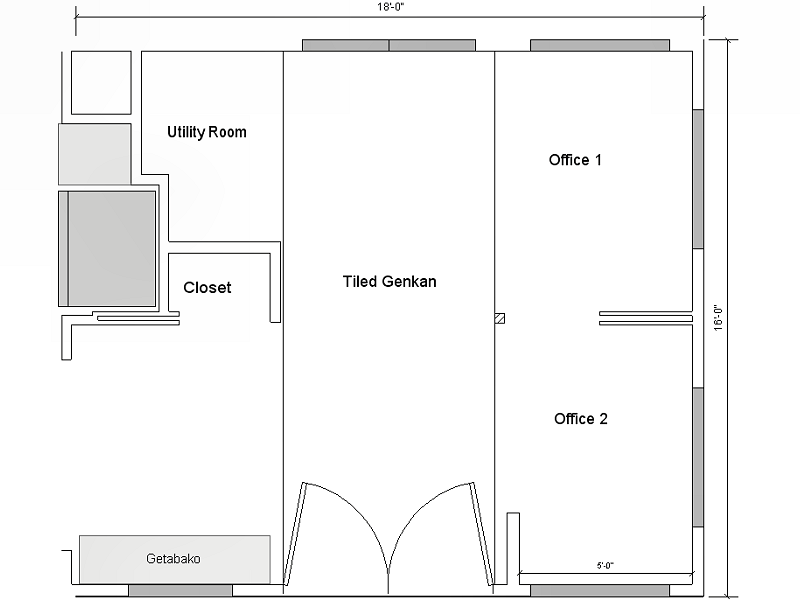 Plan for the genkan and old screen porch.
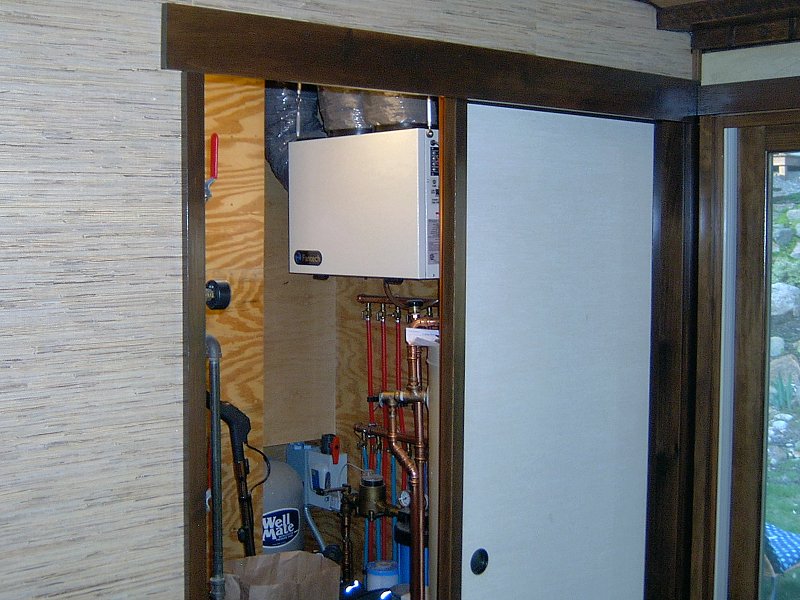
When we started working on interior space with the tear out of the old screen porch in 2005, we were starting with a blank slate as far as the design of the entryway was concerned. Things worked out very well, since what seemed to me the best solution to get a full height (6' 8") entry door into the place was to lower the floor inside the door and create an ideal space for the genkan tile floor as a bonus. The old screen porch encompassed a fairly large percentage of the entire square footage of the house, so in addition to the genkan proper, we also included a couple of small offices in the design, as well as a utility room and small coat closet. While on paper the plan looks like the space is pretty well chopped into little cubes, most of the walls consist of fusuma sliding doors, so the space can be opened up quite a bit for light and air flow (or partitioned for privacy).
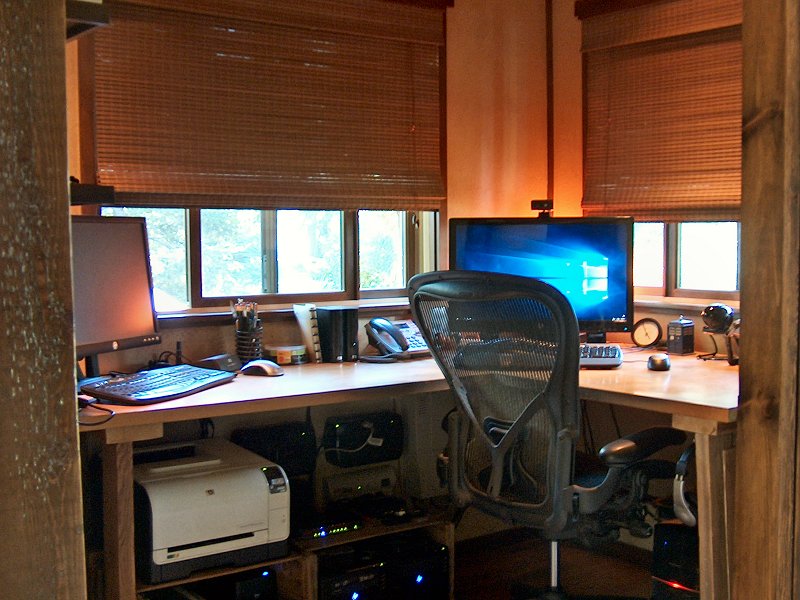
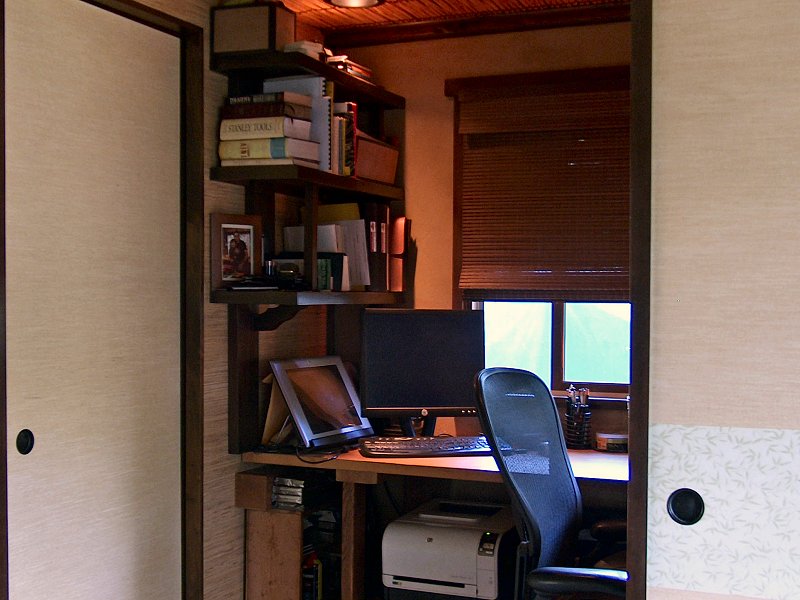
My office is located in the Southeast corner and may be completely closed off with fusuma to hush the drone of computers and hide the often messy state of my desk from guests. I also get a great view of the lake while going clickity-click at the keyboard. The lovely bride's office is in the Northeast corner, and since she's generally a bit tidier than I am we decided to leave her office open to the genkan (although we'll likely add a furosaki byoubu low folding screen eventually). We also installed a taller window on the North side of her office, so with the large window, open wall and sliding glass doors, she gets a great view of the entire garden out back. We're planning to add a pair of traditional tatami rice-straw mats to her office, as well as a tsukeshoin style tansu under the window for laptop use once the dust of the whole house renovation project settles a bit.
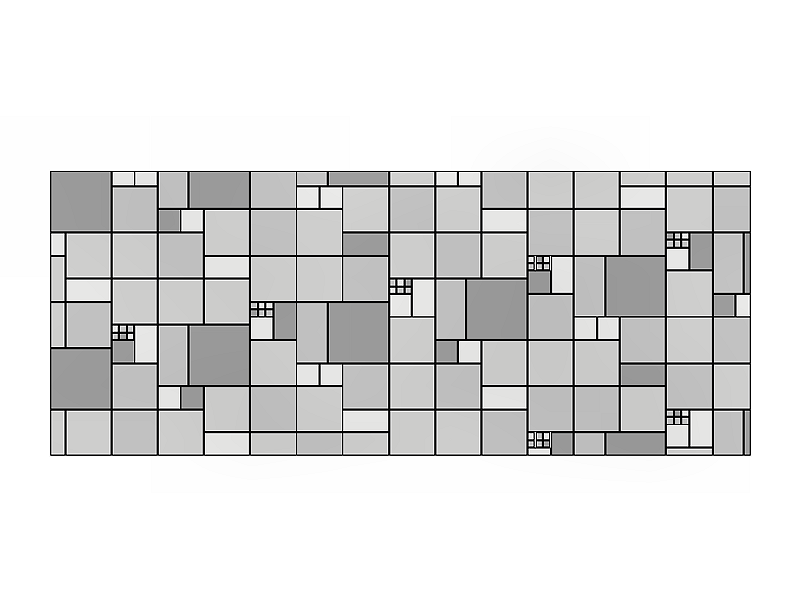
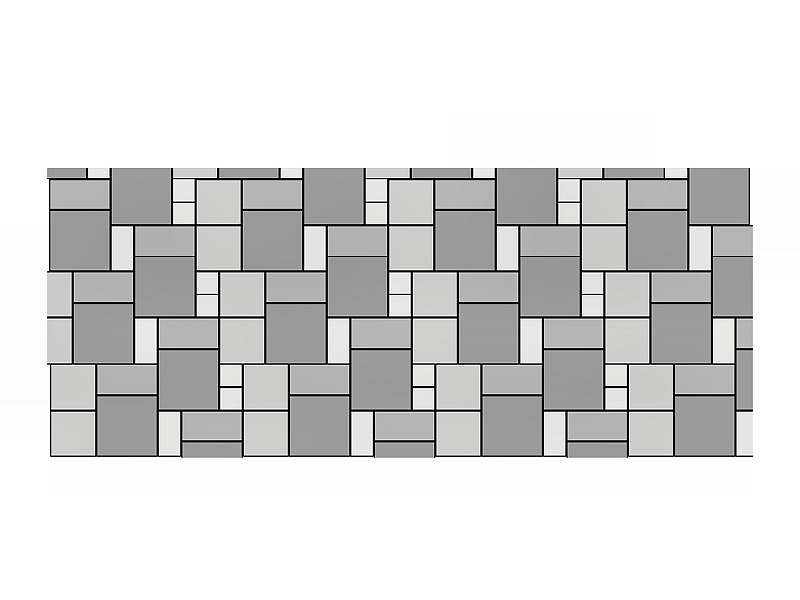
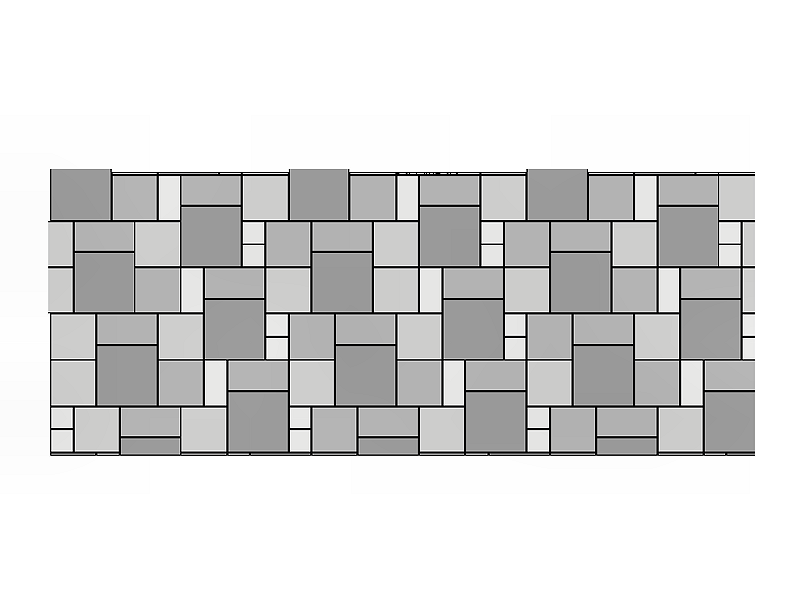
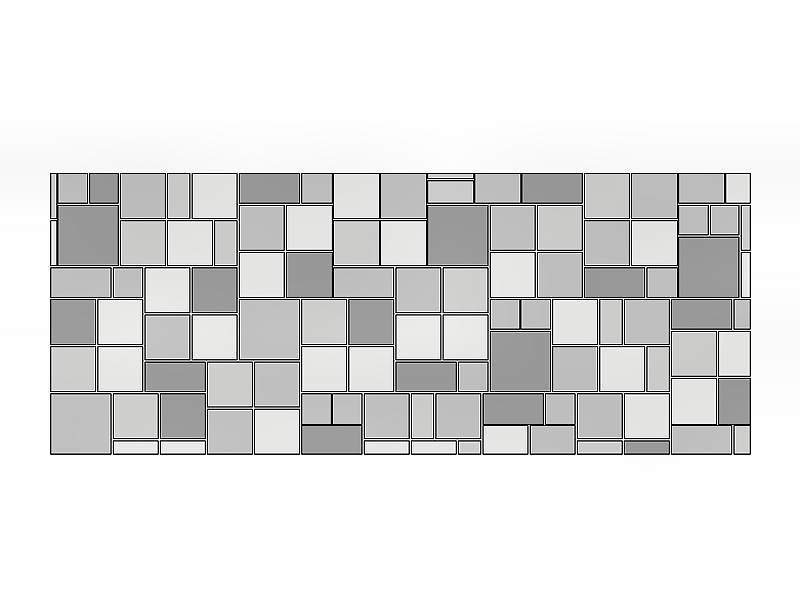
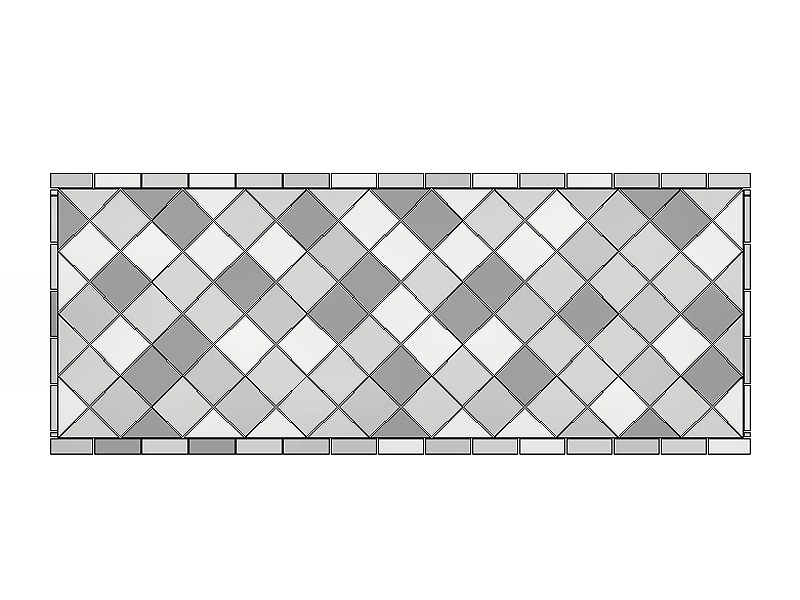 Figuring out the tile pattern for the genkan (5 sheets).
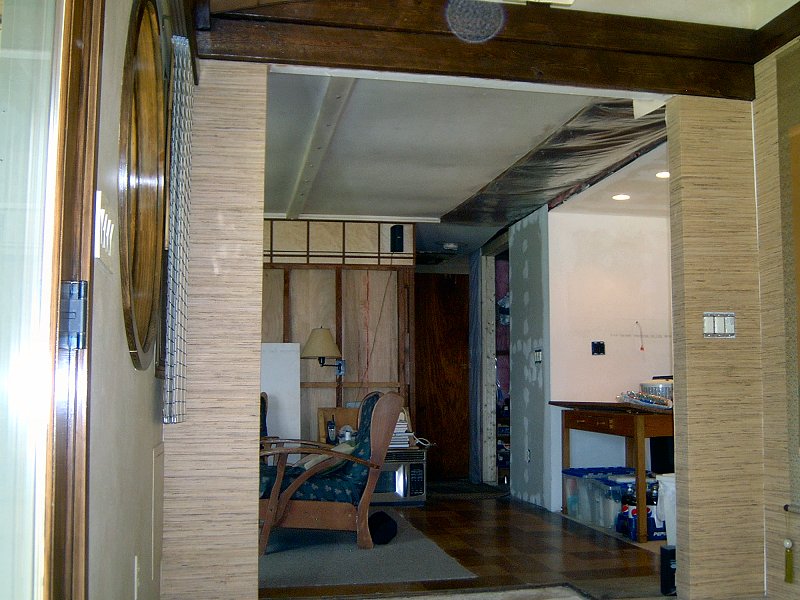
With the idea of making a good first impression on guests in mind, we also decided to keep the open ceiling of the original screen porch, at least for part of the room, and create a grand entryway (if one can call a 16' x 18' space grand). We decided to align the front and back doors across the entryway, so when one enters the house, they can immediately take in a fine view of the garden out back. It may have been more practical to put a door on the East side so we could have a direct entrance from the garage, but it would have made a mess of the space and negated any chance for a pair of offices. Because the front and back doors share the same tile floor, it's also possible to receive a guest and head right out the back door to the garden without lots of playing with footwear in the process. The lowered center section of the entryway will get tiled with gauged Slate, as will the step up to the doors outside the porch. We decided to depart from laying the entire section with a simple straight or diagonal pattern of 12-inch tiles, and instead mix in a few larger 16-inch tiles (halved and quartered too) to try and create an interesting pattern. After looking at a lot of existing tile patterns, I tried my hand at creating my own patterns to create something unique to our home. I picked up a small wet saw for tile work when working on the kitchen (which works really well), so I'm not too worried about making loads of cuts to install the goofy pattern we decided to use.
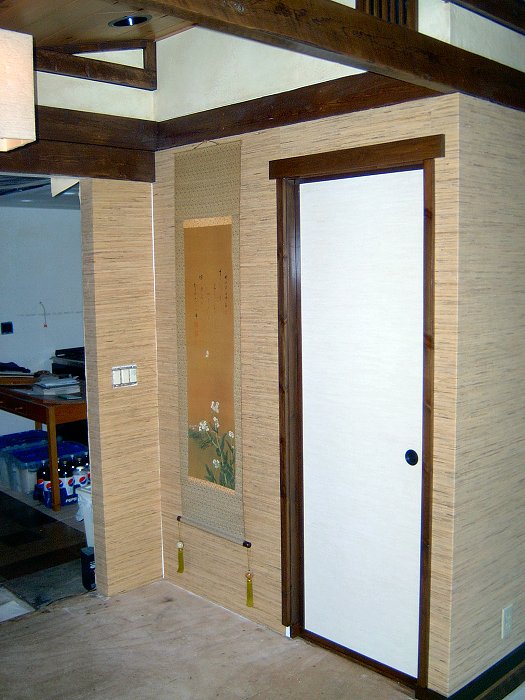
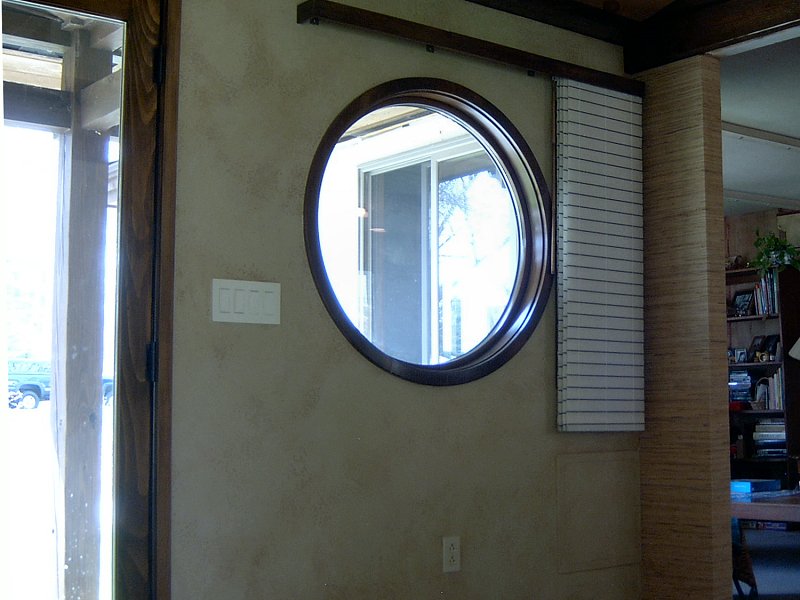
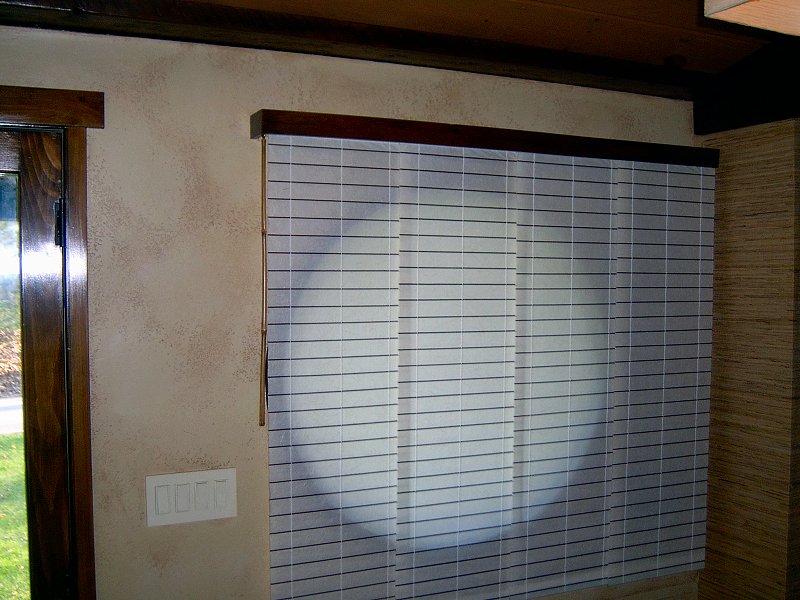
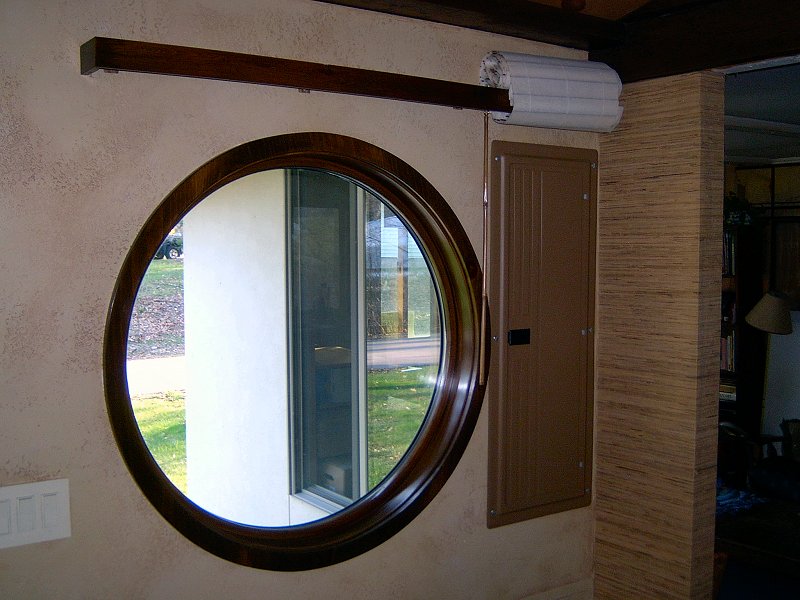
The round window was also an important addition to the design of the genkan area, and while adding a distinctly Eastern flair to the entire building, it makes an especially nice addition to the genkan . The ceiling is also raised above the round window, so this space between the genkan and the main house interior allows us to display a scroll on the wall next to the closet (lit with a recessed light from above) as well as display a flower arrangement or bonsai on the getabako in dramatic fashion. At least that's the plan… I still need to build the shoe cabinet.
Building the Genkan
Demo & Rough Carpentry Work: Fall 2005 - Summer 2006
Unfortunately, all of the photos we took during the early renovation work on the old screen porch were lost in a hard drive crash, so
I'll just briefly go over the work progression for that part of the house. Most of the major porch re-construction took place in
the Fall of 2005, when I started the installation of the windows & doors by essentially dis-assembling
the porch and re-framing the entire thing. Work continued on getting the floor re-built and installing the windows & doors well into
November 2005, then with the shell weather-tight I turned my attention to finishing the interior over the Winter of 2005 / 2006,
concentrating on getting the offices put together so we'd both have some personal space available while the rest of the house was
getting torn apart.
In the Spring of 2006, I added the porch roof to the entrance when doing roof work, and finally got the siding on the porch in the Summer of 2006. I still need to install the tile floor (although now that the weather is getting better, tile time is getting close), as well as the finish flooring in the area between the lowered floor and the living room. I suspect the flooring in that area will be one of the last things we do on the interior, since I use that space to cut gypsum wallboard (GWB), and I don't want to do that work on a new floor.
Finishing the Genkan
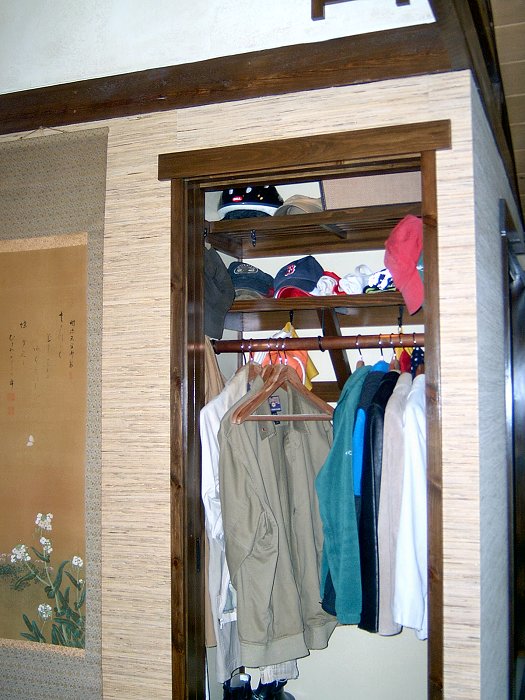
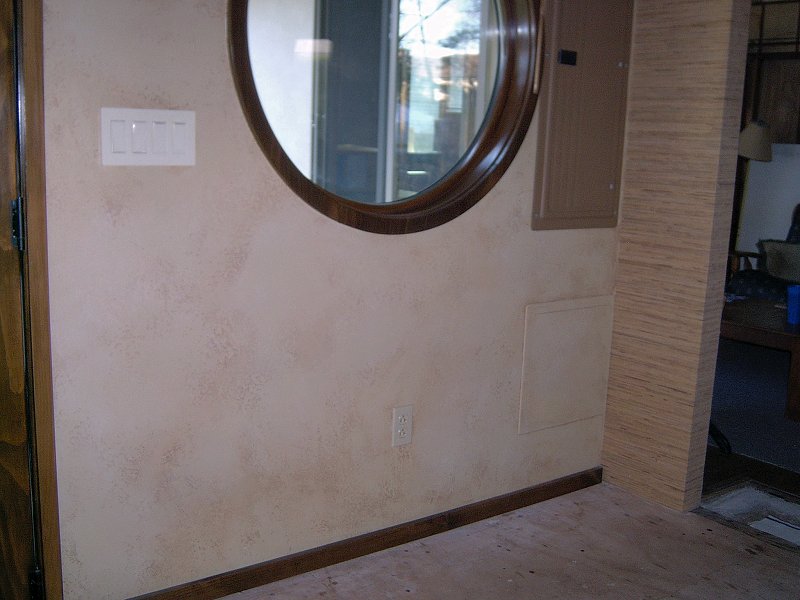
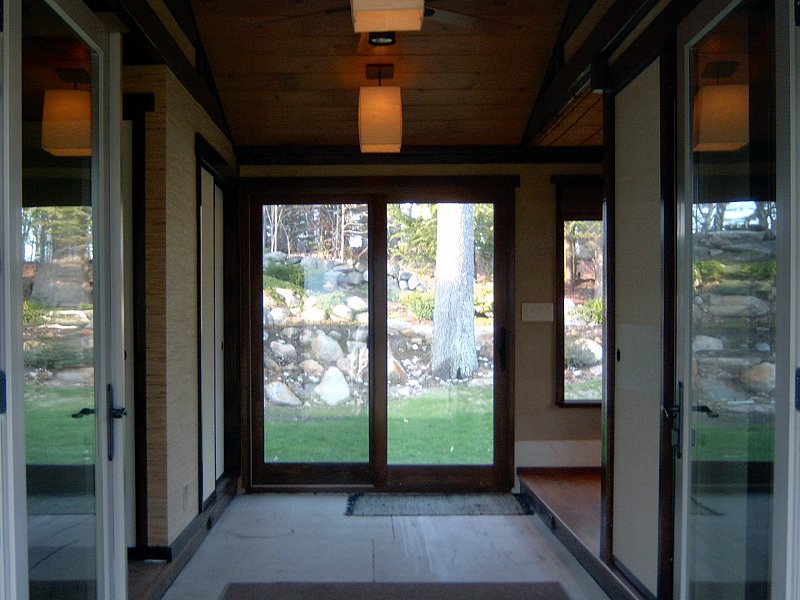 A brief tour of the genkan area (14 photos).
Wall Finishes, Ceiling Finish, and Lighting Work: Winter 2007 - Summer 2007
After the rough carpentry work involved with re-building the old screen porch, it was a real pleasure to finally get to do some
interior finish work on our little house. We'd made many of the interior design decisions while working on the
teahouse interior, since that project gave us a chance to try some color combinations
and decide what worked and what didn't. When it came time to finish the genkan , we used the same colors from
the teahouse: Valspar's "Prairie Dance", 3006-10A wall color, and Minwax's Water-Based Wood Stain "American Walnut" with their
water-based semi-gloss Polycrylic Protective Finish topcoat for the trim. However we also applied a textured, stucco finish to the
exterior walls and incorporated a series of tinted glazes to bring out the texture of the stucco. (I've described the techniques I use to
create the texture and apply the glazes in the bathroom section, since I wrote that before I
wrote this section). One change to the color scheme in the genkan that's not present in other rooms of the house
was the use of Valspar's "Drum Skin", 7003-10, on the GWB in the upper sections of the walls between the beams of the open ceiling.
The texturing and glazing method was the same as what I've described elsewhere, however with the lighter base color I only applied a
single layer of glaze to achieve the desired effect (tinted with Valspar's "Caraway Seed", 3005-9C). We'll likely use the same
combination of "Drumskin" and "Caraway Seed" glaze on the kitchen ceiling as well, since it's the only other ceiling with GWB.
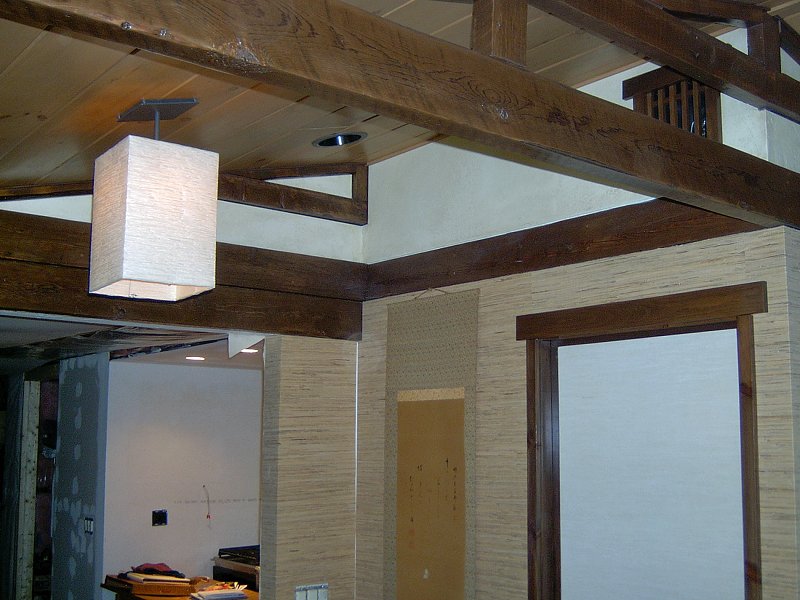
The ceilings in the genkan and offices gave us a chance to get creative, since we had decided we didn't want to use GWB, even though we hadn't quite figured out what was going to go up there. While working on getting some wiring into the kitchen (the service entrance is in the genkan ) and re-building the area between the old porch and the main house, I'd accumulated a nice stack of the old wide knotty pine tongue & groove paneling that was installed throughout the house back in 1952 (I've been told this stuff is called "Pickwick Pine", although I have no idea why). While the face of the old paneling had a lot of beading and cove work along one edge that I had no interest in seeing again, the back of the paneling was in fair enough shape that I thought we could re-use the stuff without too much work. It was worth a shot anyway, since I've tried throughout this project to avoid tossing lumber in a dumpster or bonfire whenever possible. After a bit of work with the thickness planer and belt sander, I had recovered enough useable lumber to install a T & G ceiling of 8-inch wide knotty pine over the genkan and entrance to the living room. We pre-stained all the ceiling boards with Olympic's Semi-Transparent "Desert Sand" stain and followed that with Minwax's water-based satin Polycrylic Protective Finish topcoat.
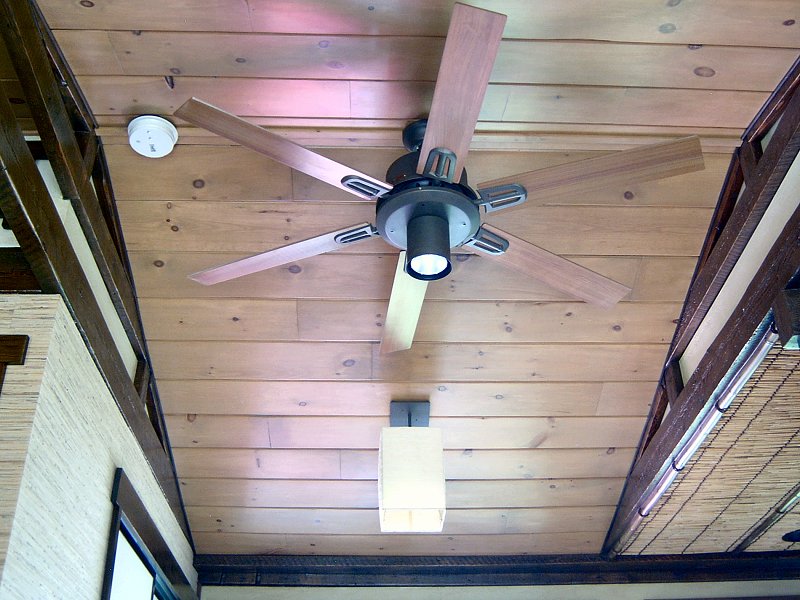 The genkan ceilings (5 photos).
The relatively low ceilings in the offices were finished with landscaping materials, for the most part. I applied dark walnut stained 1/2-inch plywood to provide a surface that would hold fasteners, then attached sections of rolled-reed fencing bound with twine using a pneumatic staple gun. I covered the seams of the fencing with half-round lengths bamboo I picked up at a local nursery, after I stained them and tied a bit of decorative lashing to the bamboo splits every couple feet. The office ceilings look just like the underside of the traditional minka style thatched roof, and we're quite pleased with cozy feeling the reed ceilings lend to the office spaces.
I had planned on installing a number of fusuma doors in the genkan area, although I wasn't too sure about exactly how I was going to make them when I came to that part of the project. A traditional fusuma door is constructed much like a shoji door, with a very lightweight wood frame and multiple cross-members held together with a series of blind mortise & tenon and half-lap joints. The fusuma construction differs from the shoji in that they have additional bracing added to the corners of the frame, then the exterior surfaces of the doors are covered with many layers of washi paper held in place with a channeled wood frame around the perimeter of the door. The doors are installed in wooden tracks top and bottom, and the face of the door is usually painted with a decorative scene (some of which are quite impressive) or geometric pattern. I'd been thinking about how I could pull off the same look, since I had no intention of building five traditional fusuma doors for the old porch.
To build my version of a fusuma door, I started with a basic hollow-core Luan interior door, and applied a good quality primer to both sides of the door. The primer would provide a good surface for the application of wallpaper to simulate the look and feel of the traditional built-up washi paper surface. Next I cut holes on each side for the hikite door pulls, then applied a cloth faced, fine weave, light colored wallpaper, trimmed about an inch from each edge. Next came the tricky bit… re-creating the wood frame. I ripped a stack of 1/4-inch thick by 1-1/2-inch wide strips from a straight-grained Fir 2x4 with the table saw (the Fir was an old wall stud I'd removed during re-modeling, by the way. I don't put lumber in the dumpster, remember?), then gave each strip a few passes through the thickness planer to reduce their thickness to 1/8-inch. I then stained and top-coated all the strips, and set about building the door frames. First a strip was glued on the long edges of the door (but not top and bottom, since those parts can't be seen) and held in place with headless pin nails from a pneumatic gun. Once the glue dried, I used a block plane to bring the edges of the strips flush with the face of the door, then glued strips to the faces of the door and over the sides of the edge strips (the wallpaper didn't go to the edge of the door so I could glue wood to wood, rather than wood to wallpaper). After that glue had dried, I'd do a little clean-up as needed to any of the glue joints, and applied a final coat of gloss topcoat to all the wood strips. I hung the doors with standard pocket-door tracks and rollers (except for the closet, which I mounted in a traditional waxed wooden track so it would feel and sound "correct" if a guest opens the coat closet). I think the doors came out great, and they were relatively easy to put together. Sometimes I get lucky.
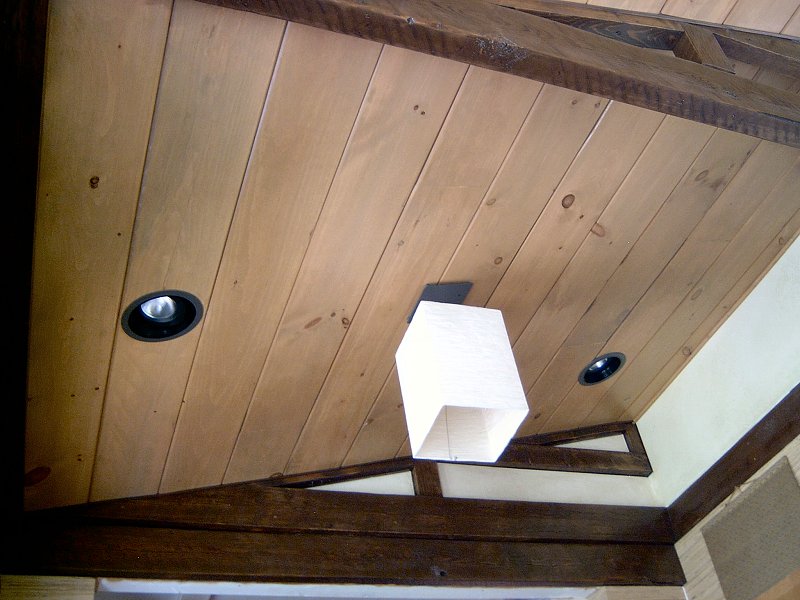 Genkan light fixtures (2 photos).
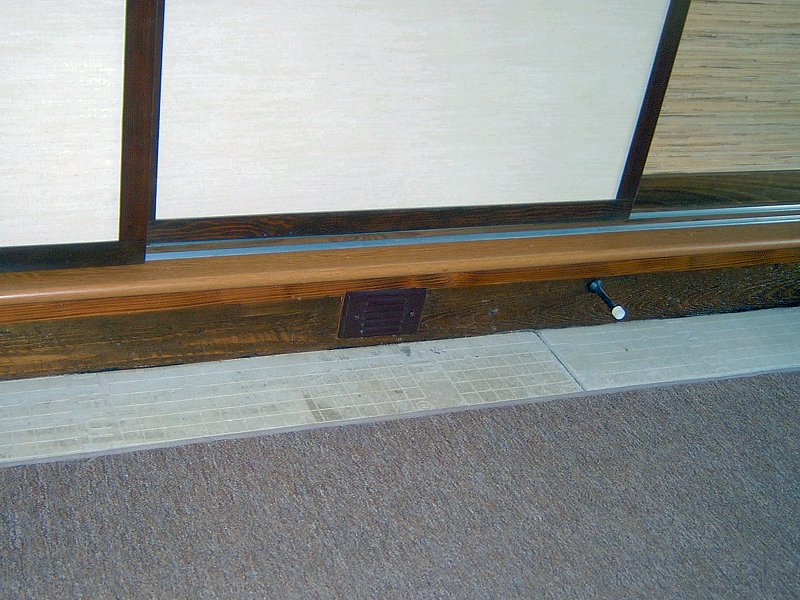
Lighting the genkan was a somewhat frustrating experience, since we just can't seem to find any light fixtures to get excited about (well, ones that don't cost thousands of dollars each, that is). I installed a pair of 6-inch recessed cans with gimbaled baffles in the ceiling between the tiled section and the living room — one over the round window (to illuminate the shoe cabinet) and one to wash the wall next to the closet door (to illuminate a hanging scroll). Each office has a pair of 6-inch recessed cans as well, to illuminate the built-in shelves and for general ambient light. The problem comes with trying to find an attractive pendant to use as general room lighting for the whole genkan area. After looking at a seemingly endless variety of fixtures, I just ended up building my own using parts from IKEA®. Another issue with lighting in the entryway was that pesky multi-level floor. I'd often stumble over the edge of the tiered floor section when going for the light switches, which was embarrassing and sometimes painful (although the switches in the living room have been installed since then, and we've gotten used to the step as well). I addressed the problem by installing an "occupancy sensor" switch that's wired to four louvered step lights around the perimeter of the tiled floor. The switch is positioned so when the room is entered from the living room or the front door is opened, the tile floor is illuminated with a soft glow. The occupancy sensor turns the floor lights off after 5 minutes, and has a light sensor so they can only come on at night. I must admit, it's very cool.
We're quite pleased with our "gateway to profound knowledge" — okay, I suppose it's just a gateway to the backyard, but we still really like the space. I sometimes wonder if the space might have been better used as living space, since we pretty much dedicated a third of our total floor space to creating an entrance, but it does get quite a reaction from folks that stop by for a visit. When I open the door to someone else's house and step into their living room, I'm very glad we decided create a proper genkan for our little Sukiya style house.
Repairing the Genkan Ceiling
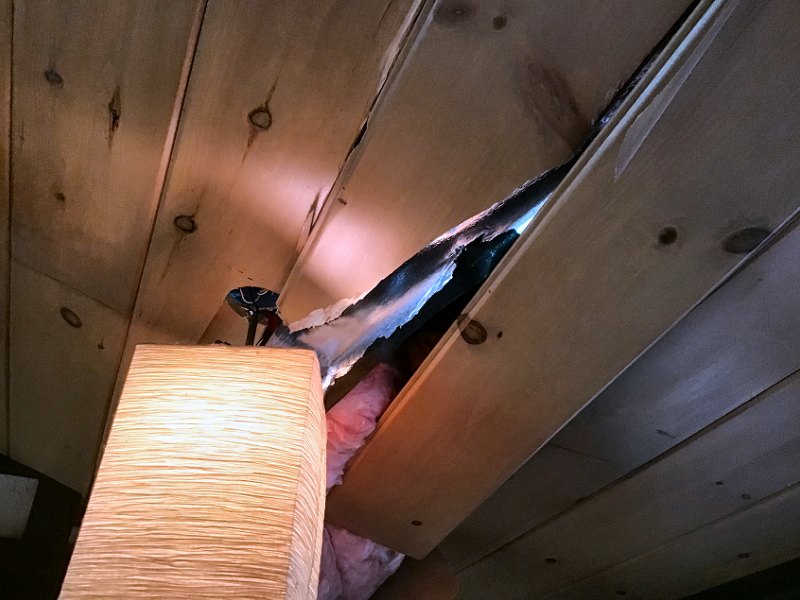
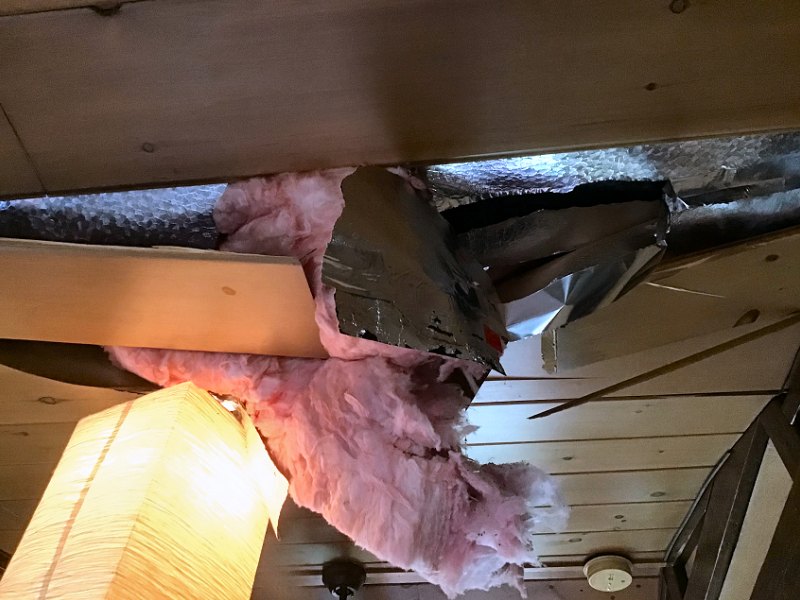
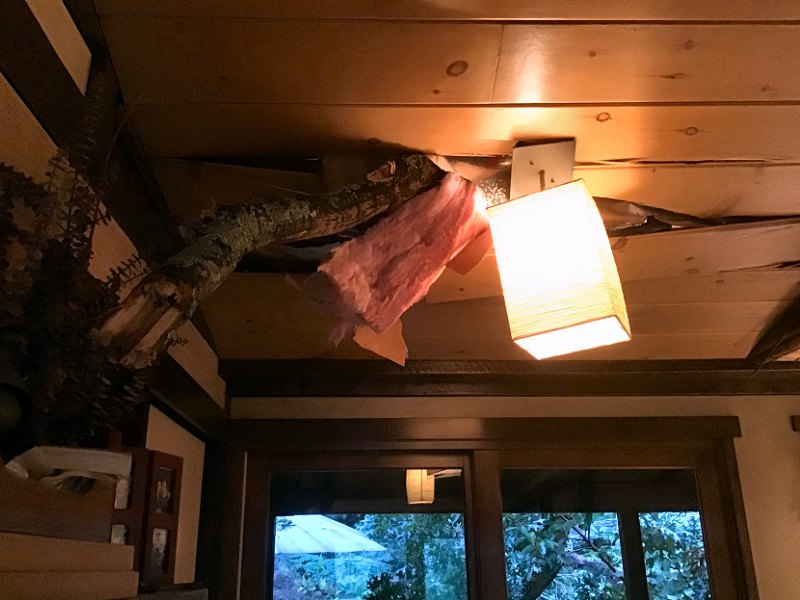 The damaged genkan ceiling (6 photos).
Repairing the Limb Damage: Fall 2020
As mentioned in a recent update to "The House" page, a large limb broke off one of the
Red Oaks in the backyard, and when it crashed to the ground a smaller limb snapped free and came through the roof and ceiling of the
genkan. Our homeowner's insurance took care of the costs for removing the tree and replacing the roof, but
I still had to do something with the destroyed ceiling. The problem of course, was that I'd milled all the T & G knotty pine
for the ceiling from old interior paneling (as described above). Even if I purchased wide pine
boards and attempted to mill them to match the thickness of the existing boards, staining them to match would be tough since the
existing boards were from 1952 and had quite a nice patina when I originally stained and installed them back in 2006. With all this in mind
the insurance adjustor and I agreed that attempting to find a contractor to mill and match new wood to the existing ceiling would be nearly
impossible (and likely quite costly), so I would just take care of the repairs myself (and she even tossed in a few hours of
labor for "standard trim carpentry" work on the repair costs estimate for me). The other problem was that I didn't have any
more of the original paneling, as I'd used every piece of it to make the original ceiling. I was just going to have to try to put together
the boards that had been splintered apart when the limb came through the roof if I wanted the repairs to match the existing ceiling.
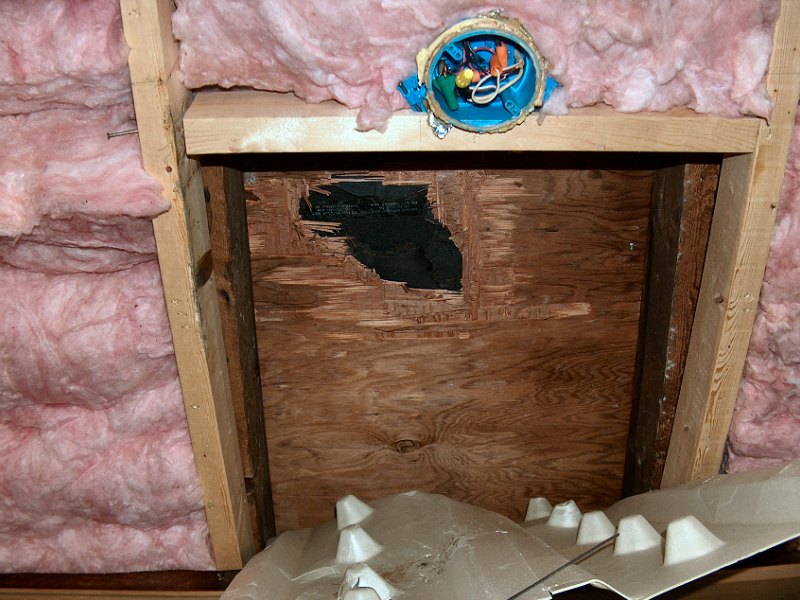
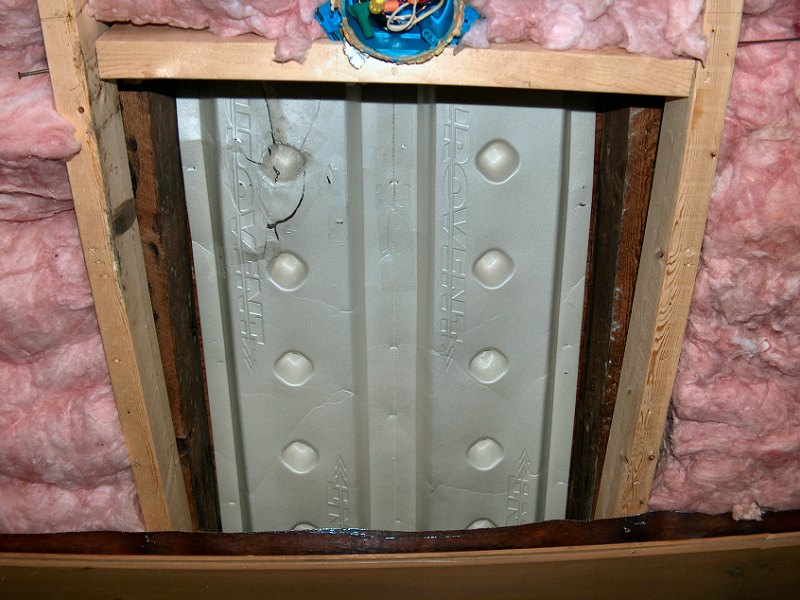
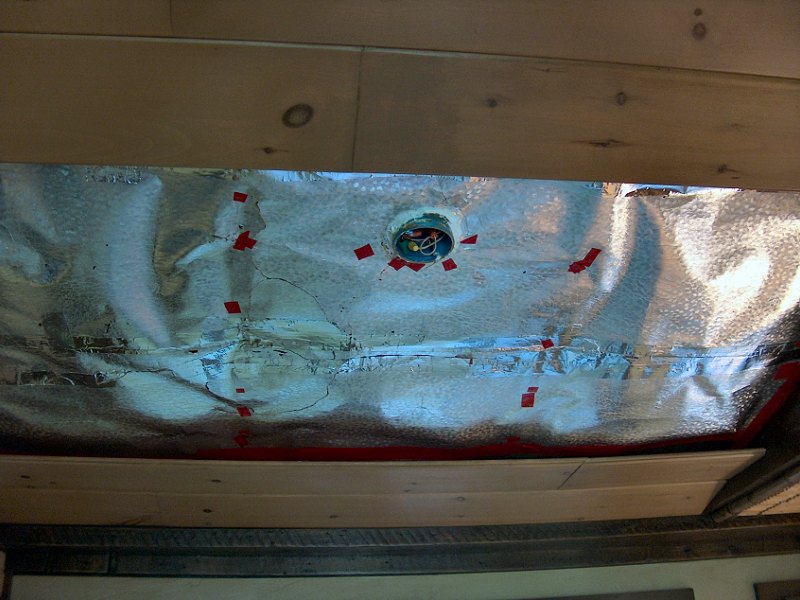
To get this crazy project started, we carefully picked up all the splintered bits from the floor (and even went through the contents of the Shop-vac to find every little piece) as we were cleaning up the mess. With all the wood bits we could find collected, I next put the stuff above the finished ceiling back together. Amazingly, when the limb came through the roof it missed the roof rafters and wiring for the light, although it did knock one of the ceiling rafters a little out-of-whack. I removed all the damaged ceiling paneling then got all the framing back in place. After that, I put the roof vent baffle and insulation back up, then taped up the foil faced vapor barrier that I'd originally used when I first built the ceiling. Now I just needed to re-build those splintered apart paneling boards.
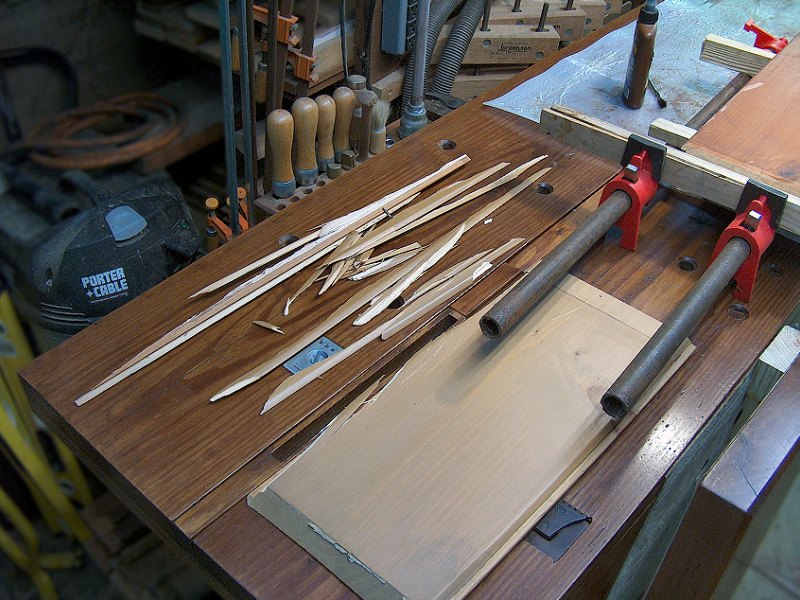 Gluing the ceiling boards back together (4 photos).
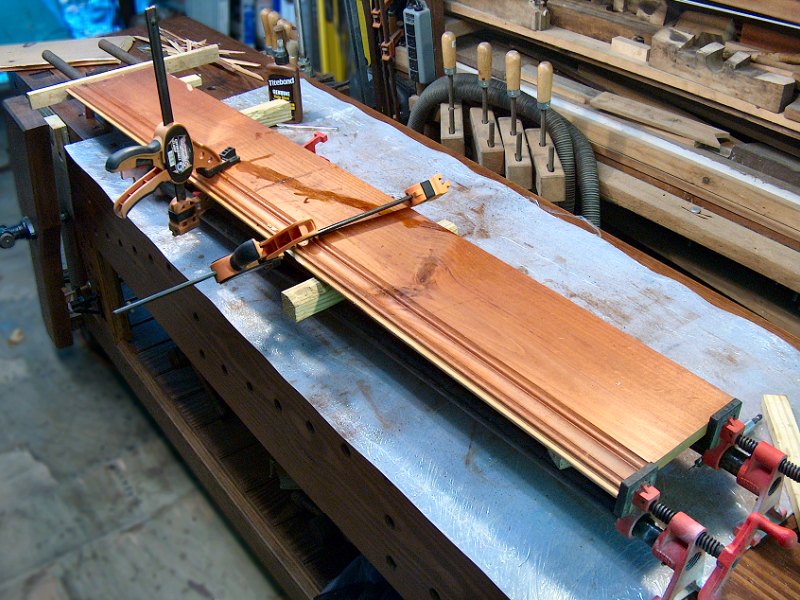
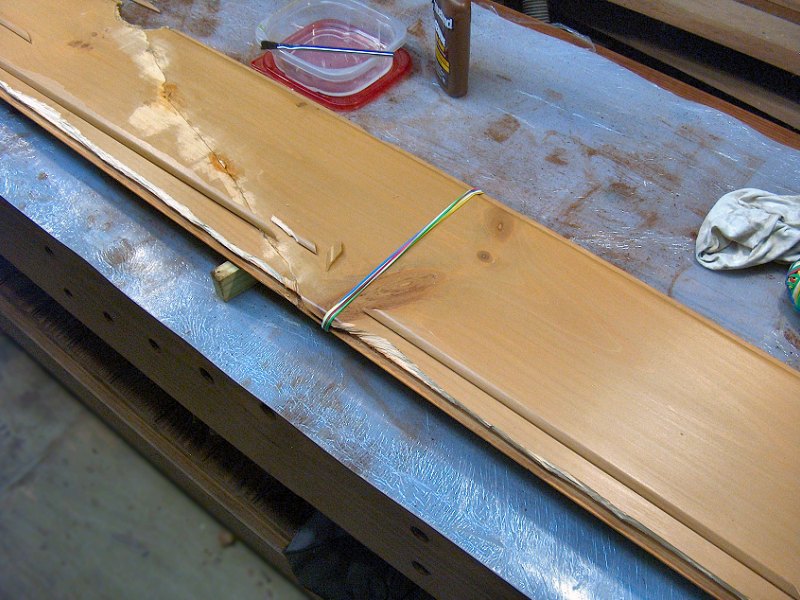
Putting the broken bits of paneling back together was an exercise in patience, to be sure. The boards that were snapped into big pieces weren't too bad to figure out, but getting all the little tongue & groove pieces back in place took a while. I set up a work area on the joiner's bench, and began by gluing together the biggest pieces. Because I was going to try to re-stain all this stock to match the existing ceiling finish, I used Titebond® "Genuine Hide Glue" for all the glue-ups. Hide glue is impressive stuff in that it completely disappears when applying the finish stain (unlike aliphatic resin wood glues, that always seem to leave a little glue line). The slower set time of hide glue was also nice while trying to get all those little splintered bits back into the right spots (but it also should cure overnight, which slowed down the project a bit).
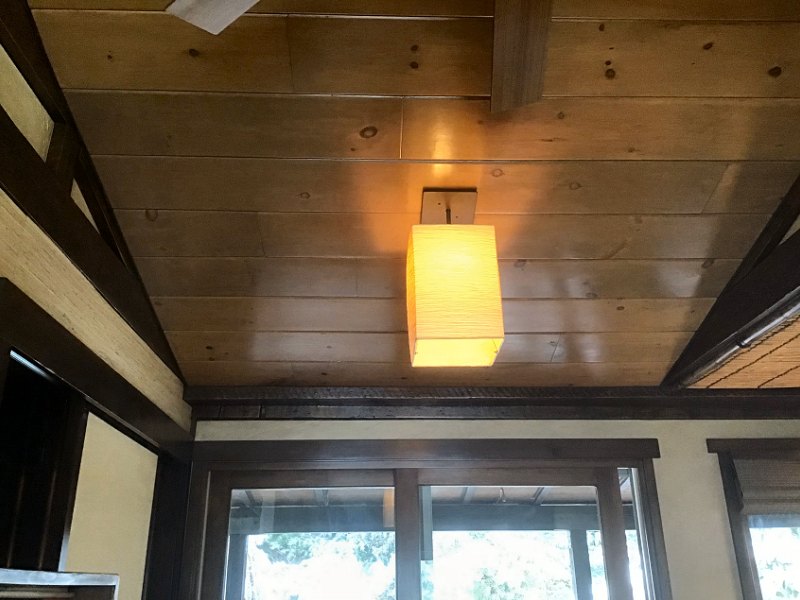
Once I got all the pieces back together that I could manage, I gently sanded the old finish off all of the repaired boards to see what I had to work with. Despite gluing back together every wood scrap we could find, there were still some bits that were missing wood. I ended up needing to apply a bit of Minwax® Stainable Wood Filler over the course of a couple days, until I finally had a good surface to re-stain. I finished everything with two light coats of "Desert Sand" semi-transparent stain, and finally the water-based satin "Polycrylic Protective Finish" topcoat. I noticed that even with the satin topcoat, the repaired boards seemed a bit more glossy than the existing ceiling. I ended up going over everything with a very fine Scotch-Brite™ hand pad to knock the gloss off a tad, then re-assembled the ceiling paneling and got the lamp back up. The color isn't quite the same as the existing stuff despite all my efforts to get it to match, but the repaired boards are barely noticeable.
↑