

The So-Called Foundation
When I first started to work on the actual house back in 2005, one of the big decisions we struggled with was what to do about the condition of the foundation, or more accurately, the lack of a foundation. The existing foundation for the main house consists of a 2 foot wide by 8 inch deep concrete footing that was placed about 8 inches below the grade of the yard. Sitting on top of the footing are two courses of 8" x 8" x 16" cinder blocks, topped with a double sill of 2 x 8 with a 2 x 8 rim joist. The porch was even worse off, with no concrete footing at all - as near as I could tell, they had buried a couple rows of cinder blocks next to each other in the soil, then topped those with two courses of cinder blocks to support the sill and rim. The cinder block foundation business was used on the South and East sides of the porch, with the North side only supported by a single column of a couple cinder blocks sitting on a little concrete pad. The West end of the porch was attached to the rim joist for the main house. The massive fireplace and chimney was supported underneath by a huge blob of concrete and cinder blocks that tapered from the floor down to the original footing. There were also a series of three more cinder block piers sitting on pads running down the center of the main house. In other words, it was a real mess.
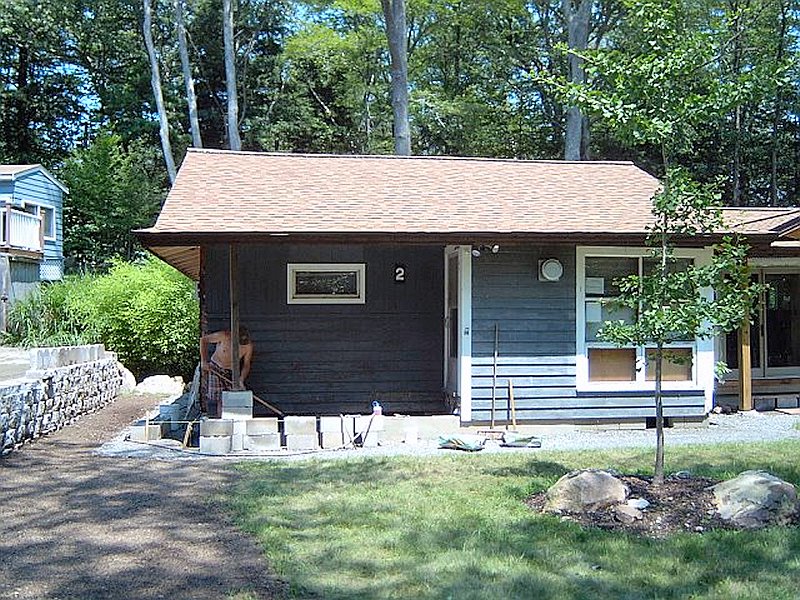
 Serious settling or just built crooked?
As you've probably seen in any of the photos of the original house (mostly in the House section), the place sorta looked like a giant had reached down and pushed the chimney down into the ground about a foot, pulling the rest of the house to slope down to that point. We got some estimates to have house movers come in and jack up the whole house, and then have a foundation crew come along and work around the house-on-stilts to excavate and pour a proper footing and foundation below the frost line. When they were finished, the house movers would return and plop the house back down onto the new foundation, all nice and level like. The result would have been that we'd have spent $30,000, blowing most of our savings, and ended up with a house that was still falling apart but that was level.
The other notion that has rattled around my brain the entire time I worked on this place was that it's probably settled as much as it's going to. Perhaps that's wishful thinking, but I've been operating under the impression that when they originally built the place, they probably didn't have heavy equipment come in to back fill and compact the house site, but instead just dug everything by hand and leveled stuff by eye. I'd been living here for nearly 15 years as a renter before we bought the place, and in that time the house hadn't seemed to have settled any more than when I first moved in. I also recently had a structural engineer look over the place to sign off on some changes I want to make to a couple interior bearing walls, and he confirmed my suspicion that it looks like the house was simply built crooked. He's quite familiar with these early 50's cottages in the area, and pointed out that this building didn't have any of the tell-tale signs that usually indicate serious settling problems due to improper foundations. That helped dispell some of the regrets I've had about not having the foundation re-built when we bought the place.
By not re-building the foundation to make the entire structure plumb and level, we were faced with another important choice that would have a big impact on all the projects involved in the renovation - that is how to construct the sections we planned to rebuild. What I mean is that when replacing a wall, or working on the roof for example, the choice is to either build the replacement section so it matches the house (not plumb or level), or to build the new section so it is plumb and level then try to blend it to the existing conditions. While it's a bit more difficult to try and blend new to old, I decided it would be best to try and make any new construction plumb and level. There would be no re-building of anything that didn't need replacing just to make it plumb and level, but any new construction would be done right.
Foundation Repairs
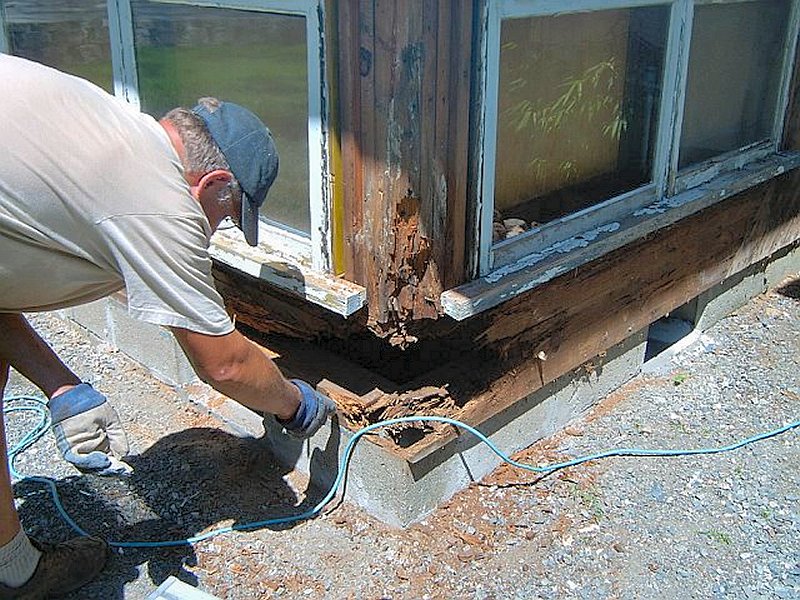
 Foundation repairs to the Southeast corner (5 photos)
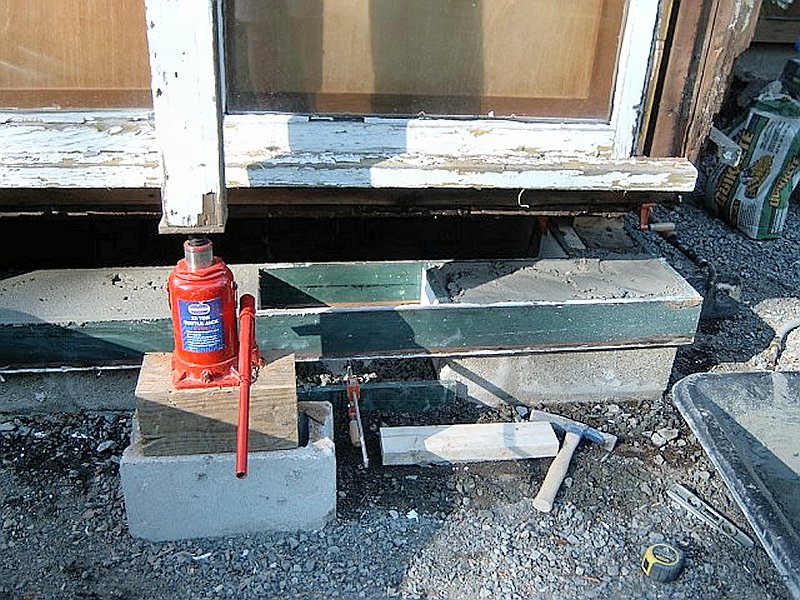
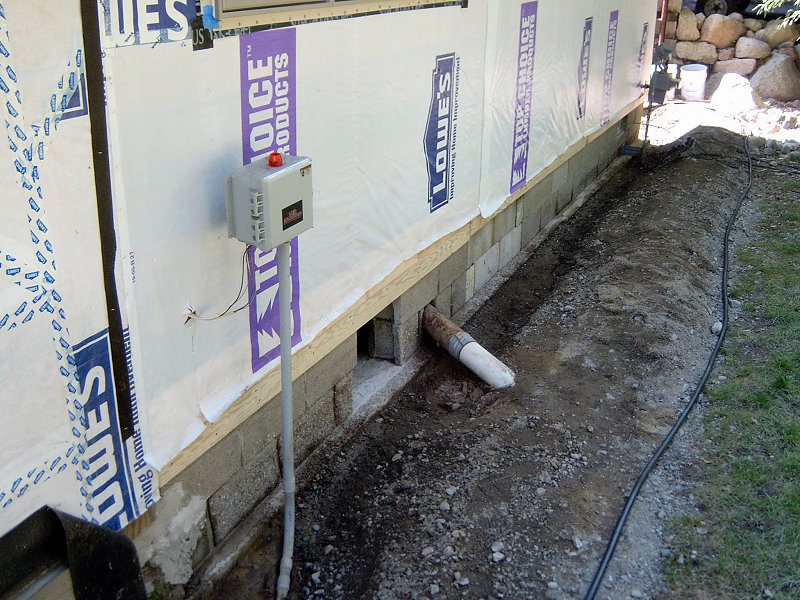
While I probably should have had the foundation rebuilt, we decided to just try and work with what we had. A big part of that decision was that we really needed to replace the leaking roof and drafty windows, and if we blew all the money on foundation work then we'd have nothing left for the rest of the house. The other problem was that every corner of the house was seriously rotted. I'm not sure if the problem was due to ice dams in the winter, or just improper construction and weatherstripping, but all the exterior corners were basically hanging off the siding, rather than resting on the foundation. I think if we had tried to jack up the house, a lot of it would have just fallen apart.
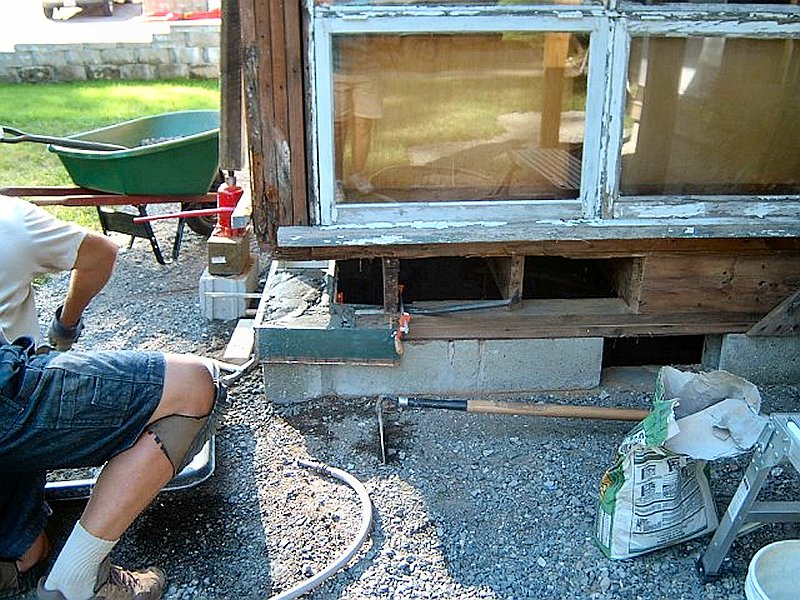
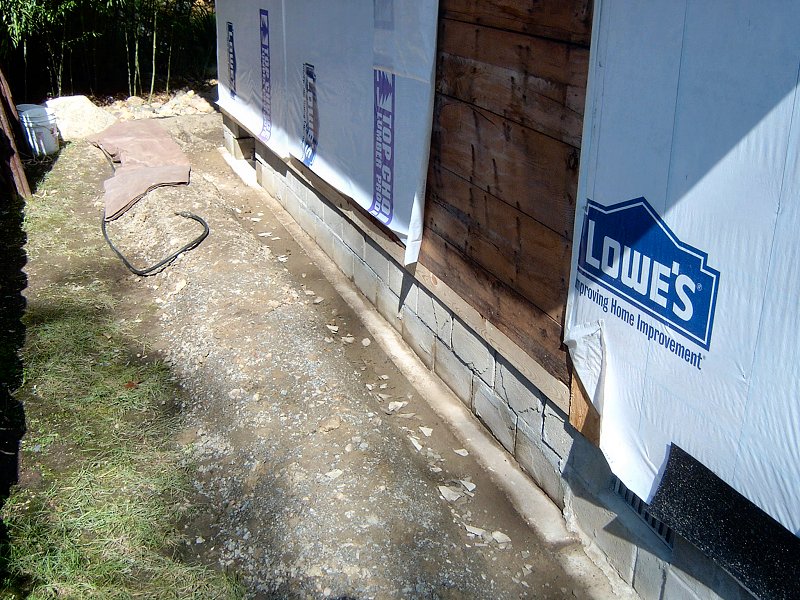
The idea of "all new work must be plumb and level" has caused no small amount of difficulty, especially with the water table and roof eaves, but I think the results have been acceptable. I still ended up performing a fair amount of foundation work, especially as I started peeling back siding and trim to reveal the rotted out corner posts, sills, and rim joists. The Southeast corner was in the worst shape, and with the foundation taking a nose-dive into the dirt there I formed up a concrete "shim", then filled all the voids in the blocks with concrete and filled the shim to level the corner again.
 New foundation wall going in the Southwest corner (3 photos)
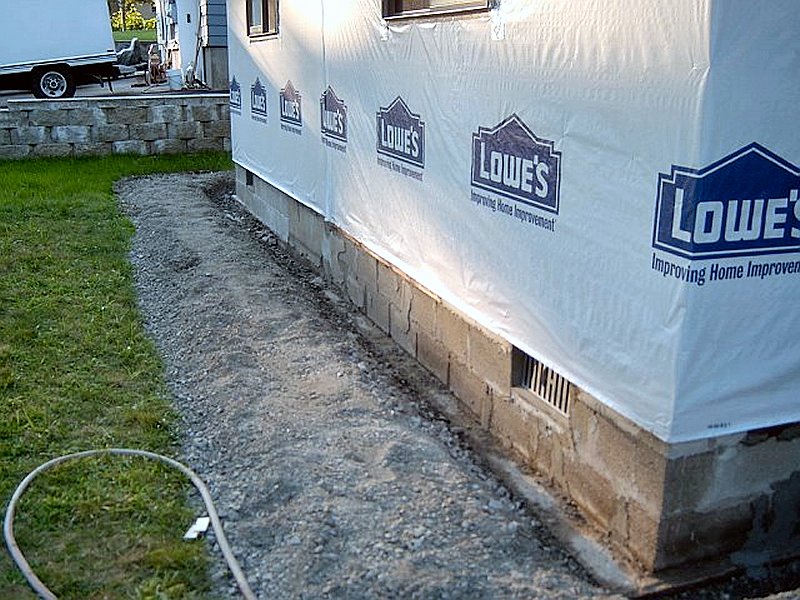
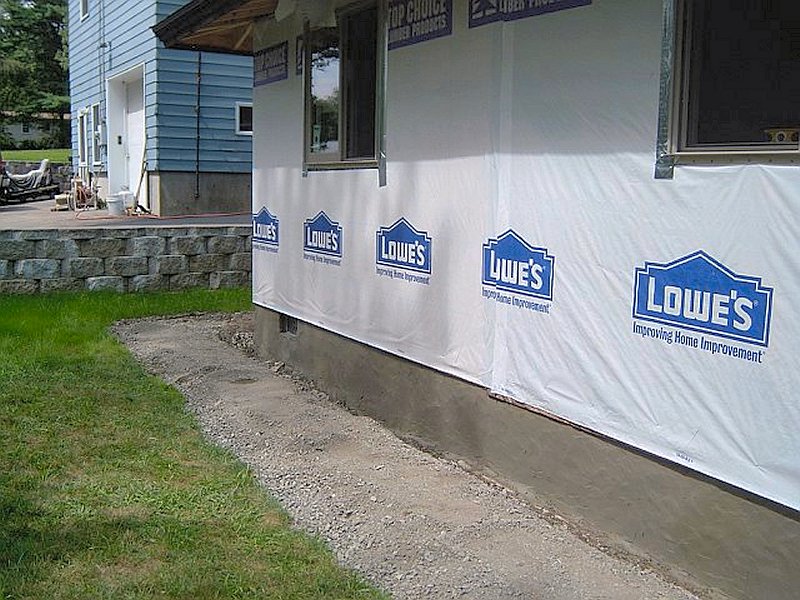
I also did a bit of masonry work in the Southwest corner, where the old entrance was located. The entrance was relocated, which allowed us to make the bedroom larger and get the front door out of the living room. In order to make those changes, the old home-made front steps were removed, and I built a new cinder block foundation wall that rested on the existing concrete pad.
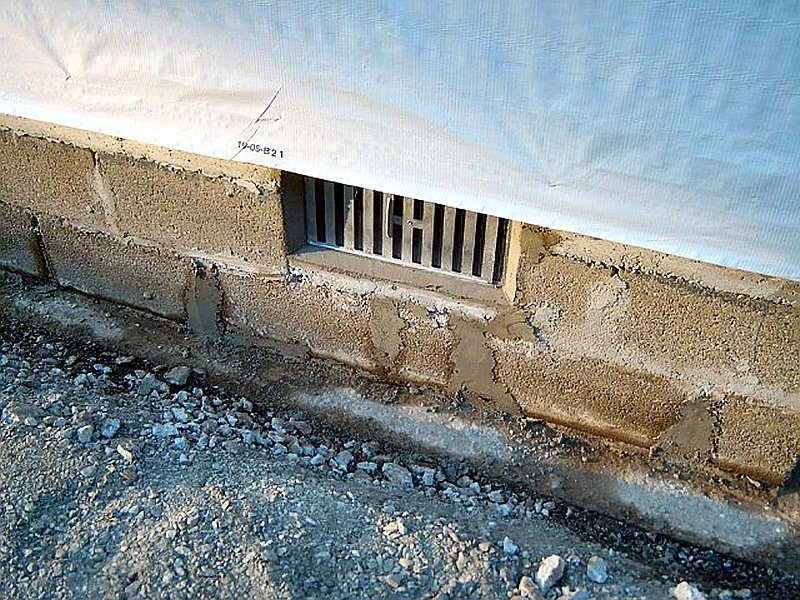
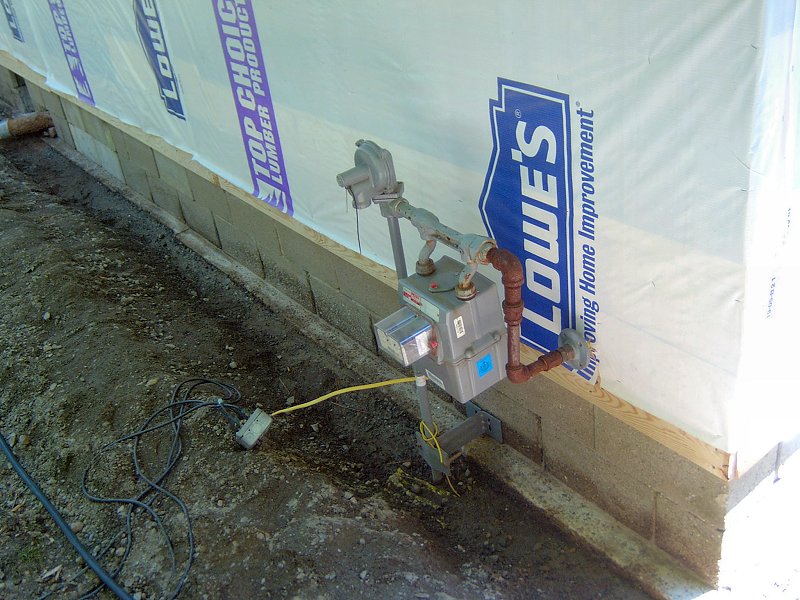
Another issue I had to address for the entire foundation was the whole idea of foundation vents for the crawl space. Originally the house had a few cinder blocks placed on their side at random locations around the foundation perimeter. Some of them had insulation stuffed into the openings (which makes no sense to me), and others were just open holes into the crawl space. The modern thinking on crawl space ventilation seems to fall into 2 categories: either seal it off completely with rigid insulation around the foundation and a heavy plastic sheet on the ground that's sealed to the foundation walls, or insulate the bottom of the floor joists and leave the crawl space well ventilated. With our proximity to the lake and extremely high water table, we often have a few inches of water under the house after a heavy rain so trying to seal the space wasn't an option. To make matters worse there's no where to try and make the water that collects under there drain off to since the area under the house is the lowest point of our yard. I tried to make a good compromise in that I replaced the old sideways block vents with a normal block in most locations, then installed proper screened foundation vents a near each corner. The vents I selected can be closed in the winter to prevent cold wind from blowing under the house, but opened in the summer to help remove the inevitable moisture that collects under the house. I also placed a plastic sheet on the ground to try and slow some of the moisture build up down there, although it's not sealed to the walls.
Finishing the Foundation
After I re-pointed all the old mortar joints and made the changes in crawl space vent locations, we needed to figure out a nice finish for the exposed foundations. We had originally thought of using a cultured stone facing, so it would look like we had a field stone foundation. As work progressed on the siding and more grading around the house, it became clear that there wouldn't be much exposed foundation at all. Rather than spend the time and money for a stone face on what little foundation would remain visible, we decided to just re-apply the mortar top coat that had been on the foundation walls originally. Most of the original top coat had chipped off over the years, so most of the foundation was already bare block anyway.
 Crawl space vents and foundation top coat (10 photos)
We selected Sakrete® Top Coat for the finish product, and once I got over the short learning curve with the stuff, it went on pretty quickly. I found things needed to be very moist to keep the stuff from just crumbling off as I worked, so the surface I was applying to was sprayed with a mist from the hose every couple blocks (cinder blocks dry out very quickly). The mix also had to be pretty sloppy in order to adhere to the block. I found the best technique was to work with 2 trowels at once: a small 6" pointing trowel was used to scoop the mortar from the mixing trough and sling it at the wall, while I held a 4" x 6" finish trowel next to the wall as a shelf to catch the incoming glob from the pointing trowel. I'd sling a glob at the trowel next to the wall, then spread it upward in a sweeping motion under fair pressure to make it stick. Working my way from the bottom of the wall to the top, I'd get a section perhaps 4 or 6 blocks long covered, then use the pointing trowel to even things out a bit and give it a little pattern of trowel marks before moving to the next section. It turned out better than expected, and gives a nice, finished look to the foundation.
↑