

2024 News Archives
This page contains the news updates from 2024, in order to keep the Welcome page from getting too big as I continue to add updates to the renovation project and web site on that page.
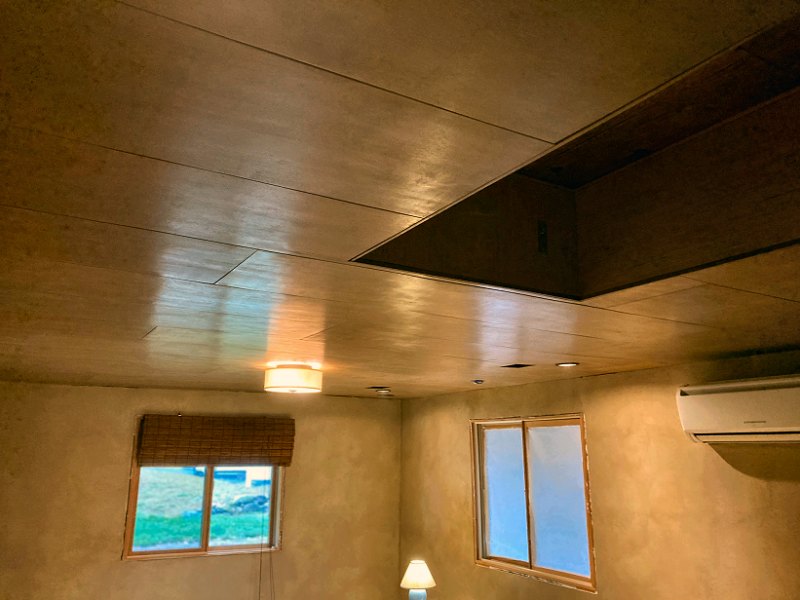
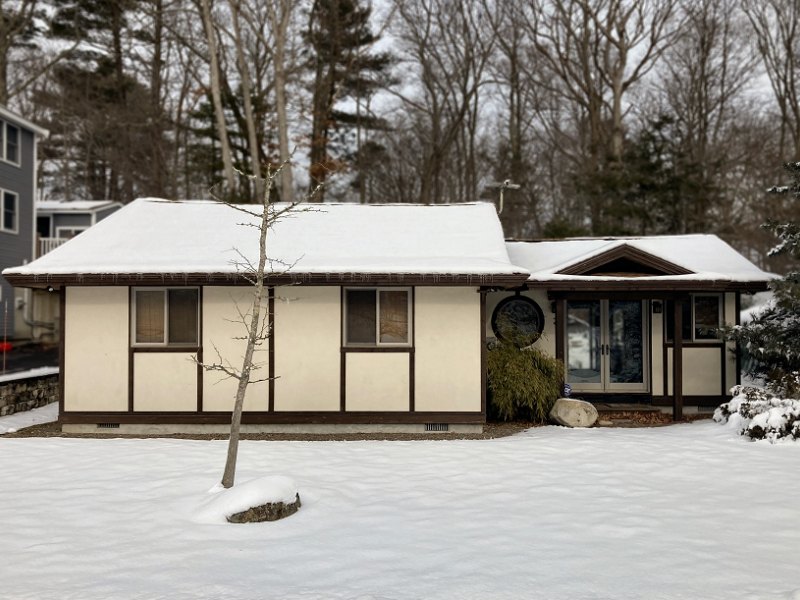
We finally progressed to work on interior finish projects in 2024 (1 photo).
2024 Projects
The House: We made more very good progress on interior renovation work throughout 2024, after dealing with the last
of the rough carpentry & insulation and completing the attic rebuild the year before. We started the year with taking care of the
re-organization project for everything from the attic and closet/laundry room, which enabled us to clear out the closet/laundry room
and bedroom to work on the gypsum wall board (GWB) for both of those rooms. By Spring of 2024 we had all the GWB work done, and then
did all the wallpaper, paint, and glaze work for those spaces too. We then made some design decisions for the finished ceiling that would go up
in the bedroom and living room, and worked on getting the stock for both rooms cut to size and pre-finished for installation. In the Autumn
we then started on the finished ceiling panel work for the bedroom, and after all those panels were up we moved on to the prep work for the living room
ceiling. By the end of the year, the bedroom and closet/laundry room were ready for new flooring and finish carpentry work, although those projects
will most likely occur in 2025, as we'd like to take care of the GWB and ceiling panel work in the living room first. As I said, we made very good
progress on interior renovation work in 2024!
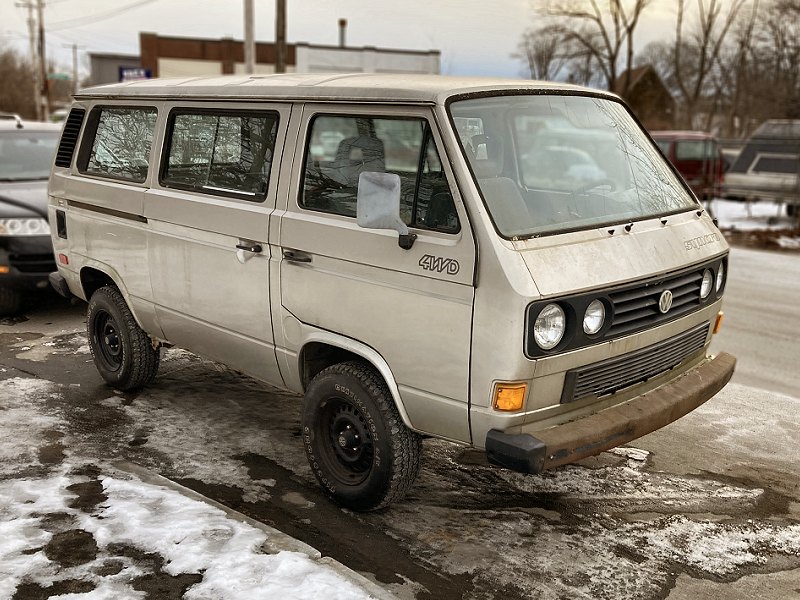
The other big news from 2024 was the progress on getting my "new" '91 VW Vanagon Synchro. The shop completed the engine swap from my
old '89 into the replacement early in 2024, then kept tinkering with migrating other parts to the replacement through most of the year. They also
sandblasted, treated, and re-painted a couple body seams that were showing signs of rust, and finally wrapped up the project in the Fall. I took
possession of the vehicle in early November, and spent a few weeks just cleaning up the thing inside and out to remove the grime from having sat
with no motor for many years. By the end of the year I had the thing road worthy again, then managed to blow a coolant hose in the engine compartment
literally on the last day of 2024. So the good news is I have a Vanagon Synchro again, but the bad news is it likely won't be fully operational
until early 2025.
The Site: Once again I managed to stay fairly consistent with getting updates posted at least once a month (other
than a brief period in late Winter and another in the late Fall), and while the updates weren't frequent, they did include a lot of information
about what we were doing and how we were doing it. Hopefully folks still find the site useful as we continue our work in 2025.
2008 News Archives.
2009 News Archives.
2010 News Archives.
2011 News Archives.
2012 News Archives.
2013 News Archives.
2014 News Archives.
2015 News Archives.
2016 News Archives.
2017 News Archives.
2018-21 News Archives.
2022 News Archives.
2023 News Archives.
Old News Updates

2024.12.23
The House: Yes, it's been a while since my last update, but there's been plenty to keep my busy while I made steady progress
on the interior of the place. In my last update I had said the plan was to continue ceiling panel installation work for most of the living room, which
meant I would need to take care of paint and plaster work around tokobashira and the upper tokonoma walls.
That work was very slow but steady through most of September and October. At the same time, I also started work in October on an old chunk of tree trunk
we've had for a few years to create a "central pillar", or daikokubashira, that also needed to be installed before living
room ceiling work could get underway. Working on that thing was also a lengthy, slow process, but it's finally secured in position as of a couple days
ago. That means we'll be able to get after the living room ceiling panels after the first of the year, which should get things moving along well on the
interior renovation work once more.
The big news however (and a decent contributor to the delay in the interior work), is that I finally took possession of the '91 Vanagon Synchro
in early November! The shop took care of all the transfer work to move my good condition, mechanical stuffs from the old Vanagon into the new one. Then
they sandblasted a couple body seams that were showing some rust, and coated the entire undercarriage and blasted seams with P.O.R. 15 rust preventative
treatment before sending it to the body shop next door to re-paint the seams and front door steps (which took a while for the body shop to get to,
but they did an outstanding job). I completed the purchase and transferred my plates the first week of November, but then spent nearly the entire
month going through the thing and removing the filth that had built up while it was parked with no motor for over 10 years. I also did a lot of
tinkering to install my old mud flaps and front spoiler, replacing bits of missing trim, and working out some wiring issues as long as the weather
was fairly mild through November and early December. I've done all I'm gonna do for now, and other improvements will need to wait for Spring weather.
I must say, it sure is nice to have a vehicle again to run errands and collect building supplies!
The Site: Even though I didn't post it here on the News page, I did make a little update to the
Bedroom page of the Interior section a few weeks ago with a bit more information and a few more photos
for the Finish Ceiling Panel Installation work entry. I've also added a couple new entries to the
Living Room page of the Interior section to discuss the Ceiling
Installation Prep Work that I did on the upper tokonoma walls, as well as lots of stuff about the
Daikokubashira Installation Work. For the new Vanagon Synchro, I re-wrote some of
the entry about the Old '89 Vanagon Synchro, then added a couple new paragraphs and a photo of the
New '91 Vanagon Syncrho in the Old Volkswagens section of Et Cetera
page. Of course, that all justified an update the search index, and new links to everything for the last couple entries to the
Project Timeline to wrap up 2024.

2024.09.02
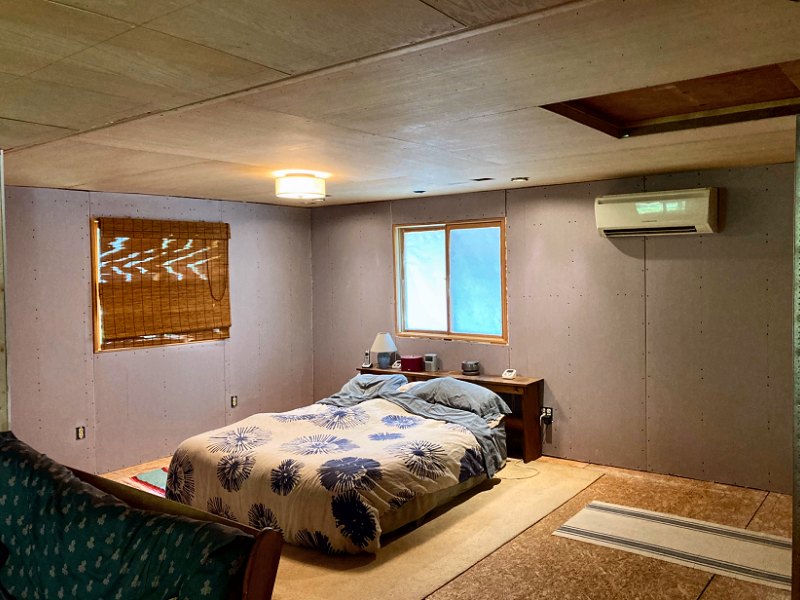
The House: Work continues in the bedroom, with almost all the new ceiling panels for that room installed. The FRP Adhesive
I selected to hold the ceiling panels in place seems to have done the job, although it couldn't initially keep the panels up on its own — I ended
up needing to get each panel in place, then immediately get one of my 3rd Hand supports under it while I went over the thing
with a laminate roller. Once it had been rolled a bit, I could then add a few brads and it would stay put. Unfortunately, I also tweaked my lower
back pretty well when using that roller, so progress on the last couple ceiling panels is now going very slowly. The good news is that the panels
feel very solid after the adhesive cures overnight, but the bad news is that I'm going to need to fiddle with some wood putty for a while to make
the extra brads I needed for each panel disappear. I also think we're going to go ahead and put up most of the ceiling panels for the living
room while we're at it, and that'll just leave the a short panels for the perimeter uninstalled until the GWB work in there is done. I'll have to
take care of the plaster work for the tokonoma walls first (so I don't get plaster and paint all over the ceiling panels),
but that shouldn't be too bad.
The Site: Once again, the Bedroom page of the Interior section
got another update, with a new entry regarding the Finish Ceiling Panel Installation work. That also
got me to update the search index, and add a link for the new section to the Project Timeline, as usual.

2024.08.24
The House: Things are moving along pretty well now with regard to progress on the remainder of the bedroom renovation
work. The last couple weeks have been spent working on one of the oddest little carpentry projects I've undertaken yet (as if creating 18-foot
long "shims" to level the ceilings, then framing a raised attic floor to add 16-inches of insulation weren't strange enough). Now I've
been doing a fair amount of rather finicky carpentry work on the attic hatch opening to make the perimeter square and all the inside walls plumb. With
that little project completed, I also managed to get the second coat of clear on all the finished ceiling stock for both the bedroom and living room
ceilings. The next project will be to install the bedroom ceiling panels, which I'm planning to do with some Titebond®
"Fast Grab" FRP Adhesive. Ideally I can just spread the stuff on the panels then stick 'em to the ceiling "underlayment" and
hit 'em with a roller, but I suspect they're gonna need a few brads to actually keep them in place. We'll see…
No news on the replacement Vanagon Synchro yet, but I've got enough stuff to do before I need to fetch the last few sheets of GWB for the living
room so I'll remain patient.
The Site: As usual lately, the Bedroom page of the Interior section
got another update, with a new section detailing the Finish Carpentry for the Attic Access Opening and
a load of photos for that project. I also finally figured out where I want to have the section regarding making the plans for the attic access hatch
(which I wrote back in January and stuck on the Living Room page at that time), by adding that to the
Bedroom page just before this latest addition. Naturally I've also updated the search index update, and added the new stuff
to the Project Timeline as well. That is all.
2024.08.04
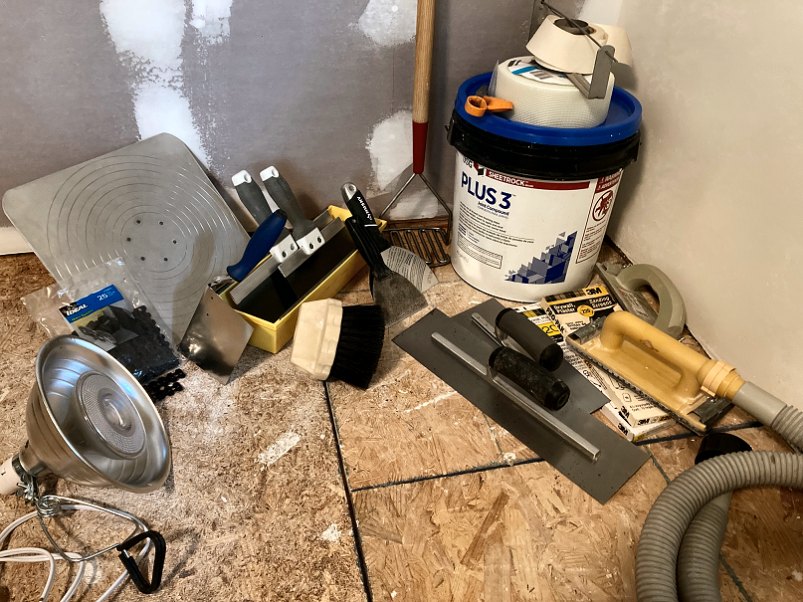
The House: As I mentioned in the last update, I was hoping to get all the bedroom joint compound work done
to allow me to get the room painted by the end of July. I'm pleased to report that I managed to get the final coat of tinted glaze on
the South and West bedroom walls yesterday, so paint work in there is complete! I've also been putting some time in each day to
get all the ceiling panel stock sanded, stained, and top-coated with the first coat of semi-gloss clear. I'm thinkin' I'll give all that
stuff a light sanding with some 320-grit while it's all out in the shop, then bring it inside for the second application of clear coat.
Now that the bedroom paint work is done, I can stack all the ceiling panels in there as I get the final coat of poly applied to make it
ready for installation.
I'm also planning to get the rest of the wallpaper up on the bedroom/closet partition walls next week, then I'll need to take care of
some carpentry tweaks to the attic hatch opening to square it up before I can start the final ceiling work. Once that's done I'll then need
to dig through the piles of wood in the shop to see if I've got enough material to get the bedroom trim work underway. Plenty of stuff to do!
The Site: The Bedroom page within the Interior section got
a couple new entries and a handful of progress photos for the Bedroom GWB & Plaster Work and
Bedroom Paint & Wallpaper (although I intend to add more photos once I've taken care of the
wallpaper work). I also discussed the process for getting all the bedroom and living room ceiling panels ready for installation
in a new section on the Living Room page regarding Finished Ceiling Prep Work.
This new stuff warranted a search index update, and the usual matching entires have been added to the
Project Timeline. Enjoy!
2024.07.20
The House: With the walk-in closet/laundry room mostly finished, the next step to make progress on the
interior was to move all of the tool & supplies bins and the stack of IKEA® bedroom furniture boxes
in to the living room to leave the bedroom clear for wall work. I then got all the gypsum wall board for the bedroom and
tokonoma walls installed, and started taking care of plastering everything to ready the bedroom for finish work.
The work order is to get the plaster work done on the bedroom side of the closet and bathroom walls, then get those walls primed for wallpaper
(which will allow me to get the last of the wallpaper up in the closet/laundry room, as some of it will wrap around onto the
bedroom side of the closet walls). Before I can get the last of the wallpaper up however, I need to finish the bedroom perimeter walls with
textured plaster, paint, and glaze, which is what I'm working on now.
This workflow has been slightly delayed for a couple of reasons: The first was that I received two summons for jury duty this Summer!
The first was for the Massachusetts Superior Courthouse up in Lawrence, MA in the middle of June, then I received a second summons for the U.S. District
Court for the District of Massachusetts in Boston, which is an on-call summons that runs for three weeks starting on July 7th.
Joy. After spending most of a day waiting at the Lawrence courthouse, those of us that were left were let go by mid-afternoon after they had
selected enough jurors and alternates to proceed with the trial the next day. Even though I had fulfilled my service for the Commonwealth of
Massachusetts, that doesn't qualify one to be excused from the U.S. District Court summons unless one is impaneled and serves for five or more
days. That meant I had to call the district court office each Friday to determine if I was required to report the following Monday for service.
I didn't have to report for the 7th, but when I called on the 12th I was told to show up at
8 a.m. on the 15th (and getting to the courthouse in Boston would require leaving before 6 a.m. to catch a commuter
rail in to Boston, then a subway, and then a bus - not fun). Thankfully, I received a call from the district court office on Saturday telling
me that the case was no longer going to proceed, and that my U.S. District Court jury service had now been fulfilled. Phew!
The other delay/diversion from wall work was that I got a call from my friend with the pick-up truck to say he was going to be around for
a couple days while the rest of his family extended their stay with relatives in the midwest, so he thought it might be a good time to get all the
1/4" plywood for the ceiling, and run everything through his table saw while his kids weren't around. A couple days later I had a stack
of 13 sheets of 1/4" plywood that had all been cut into 16-inch wide strips and proper lengths for all the finish ceiling work for the
bedroom and living room. With all that stock available, I could adjust my interior workflow a little to really make some good progress
for the bedroom and living room. Once the bedroom wall paint and wallpaper work is done, the new plan is to then install the finish ceiling in that
space, which will then allow me to install the finish flooring for the closet/laundry room and the bedroom. That will allow me to
then install the remaining trim for the closet, and all the trim for the bedroom - which means I'll finally be able to assemble and place all
the IKEA® furniture and stop moving those damn boxes all the time!
So, I now spend time each day getting stain and clear coat applied to a few of the ceiling panels (I can't do them all at once, as there simply
isn't anywhere to work on more than a couple at a time inside the house, and it's way to hot and humid to do finish application to this stuff out
side). Then I spend a little time sanding and plastering the bedroom walls to get those ready for paint. Things are moving along slowly but
steadily, and I expect to start wall paint work before the end of the month. All good progress.
The Site: Other than this rather lengthy status update, the only real change to the site this time around was to create
a new News Archive page to get all the 2023 News Updates off this Welcome page. That is all for now.

2024.06.30
The House: It's been a busy couple of months getting most of the work done for the walk-in closet/laundry room.
It started with a visit from the building inspector to ensure the new bearing wall between the closet and bedroom is correct (it is).
Next, all the wallboard was installed, and it also got the full "textured plaster" treatment on the ceiling and the two perimeter walls.
Everything was then primed and painted, using my glazing method to bring out the plaster work (and finding glaze was no picnic, apparently
faux finishes for interior walls are no longer in style). The partition walls between the closet, bathroom, and bathroom also got their
grasscloth wallpaper applied, then I milled up all the trim and got that finished and installed. All this stuff allowed me to finally get the
washer & dryer put into their "final" position, then get the wall cabinets installed on the wall with the laundry equipment.
The only thing left for that room now is to put down the new flooring and install the baseboard trim – although that work will have to
wait until the wallboard work is done for the rest of the bedroom, and likely for the finished ceiling to get done in there too.
The latest on the replacement VW Vanagon is that it's pretty much done. We need to take the Cabriolet in for some brake work next week, and
we'll get the Vanagon as a "loaner vehicle" for a few days while the brake work gets taken care of. The only thing left for the Vanagon
at this point is to give the undercarriage a coat of P.O.R. 15, then hit it all with some undercoating. It'll be interesting to see if I remember
how to drive a Vanagon – it's been a few years!
The Site: All the latest work for the closet/laundry room has been added to a couple of new sections
in the Bedroom page within the Interior section. The wallboard work is briefly described
in the section on Gypsum Wall Board, then I added lots of description and photos of the
Wall & Ceiling Finish Work, followed by another section regarding the
Trim & Cabinet Installation. Of course, I've also updated the
Project Timeline and the search index.

2024.04.29
The House: Yeah - it's been a while without an update. We both went through a long cold/flu for most of February and
March, although multiple tests showed it wasn't COVID, so that's good I suppose. I did manage to get all the stuff organized and stored in the attic
to get the closet/laundry room all cleaned out, and also started putting up the Gypsum WallBoard (GWB) for the rest of that room. I used up
the last of the fiberglass-faced, moisture proof stuff I had available on the wall between the bathroom and laundry room (and no one seems to sell
it around here anymore), then the rest of the room got regular lightweight GWB. I'll need to get the local building inspector to stop by for a look
at the new wall and header between the bedroom and closet/laundry room, then I can get the rest of that wall covered with new GWB and get busy on
the wall and ceiling finishes for the closet/laundry room.
I've had no update on the replacement VW Vanagon for many weeks, although I'm sure it's still moving along well enough. I did deliver the title for
the old vehicle in early February (so they could scrap it), and also put down a decent deposit to help with the cost of parts for the
replacement. Because I still have no vehicle, I'll likely be heading off to Home Depot this week with my friend with the pick-up truck to grab a
dozen sheets of GWB and bucket of mud so I can start getting GWB up in the bedroom too. Hard to believe I'm finally covering those plastic-covered,
stud walls after all these years. Progress!
The Site: This update is only to say I'm still here and (now that I'm no longer sick) still making progress
on projects. I've grabbed a few photos of the GWB work, although it's not very interesting stuff (and possibly my least favorite task — I
thoroughly enjoy doing plaster work, but I really dislike the mess of cutting and hanging GWB). I should have an update together fairly soon
that shows the progress on the GWB work for the closet/laundry room, but this'll do for now.
2024.01.22
The House: We're still mostly working on organizing all our stuff into properly label storage bins and making good progress on
that project. All the stuff from the old "hardware store" closet/laundry room (that isn't bothered by freezing) has been moved
to the attic. We also loaded eight bins with books and family photos from bookshelves we cleaned off recently and got all that stored up there too.
I'm still working on the last of the wall insulation work in the closet/laundry room, and also started going over the existing vapor barrier for
the living room and bedroom exterior walls to ensure it's all well sealed before starting wallboard work. While going through the "hardware store"
bins I found I had a little extra CL-2 speaker wire and a few keystone wall plates, so I decided to also add some more audio wiring to the living room wall
before the plaster work begins. This gives us the ability to add front, in-wall speakers someday if we ever decide to get rid of our bulky, free standing
floor speakers.
I also got an update on the replacement VW Vanagon, with news that the engine swap is finished and they're now working through the rest of the vehicle
to bring over all the little goodies from the old vehicle before it goes away.
The Site: This is a fairly small update, with a little new text on the Energy Efficiency page
within the Mechanical section regarding the wrap of the work to Insulate the
Exterior Walls, as well as some information on the Wiring page about the Front
In-wall Speakers prep work I took care of before sealing up the front wall vapor barrier. I think the most significant progress was to get some
decisions made regarding the attic hatch while Working Out the Attic Access through a new set of plans,
with information available in a new section on the Living Room page within the Interior section of
the site (although that entry has since been moved to the Bedroom page). There's a link to the PDF for the plans
on the Specifications page and Project Timeline as well. I've also updated
the search index, which will take care of this update.
2024.01.11
The House: The attic insulation work is finished, so the work in the attic is done after nearly two decades! The only
thing left up there is to get the new entry hatch built, which I'm starting to plan now. We're also working on "round 2" of organizing all
our stuff into properly label storage bins (which we took our first stab at back in July) so all that stuff can go back into the attic and
clear out the place to get started on gypsum wall board (GWB) installation. I'm also taking care of the last of the wall insulation work in
the closet/laundry room to get that space ready for GWB as well.
No news on the replacement VW Vanagon yet, but I expect to have a progress report for that project soon.
The Site: The final attic insulation work information has been added to the Energy
Efficiency page within the Mechanical section, with a new section of text and photos for the
Last of the Attic Insulation installation over the kitchen and living room perimeter. I also
added a couple new titles from Lost Art
Press![]() to the
Specifications page that Santa left for me under the Christmas tree this year. This new stuff has been added to the
Project Timeline as usual, along with an updated search index.
to the
Specifications page that Santa left for me under the Christmas tree this year. This new stuff has been added to the
Project Timeline as usual, along with an updated search index.
↑