

Building the Pond
 The pond in 2003 (6 photos)
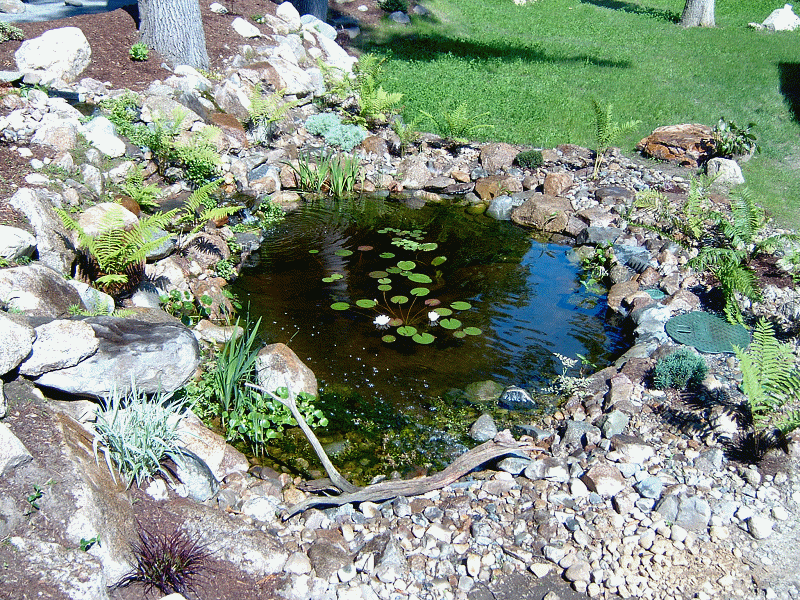
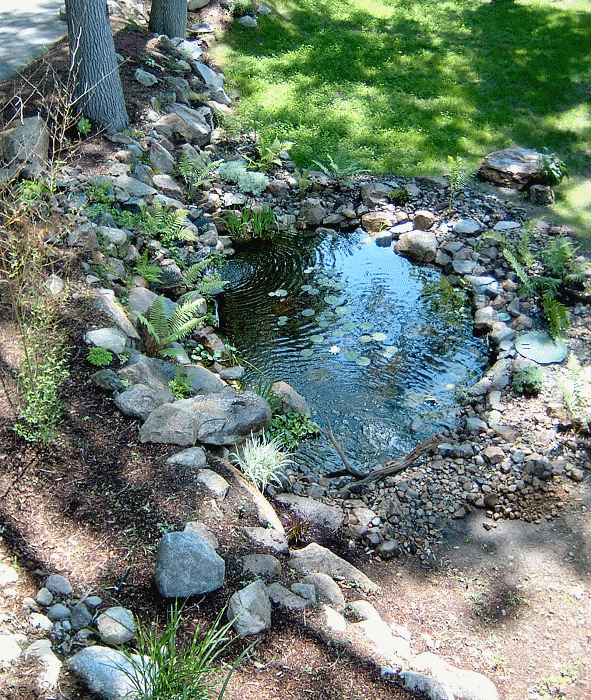
We decided to add a water garden while the septic system was being installed, since having the heavy equipment on site saved a
lot of time and effort in making the big hole for the pond. We made it about as large as we could and still squeeze it in between the
septic tank and the edge of the lot. We determined the pond would be around 3000 gallons, with a kidney shape that's roughly 12 feet by
18 feet, with an average depth of 2 feet and a maximum depth of 4 feet. Our initial thought was that we'd only have a water garden with no
fish, since we thought that would allow for a much simpler filter system. After a few visits to our local pond store for advice and supplies,
Country Gardens of Rowley,
![]() we decided to at least build the
thing so we could add fish later if we decided to do so. Basically the filter system for a fish pond versus a water garden was a completely different
animal, and to try and retrofit appropriate filtration for fish would have meant completely re-doing the pond. It was easier to "over filter" the
water garden so it could support fish, than it would have been to "under filter" a fish pond and use it as a water garden, if that makes any sense.
we decided to at least build the
thing so we could add fish later if we decided to do so. Basically the filter system for a fish pond versus a water garden was a completely different
animal, and to try and retrofit appropriate filtration for fish would have meant completely re-doing the pond. It was easier to "over filter" the
water garden so it could support fish, than it would have been to "under filter" a fish pond and use it as a water garden, if that makes any sense.
Once the basic hole was made, the next step was to do some final bottom profile shaping and figure out where the waterfall would go. This was all done by hand, but since the main hole was already there, it really wasn't tough going at all. We made a small section about 4 feet deep that was near the East edge of the pond, and about 4 feet in diameter. This would be fed by the water fall, and contain a bottom drain to pull up any debris that didn't get caught by the skimmer filter. From the deepest section, the bottom gradually sloped up to the west with an average depth of 2 feet, then eventually came up to ground level at the Western edge to form a "beach" area. This is also the location of the water inlet, which bypasses the bio-filter and provides a bit of current to keep all the water circulating. There is also a plant shelf, that's about 1 foot deep and 1-1/2 feet wide that goes from the "beach" around the Northern edge to the skimmer inlet, then continues around to the waterfall. Once all the contours were created, everything was covered with about 3 inches of wetted and tamped stone dust to avoid any big rocks or roots sticking into the liner. The stone dust was then covered with 1/4 inch think polyester felt pond liner underlayment, and then finally we dragged in the 45 mil Firestone PondGard EPDM pond liner.
Filter Systems
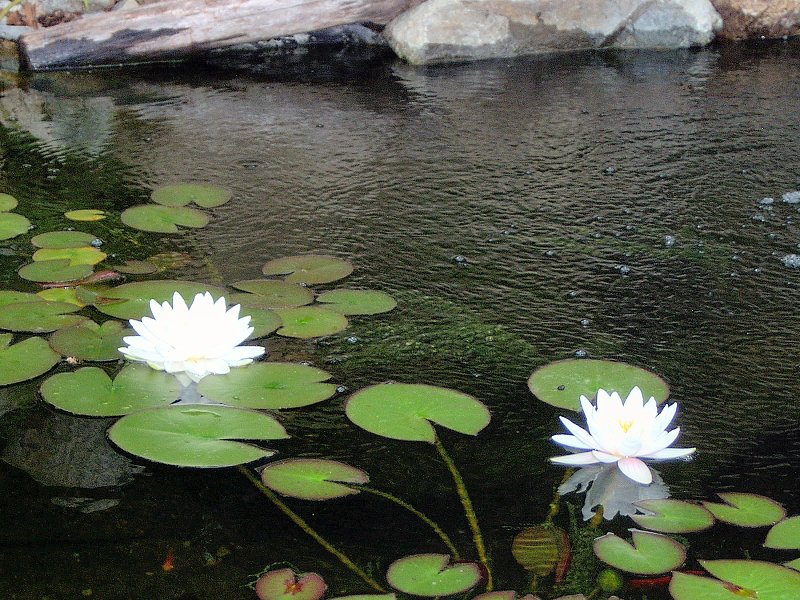
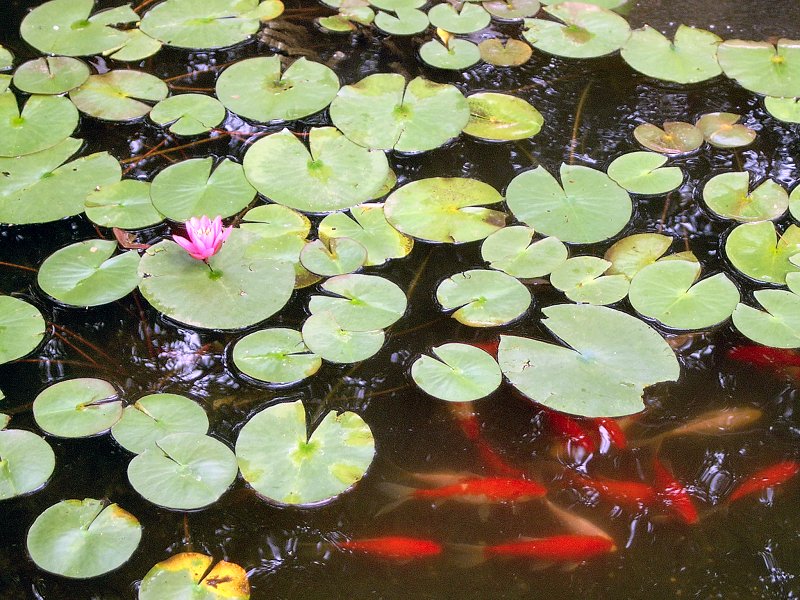 A healthy cover of lily pads provide shade to curtail algae growth.
In a well balanced, self contained pond system, we need to address water purity (removal of toxins), water filtration (removal of solids), and water clarity (so we can see and enjoy the fish and plants). Even though we didn't start with a true fish pond, I designed the system so that it could eventually support a healthy fish population. The first priority was to deal with toxins from fish waste through what's called the Nitrification Cycle. Fish waste is mostly Ammonia (NH4), and when even small quantities of Ammonia are present in the pond it will kill the fish. To remove the Ammonia, Nitrosomonas bacteria present in the bio-filter (and everywhere else in the pond to a lesser degree) oxidize the Ammonia to other Nitrogen chemicals called nitrites (NO2). So far so good, but nitrites in sufficient concentrations will also kill the fish. The good news is Nitrospiria bacteria also present in the bio-filter will convert nitrite chemicals into nitrate (NO3) chemicals. Nitrates are far less toxic to the fish than the raw fish waste and easily taken up by pond plants, so the goal of the bio-filter is to convert highly toxic Ammonias to much less toxic nitrates.
In an open natural stream or lake with flowing water, fish populations are relatively low and the nitrifying bacteria are present on any underwater surface. Submerged rocks, trees, plants roots, etc., all provide areas where the bacteria live and convert ammoniums to nitrates constantly (as long the water moves and contains sufficient oxygen for them to do so). In a self contained garden pond a filter is installed to make up for the unnatural conditions of relatively high population of fish, lack of fresh water inflow, and to allow large concentrations of bacteria to operate effectively in a small volume by providing a greatly increased underwater surface area for the bacteria colonize. Decaying plant matter is also producer of Ammonia, so even without the presence of fish, a self contained pond still requires some method of removal of toxins. In a very small pond, this can be accomplished by occasional regular water changes, but for anything of decent size (say over 100 gallons) some manner of bio-filter becomes a requirement.
Water Purity: The Bio-Filter
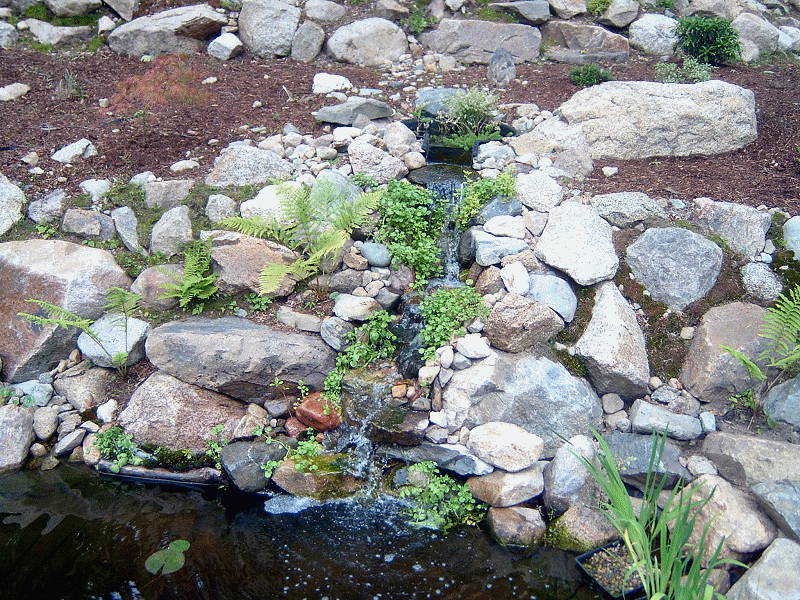
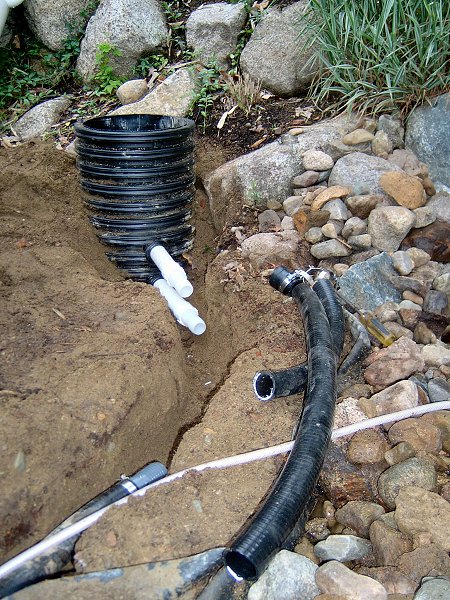
The pond is positioned with its back edge against one of the rock retaining walls which allows for the natural looking addition of a waterfall in that area. The source of the waterfall became the bio-filter, which is simply a big tub of filter media that provides plenty of surface area for nitrifying bacteria to colonize. A couple important considerations when selecting or "sizing" the bio-filter are the amount of filter media the unit can hold and the flow rate or "turnover" of the volume of water the filter can process (which is also a function of the pump system in addition to the actual size of the filter tub). We also had to make a decision regarding the fish population fairly early in the design process. As I said, we initially wanted just a water garden, and had no plans for any fish. After seeing some of the wonderful Koi ponds at the local pond store, it became obvious that we were going to have fish, however we decided to stick to Goldfish in order to avoid some of the headaches involved with Koi. My main concern was that Koi never stop growing, whereas Goldfish will limit their growth based on the size of the pond and the number of fish in the pond. We preferred the look of lots of little fishies over that of just a couple monster Koi lurking in the depths. That decision put our pond in the category of an "Ornamental Koi / Plant Pond" as opposed to a full-fledged "Koi Display Pond", and allowed us to accurately select the appropriate filtration components.
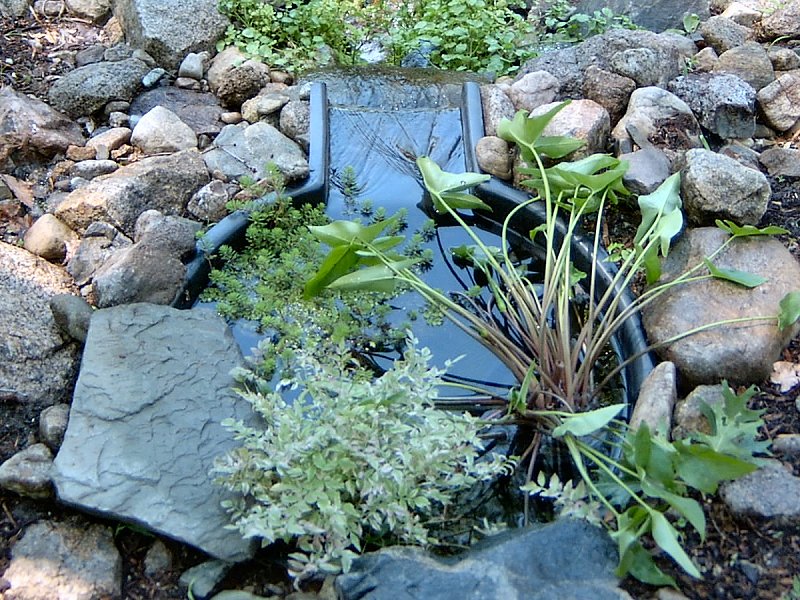 Plants in the Bio-filter help it perform.
An ornamental pond should have a bio-filter with a 5% or greater capacity (depending upon the fish load) of which about 3% should be
filter media. With a pond volume of 3000 gallons we then can determine that we'd ideally have a filter capacity of 150 gallons with 90
gallons of filter media - that will support a Goldfish population of 1 to 1-1/2 fish per 50 gallons, or 60-90 fish. So much for theory.
The reality is that I had no intention of putting in a 150 gallon tub as a bio-filter (although in retrospect, I probably should have, and
likely will do so in the next couple years). I also had no intention of stocking 60 Goldfish (about 20 seems to be a nice balance in this size pond)
so I did some significant fudging of the numbers to arrive at a bio-filter that seems to be doing the job quite nicely, based on water tests and
fish health. We ended up with an Atlantic Water Gardens
FilterFalls ![]() unit,
which is an upflow filter tub with about a 40 gallon capacity. For filter media, we use
Savio Springflo
unit,
which is an upflow filter tub with about a 40 gallon capacity. For filter media, we use
Savio Springflo ![]() media and one package fills the tub right to the top.
media and one package fills the tub right to the top.
Since the bio-filter we currently have is undersized for an "ideal" system, I've also included a pair of AquaScape AquaMats, which rest on the bottom of the pond and provide additional surface area for nitrifying bacteria. These units also allow me to shut down the waterfall bio-filter in the winter, while still maintaining some level of colonized bacteria in the pond environment all year.
Water Filtration: The Skimmer Filter
The location of our pond relative to the large Red Oaks in the back yard means the pond is under a constant barrage of falling leave and twigs from the trees.
We also get some soil from the retaining wall behind the pond, and seasonal sprinkling of leaves from the nearby Bamboo. In order to remove the leaves
and other floating debris, we installed a
Savio Skimmerfilter ![]() .
The skimmer filter catches nearly everything that lands on the pond in it's internal filter basket, and also contains a filter mat that acts
as a pre-filter to keep the finer particles out of the bio-filter system. We also use the skimmer filter to hold the submersible pump that feeds the bio-filter
and provides all the water circulation for the pond.
.
The skimmer filter catches nearly everything that lands on the pond in it's internal filter basket, and also contains a filter mat that acts
as a pre-filter to keep the finer particles out of the bio-filter system. We also use the skimmer filter to hold the submersible pump that feeds the bio-filter
and provides all the water circulation for the pond.
Water Clarity: UV Sterilizers, Air Pump and the Foam Fractionator
This is the part of pond ownership where folks seem to really lose it - one may have a perfectly healthy pond with no toxins, disease free and
pest free fish populations, and thriving pond plants, yet the thing looks like a swamp of pea soup with a thick, furry coating of algae
growing over everything. Not pretty. Rather than dump gallons of chemicals into the pond to try and "fix" problems with water clarity,
I try to encourage a natural balance as much as possible, and it's worked out well so far. The problem is there is no way around the
simple fact that water + sunlight = algae growth, period. The first step I took to address algae growth was to remove the sunlight part of the
equation by adding lots of water lilies. By mid-summer the pond is pretty much completely covered with lily pads which do a fine job
of blocking out sunlight and shading the fish at the same time. Since the potential for significant "algae blooms" - where the water is
actually clouded like pea soup by suspended algae - still exists in the Spring and Fall when the lily pads aren't doing their thing, I
employ a pair of UV Sterilizers
![]() from Savio that fit into chambers
inside the skimmer filter and zap any microscopic oogies as the water passes through the filter to the pump.
from Savio that fit into chambers
inside the skimmer filter and zap any microscopic oogies as the water passes through the filter to the pump.
Another issue that contributes to rampant algae growth is lack of Oxygen in the water. Plants thrive on Carbon Dioxide, so while
the fishies are consuming Oxygen and converting it to Carbon Dioxide, algae shows up to consume the Carbon Dioxide the fishies produce.
The more fishies in the pond, the greater the chance of an algae bloom. To make matters worse, as the water temperature rises in the Summer it
holds less dissolved oxygen. The waterfall and circulation systems add some oxygen back to the water, but I decided to add a dedicated
air pump to ensure plenty of dissolved oxygen would be present in the Summer months.
I selected an Alita Linear AL-40 ![]() air pump as the best balance of CFM, energy consumption and serviceability, and it feeds a 9" diameter disc-style EPDM air diffuser mounted on the bottom drain.
The air from the pump is split between the disc diffuser and a pair of air stones in the foam fractionator, since if I run full output to the diffuser, it
makes a 6" high rolling hump of water in the center of the pond, and blows all the lily pads to the edges (great for pond cleaning sessions, and the fish
seem to have a blast swimming through the air column when I crank it up, but a bit much for day-to-day use).
air pump as the best balance of CFM, energy consumption and serviceability, and it feeds a 9" diameter disc-style EPDM air diffuser mounted on the bottom drain.
The air from the pump is split between the disc diffuser and a pair of air stones in the foam fractionator, since if I run full output to the diffuser, it
makes a 6" high rolling hump of water in the center of the pond, and blows all the lily pads to the edges (great for pond cleaning sessions, and the fish
seem to have a blast swimming through the air column when I crank it up, but a bit much for day-to-day use).
 Installing the foam fractionator (3 photos)
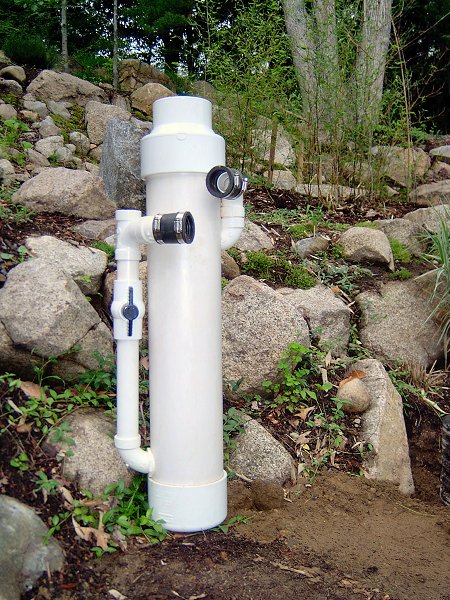
The final nagging issue we had with water clarity turned out to be related to the location of our pond under the Oak trees. We noticed that while the pond seemed to be crystal clear most of the time, the water actually had a brown tint to it - almost like weak tea. There was very little algae growth and it was still clear, it just had a brown tint and we couldn't figure out why. After some careful observation, we figured out that the condition was worst after a rainfall, and would clear up if we did a partial water change and it didn't rain. Eventually we determined that the brown tint was a direct result of rainfall washing tannins out of the bark of the Oak tree directly over the pond! Not great news at the time, since I wasn't going to move the pond or the Oak tree. Luckily the internet is full of folks that are smarter than me, so I was able to find a solution to the "tea pond" in a waste water treatment device called a foam fractionator (also known as a protein skimmer to the marine aquarium enthusiast). The concept of how the thing works is pretty straight forward: organic particles in water will "stick" to the air/water interface (or surface tension) through a process called adsorption. This means these organic pollutants are mostly at the surface of the water, but will also collect around an air-bubble (since it's actually a bit of air surrounded by a circular water surface). You've probably witnessed this phenomena without realizing it if you've ever noticed a tan colored foam along the beach at the surf line or at the base of a waterfall. A foam fractionator concentrates the principal of adsorption into a container and provides a method of removing the organic pollutants in the form of a relatively dry foam.
There was one company in the UK that manufactured such a thing for the pond hobbyist and based on the reviews I'd found, it looked like it was the right tool for the job. It was also a very expensive unit, and the shipping charges to get the thing here really put it out of reach at the time (this was a few years ago, and there are now a few models of these things being distributed in the US). As I said, a protein skimmer for a marine aquarium operates on the same principal, although the price of a 3000 gal capacity protein skimmer is crazy. It was apparent that if I wanted to get rid of the "tea pond" I was going to have to build my own foam fractionator, so that's what I did. In it's most basic form, a foam fractionator consists of a large diameter tube with an inlet for water near the top, and an outlet near the bottom. With water flowing down through the tube I then need a source of air bubbles in the tube to provide the air/water interface for adsorption to take place, so I placed a couple air stones in the bottom of the tube. With bubbles moving up through the downflowing water, I effectively double the length of the water column (compared to having both the water and the bubbles travelling up through the tube). As the bubbles travel up, they grab the organic particles (specifically the tannins, in my case) which yields the foam at the top of the tube (if there's nothing in the water to stick to the bubbles, then the bubbles just pop when they reach the surface). To get rid of the foam, the top of the tube is tapered up to a smaller diameter tube, which concentrates the bubbles and allows them to dry out a bit as water runs off the outside of each bubble, leaving a relatively dry foam of tannins and other organic pollutants. This foam then overflows the top of the tube into a catch rim and breaks into liquid again, which dribbles out a drain tube as wonderfully rich organic fertilizer for the nearby Bamboo. No more tea pond and happy Bamboo as a bonus!
I recently received some reader questions regarding construction of the foam frctionator, so I put together a quick drawing that shows all the parts
and how the thing goes together: Foam Fractionator Plans ![]()
Pond Plumbing
 The pond plumbing schematic
The heart of the pond circulation system is the main pump, which supplies the bio-filter / waterfall and foam fractionator. When designing the initial pond layout, we decided to use a submersible pump that would be housed inside the skimmer filter. Although submersible pumps all tend to look alike, there's a big difference between a standard home "sump pump" and a purpose built backyard pond pump. Sump pumps are made to run intermittently, and generally consume massive amounts of electricity (4,000 GPH consumes approximately 10 - 12 Amps @ 115VAC) when compared to the energy requirements of a purpose built pond pump (4,000 GPH consumes approximately 3 - 4 Amps @ 115VAC). Since the pond pump runs year round (I do shut it down and remove it if we're expecting an extended sub-zero period of winter weather), energy consumption is a key factor in deciding on a pond pump. The most important consideration in pump selection however, is getting a correctly sized pump to deliver an adequate volume of water to the filter system.
Sizing the Pump
As a general rule, an ornamental fish pond should have a pump that can deliver 1/2 to 1 times the total volume of the pond through the filter per hour. Pump output is usually expressed as gallons per hour (GPH) at 1 foot of head, so in our case we would need a pump with a capacity of at least 1,500 GPH. That sounds simple enough, but there's that pesky "at 1 foot head" business in the pump specification. That little tidbit is where folks seem to get tripped up in pump sizing, and usually end up with a woefully inadequate pump for their pond. Head pressure in this case refers to the pump's ability to raise water above the pump (or more accurately, above the level of the water that contains the pump). "At 1 foot head" means the pump can deliver x amount of GPH through a pipe that's the same diameter as the pump's outlet to a height 1 foot above the water level of where the pump is placed. In addition to resistance to raising water vertically (head pressure loss), we need to consider "friction head loss" which is a measure of the resistance introduced by all the fittings, valves and pipe through which we're going to pump the water. So in order to arrive at an accurate pump capacity requirement, we need to figure out not only the height of the waterfall spillway above the water level of the pond, but also total up all of the friction head losses that each fitting and length of pipe will introduce to the equation. Remember, everything adds resistance to the flow, and seemingly small differences can really add up (like smooth walled pipe versus corrugated pipe).
I find it easiest to layout the pond on paper, with notes regarding vertical rise and lengths of pipe runs, then start substituting in various pipe diameters and placement of fittings and valves to determine the best options (for example, 2" pipe versus 1-1/2" pipe means less friction loss, but it may be cheaper to purchase the 1-1/2" pipe and a larger pump since 2" pipe and fittings are pretty expensive). In our case we went with 1-1/2" flexible reinforced PVC pipe, which can be used either with slip fittings and glue, or barbed fittings and clamps... slip fittings add much less friction loss. We want to turn over the pond about once per hour so we'll need a 3,000 GPH (50 GPM) pump to meet that goal. Armed with the GPH goal and planned pipe diameter, we can then calculate the friction losses that will be introduced to the system by all the plumbing (see schematic).
Friction loss charts for pipe usually list the equivalent head loss for a given pipe diameter at a given flow rate per 100 feet of pipe. When we plug in our numbers we find 100 feet of 1-1/2" pipe introduces 13 feet of head loss at 50 GPM. We have a total of about 45 feet of pipe (call it 50 feet), so the head loss due to pipe is 6.5 feet. Next, we need to consider pipe fittings and valves. Charts for friction loss these items introduce usually list the straight pipe equivalent for the particular fitting, so we need to first figure out the total additional straight pipe equivalent, then consult the pipe friction loss charts again. When we total up the tees, valves and couplings from the layout, we find the valves and fittings equate to an additional 30 feet or so of straight pipe, which adds another 4 feet of head loss. We must also add in the vertical height of the waterfall outlet from the surface of the pond, which in our case is about 3.5 feet. Now we can determine the total head loss for our pond layout with 6.5 feet of pipe loss, 4 feet of fittings loss, and 3.5 feet of vertical head loss for a total head loss of 14 feet. With that number we can finally select an appropriate pump by consulting the pump manufacturer's performance charts.
We originally selected an Anjon Big Frog BF4200 pump, which provided about 2,800 GPH at 14 feet of head pressure (about 47 GPM, so it's right in
the ballpark). That pump lasted about three years before I started to notice a drop in performance and that sometimes after a power outage it would take
a couple tries of re-setting the breaker before it would start again. This year (2013) we decided to finally replace the Big Frog with new pump,
and selected a top-of-the-line ShinMaywa Norus CR
![]() series pump. We got the 50CR2.25S 1/3 HP unit,
which provides slightly less GPH at 15 feet of head, but I also changing a couple fittings at the pump (I went for a 2" pipe direct from the pump into
a 2" tee, which then connects to the two 1-1/2" output pipes - that dropped the fitting loss by a couple of feet), so now our loss is closer to the 10 foot
mark rather than the 15 foot mark. The ShinMaywa is rated for 3000 GPH at 10 feet, so we still get plenty of flow to the biofilter, and it uses less
power as well. For more information regarding the ShinMaywa Norus CR series pump, please review this
ShinMaywa Brochure
series pump. We got the 50CR2.25S 1/3 HP unit,
which provides slightly less GPH at 15 feet of head, but I also changing a couple fittings at the pump (I went for a 2" pipe direct from the pump into
a 2" tee, which then connects to the two 1-1/2" output pipes - that dropped the fitting loss by a couple of feet), so now our loss is closer to the 10 foot
mark rather than the 15 foot mark. The ShinMaywa is rated for 3000 GPH at 10 feet, so we still get plenty of flow to the biofilter, and it uses less
power as well. For more information regarding the ShinMaywa Norus CR series pump, please review this
ShinMaywa Brochure ![]()
The ShinMaywa Norus was pumping along much better than the old Anjon "Big Frog" pump we started with (the modified 2" output and tee likely helped with that). It had been running along fine for many years, but late in 2021 it started having trouble running continuously. It would simply shut down occasionally for no apparent reason, then start up again a few minutes later. We never ran the thing dry, but sometimes when the water level in the filter dropped due to evaporation and a loaded-up filter screen, we could hear the pump "gurgling" a bit. We'd clean the filter screen to get more water into the pump area of the filter, but I think it was just constantly tripping the "thermal overload" contact when it was running without much water available. By the end of the season, it had simply stopped working completely. Considering the "Big Frog" had only lasted three years, I was okay with needing a new ShinMaywa after eight years of excellent performance (and it was $100 less than the Anjon).
While I started to get the pond cleaned up in the Spring of 2022, I also dug the pump out of the shed and disassembled it to see if I could
get it running again. I managed to find an owner's manual & parts list ![]() for the thing to see if it had any information that might be useful. What I didn't realize is it's an oil-filled pump, and the oil is supposed
to be changed every season. Oops. Now I had to find some "#32 Turbine Oil" to see if changing the oil would help get it running
again. I found the oil on Amazon (Renewable Lubricants Bio-Bottle Jack™ Hydraulic Fluid ISO 32", and took the pump apart while I
waited for the oil to show up. When I got the top section off the pump where the thermal overload protector is located, I found things were
beyond repair. A couple of the wires were pretty toasted with all the insulation burned off, and no longer connected to anything. It was also
pretty wet inside the lid, and it's supposed to be water tight.
for the thing to see if it had any information that might be useful. What I didn't realize is it's an oil-filled pump, and the oil is supposed
to be changed every season. Oops. Now I had to find some "#32 Turbine Oil" to see if changing the oil would help get it running
again. I found the oil on Amazon (Renewable Lubricants Bio-Bottle Jack™ Hydraulic Fluid ISO 32", and took the pump apart while I
waited for the oil to show up. When I got the top section off the pump where the thermal overload protector is located, I found things were
beyond repair. A couple of the wires were pretty toasted with all the insulation burned off, and no longer connected to anything. It was also
pretty wet inside the lid, and it's supposed to be water tight.
The new pump arrived at the end of May. I intend to check the oil at the end of every season from now on, and may pull the top off to check the wiring and ensure it's water tight. Hopefully we'll get more than eight years out of the new one, now that I know that it needs a little maintenance each year.
.Comets & Shubunkins
As I said earlier, we hadn't originally planned to have a fish pond, but rather just a simple water garden. If you've read this far, you've probably figured out that it wasn't exactly simple, but I also didn't go through all that planning and construction just to have really happy water lilies either. As soon as the filters were up and running, I stopped by the local Petco and grabbed a couple dozen little orange minnows whose sole purpose in life was to feed other fish. I figured they'd make a good test batch to see if all the planning was working out, or if they'd just end up floating around the pond after a week. We added the feeder minnows, as well as another couple dozen Gambusia "mosquito fish" I mail ordered from Carolina Biological Supply and then waited to see if the bio-filter was working. After about a month the pond seemed to be working fine, and water testing showed no problems with Ammonia, nitrites or fluctuating pH levels. It was time to get some "real" fish.
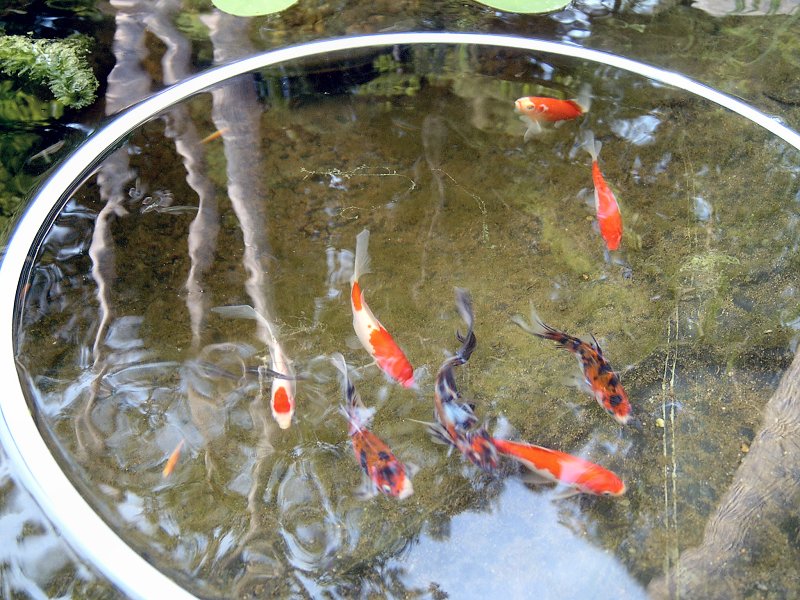
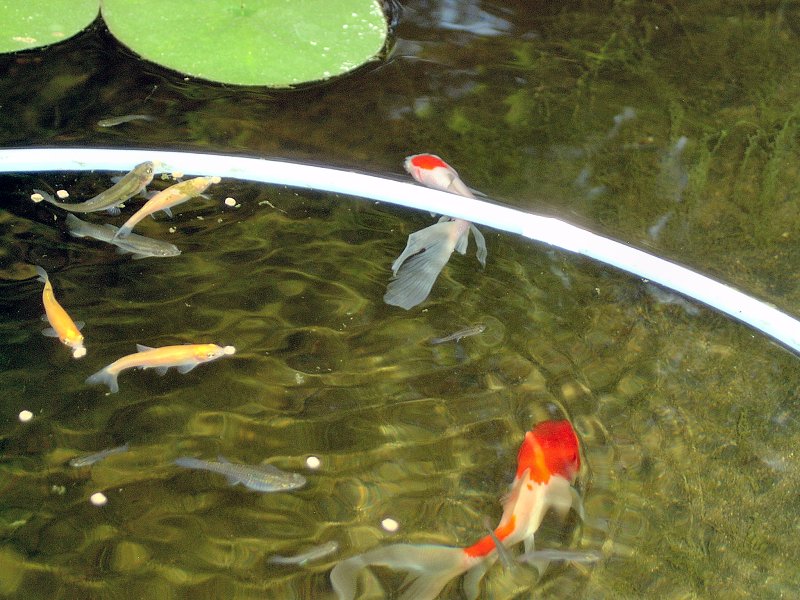
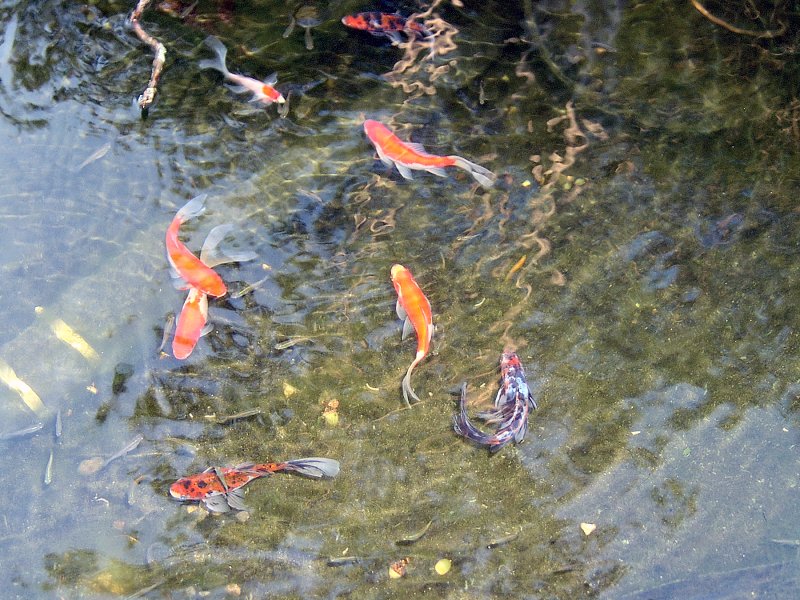
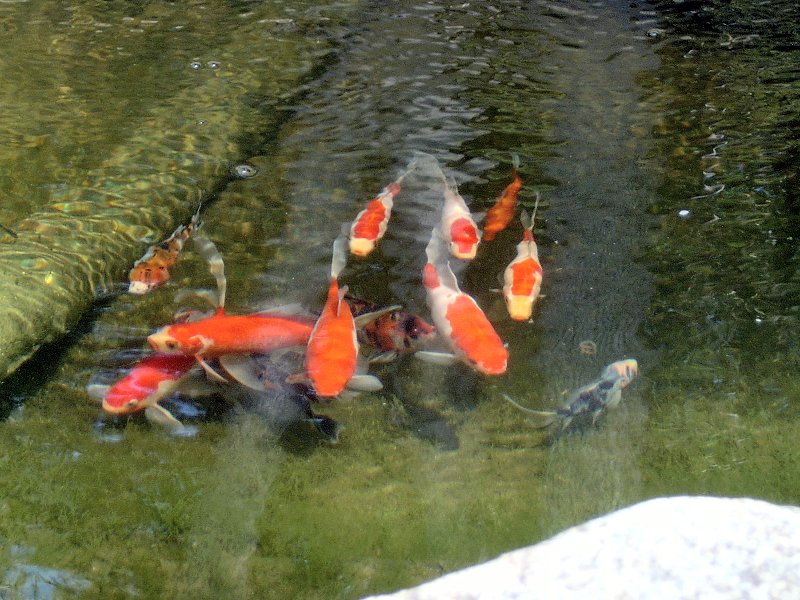
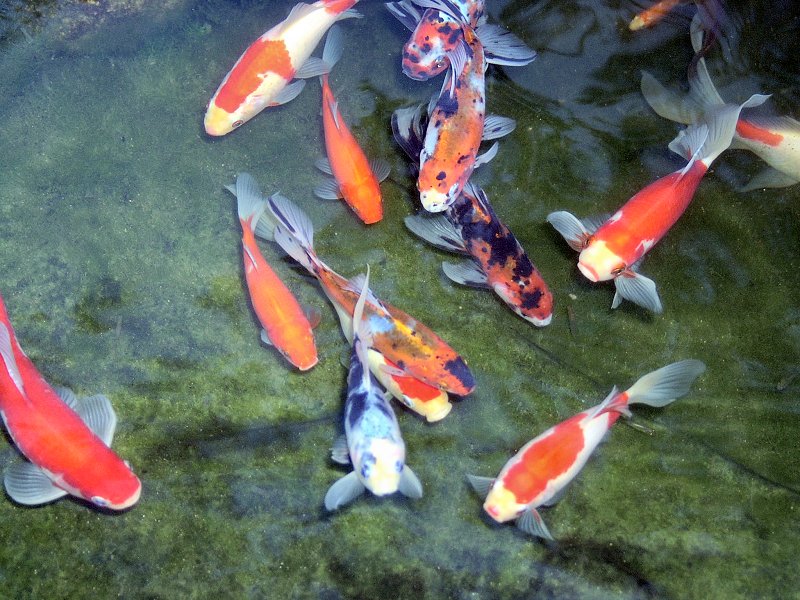
 Our pond residents (9 photos)
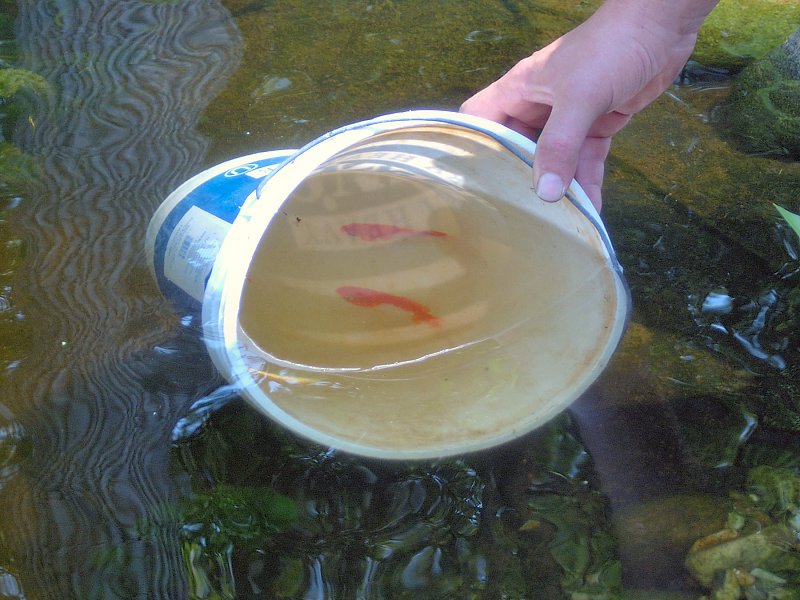
Our first pond stock consisted of 6 Sarassa Comets and 3 Shubunkins, all about 3 inches long. We brought these home and placed them in a temporary quarantine tank with about 30 gallons of pond water, one of the Aqua-mats from the pond as a mini bio-filter, an air stone, and a few fake water lilies to give the fish a little cover. They spent 2 weeks in quarantine, just to make sure they could deal with our water quality and so we could keep a close eye on them for disease or parasites. After the quarantine period, they went into the pond and immediately disappeared from view for another couple of weeks.
Once they got used to their new home, we started training them to find food. We made a 2-foot diameter ring from 1/2 plastic pipe that we'd float on the pond at feeding time then sprinkle the food in the ring. The ring contained the floating pellets and gave the fish a chance to find the food before it's drawn in to the skimmer filter. After a few weeks of ring use, the fish we're used to us coming to the edge of the pond, and they'd come right over to the "feeding rock" and wait for food.
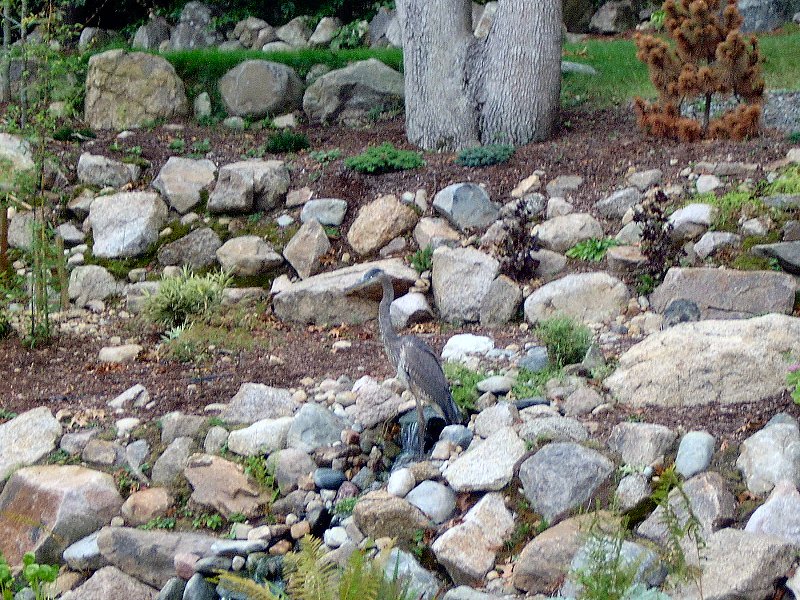
We didn't lose any fish that first season due to water quality or disease, but we did have a visit in late Fall from one of the local lake residents, a Great Blue Heron. I managed to snap a picture through the kitchen window of it, and then ran outside to shoo it away. By the time I got outside, there wasn't a fish to be seen anywhere in the pond. At first I thought he'd cleaned out the entire population, but after a little poking around with a net I noticed a few fish had hidden themselves amongst the lily pots in the pond bottom. When the lovely bride got home from work, she put on her swimsuit and jumped right in the pond to take stock of the damage (mind you, this was in October). She started moving pots out of the pond and looking for fish, and as near as we could tell the heron had only managed to take one of the Shubunkins. I ordered a heron decoy that evening which supposedly acts as a deterrent to the highly territorial heron, and it seems to have done the job since we haven't had any visits since using the decoy.
Feeding the Fish
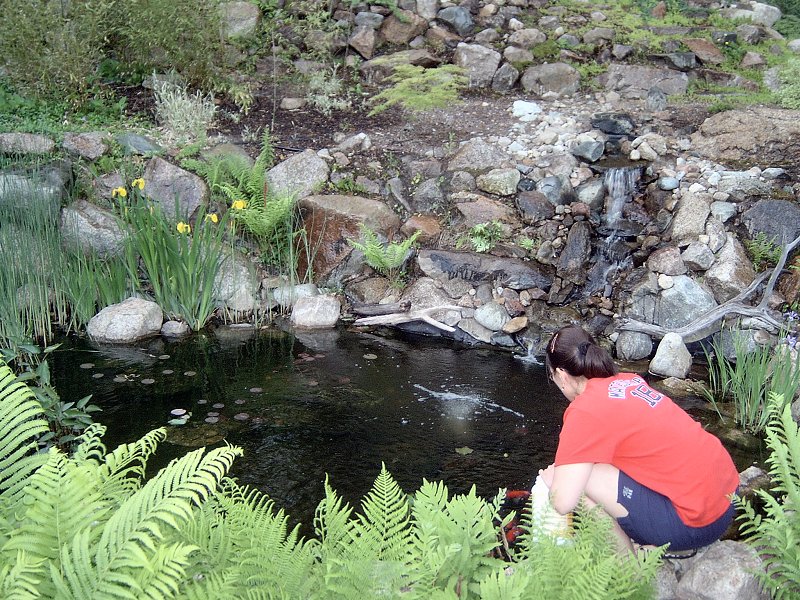 The lovely bride feeding the piggies.
We originally fed our fish with some generic cheap-o pellets from the local pond store, but a few years ago we tried out the
Microbe-Lift ![]() Legacy 7-Day Nutritional Feeding System and we've been quite pleased with the results (and the fish don't seem to mind either).
Goldfish will eat pretty much anything, but to maintain their best health, it's a good idea to give them a variety of foods as well as keep a
close eye on the water temperature to determine what type of food to provide and how often they need to be fed. Cooler temperatures dictate
a lower protein content with more carbs and fats, while warmer temperatures dictate higher protein content to stimulate growth, along with
color enhancers. Once the water gets very cool in the Fall (below 50° F.), the fish are not fed at all, and go into a state of semi-hibernation
while they hang out in the relatively warm depths of the pond for the Winter.
Legacy 7-Day Nutritional Feeding System and we've been quite pleased with the results (and the fish don't seem to mind either).
Goldfish will eat pretty much anything, but to maintain their best health, it's a good idea to give them a variety of foods as well as keep a
close eye on the water temperature to determine what type of food to provide and how often they need to be fed. Cooler temperatures dictate
a lower protein content with more carbs and fats, while warmer temperatures dictate higher protein content to stimulate growth, along with
color enhancers. Once the water gets very cool in the Fall (below 50° F.), the fish are not fed at all, and go into a state of semi-hibernation
while they hang out in the relatively warm depths of the pond for the Winter.
Each season we purchase the following set of fish foods, and they usually last the entire season:
- • Microbe-Lift Legacy Summer Staple Food - 2lb. 3oz. size
- Every other day (3 days a week) when water temp is over 68° F., up to 3 times per day depending on water temp.
- • Microbe-Lift Legacy High Growth & Energy Food - 16oz. size
- Alternate days from Summer Staple (1 or 2 days a week) when water temp is over 68° F.
- • Microbe-Lift Legacy Immunostimulant Food - 13oz. size
- Alternate days from Summer Staple (1 or 2 days a week) when water temp is over 68° F.
- • Microbe-Lift Legacy Fruits & Greens Food - 13oz. size
- Alternate days from Summer Staple (1 or 2 days a week) when water temp is over 68° F.
- • Microbe Lift Legacy Variety Mix - 13oz. size
- Used on afternoon or evening feedings as alternate to Summer Staple when water temp is over 68° F.
- • Microbe Lift Legacy Cold Weather Fish Food - 16oz. size
- 3 or 4 days a week when water temp is between 55° F. and 68° F.
Pond Plants
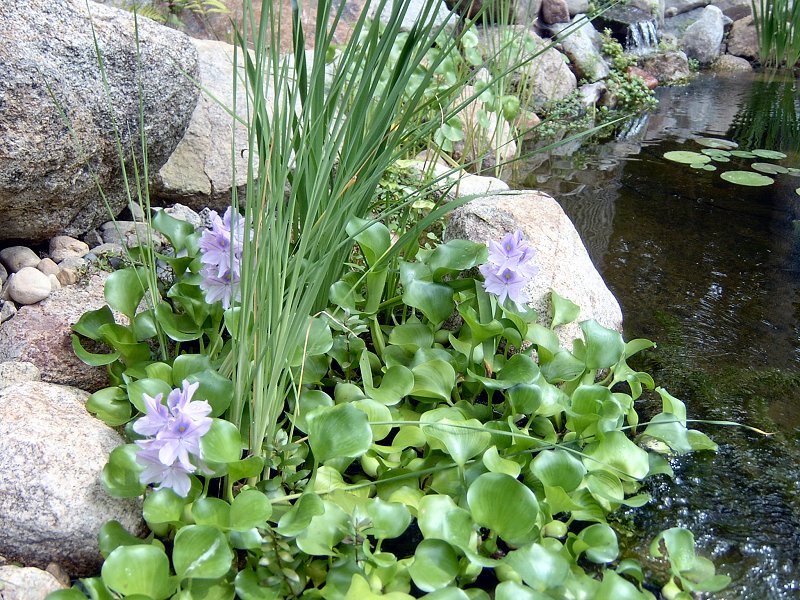 Hyacinth, Dwarf Cattails and Iris
The water garden part of the pond consists of four areas of plantings: winter hardy water lilies grown in pots in the pond bottom, hardy marginal plants grown in pots or bare-rooted along the plant shelf around the edge of the pond, non-hardy floating plants, and bare rooted submerged oxygenating plants. Most plants have been purchased over the 'net from nearby water garden stores, although we have collected a few interesting plants from the lake as well (collected plants were carefully cleaned of all native soil and soaked in a mild chlorine bath before being added to the pond to avoid introducing any pathogens to the closed pond system from the lake).
As the years have gone by since we got the water garden / pond up and running, trying to keep all these plants alive as been pretty tough. Most of them don't make it through the Winter, and we don't take the time to run around and buy replacements each year. I've kept the original plant list as it was when we started, but I've updated the plants we no longer have with a "strikethrough" typeface to show what is no more. The water lilies do very well each season, so the pond still looks wonderful by mid-Summer.
| Hardy Marginal Plants | Hardy Water Lilies |
| Arrow Arum Peltandra virginica | Arc-en-Ciel water lily Nymphaea 'Arc-en-Ciel' |
| Dwarf Water Bamboo Dulichium arundinaceum | Attraction water lily Nymphaea 'Attraction' |
| Small Cattail Typha Augustafolia | Gonnere water lily Nymphaea 'Gonnere' |
| Horsetail Rush Equisetum hyemale | Starbright water lily Nymphaea 'Starbright' |
| Yellow Iris Iris pseudacorus | Yuh-Ling water lily Nymphaea 'Yuh-Ling' |
| Blue Flag Iris Iris virginica * | White (Fragrant) water lily Nymphaea odorata * |
| Lizard's Tail Saururus cernuus | Spatterdock (Cow Lily) Nuphar luteum * |
| Pickerelweed Pontederia cordata * | Water Shield (Dollar Bonnet) Brasenia schreberi * |
| Water Pennywort Hydrocotyle ranunculoides | Oxygenating Submerged Plants |
| Variegated Water Celery Oenanthe javanica 'Flamingo' | Anacharis Egeria densa |
| Floating Plants | Cabomba Cabomba caroliniana * |
| Parrot's Feather Myriophyllum aquaticum | Hornwort Ceratophyllum demursum |
| Water Hyacinth Eichornia crassipes | |
| * indicates plants which were collected locally. | |
Living with the Pond
The pond requires a fair amount of attention throughout the summer months to prevent it from turning into an algae infested cesspool, although I tend to view pond maintenance as an enjoyable outdoor activity, rather than a wearisome chore. None of the work is particularly difficult, but if we skip weekly tasks in the pond then the time required to put things right again can really add up. The single most important task is keeping up with weekly filter cleaning. The filter basket of the skimmer filter fills up pretty quickly with the pond located directly below an Oak tree, and the filter mat in the skimmer gets well clogged with gunk if it's not hosed off once a week. That filter mat usually only lasts one season, since even with a good weekly blast from the hose, it gets plenty of crud embedded in it that just doesn't rinse out by the end of the summer. Rather than buy a replacement pre-cut filter from Savio every year (for nearly $30), last year I purchased a 3' x 6' piece of 1" thick generic filter material for $25, then I cut a pair of appropriate sized pieces to fit the skimmer's filter holder. Each week I pulled the gunked up filter mat and replaced it with the cleaned piece from the week before, then I could take my time hosing off the filter that came out and ready it for the next swap.
 The joys of water gardening
Like the rest of the garden, Spring and early Summer are the busiest times with pond chores as well. As soon as the ice is gone from the pond in early Spring, we toss in a 50 lb. white crystal brine block of salt from the local farm supply. This gives use about a 0.2% salt concentration, which makes the fish happy, and fish parasites very unhappy. After a month or two (once the water gets up to at least 70° F), we usually do a partial water change to get the concentration back down around 0.1% for the remainder of the season. During that first pump out session, I usually get in the pond and do a thorough cleaning of any sludge and acorns that are still hanging around on the bottom, add a few handfuls of submerged plants, and fertilize all the lily pots with "pond tabs". In-pond bottom clean-up then takes place about once a month for the rest of the summer, during which time we shut down the waterfall for the day and let the Oxy Pond Cleaner chow away any green fuzz that has sprung up in the waterfall rocks. I also get in the pond to dead-head the water lilies as needed, and re-fertilize them at least once a month.
Besides a weekly hosing off of the filter mat and emptying the filter basket, we regularly use pond additives to help maintain
the organic balance of the pond (I don't know if they do anything, honestly, but they do provide some peace of mind in that we're at least
trying...). I've found the Microbe-Lift products to be very cost effective, and they seem to have the most sensible family of products to meet our needs.
I purchase all of our pond additives on the 'net from The Water Garden ![]() (which recently changed their name to Aquanooga), and have always enjoyed their reasonable price and very fast shipments (we also get our fish food
from these folks). We use the following products in the pond to help with string algae and ensure the bio-filter is happily seeded:
(which recently changed their name to Aquanooga), and have always enjoyed their reasonable price and very fast shipments (we also get our fish food
from these folks). We use the following products in the pond to help with string algae and ensure the bio-filter is happily seeded:
- • Microbe-Lift Spring/Summer Prep
- Added weekly in early spring to help breakdown leaves and other organic waste that slipped past the net over the winter.
- • Microbe-Lift PL
- Added monthly throughout the summer to promote healthy nitrifying bacteria colonization
- • Microbe-Lift Oxy Pond Cleaner
- This white granular powder is sprinkled on the waterfall rocks about once a month in the summer to dissolve string algae
- • Savio Barley Straw Extract
- Added every other week throughout the summer to help control string algae
- • Microbe-Lift Autumn/Winter Prep
- Added monthly in the fall and winter until the pond freezes over
In the Fall we keep a close eye on the Oaks to try and make sure we get our leaf net over the pond before they let their leaves go, then once the weather turns really cold and threatens to freeze, I toss in a little pond de-icer that floats on the surface and keeps a small spot of open water. The waterfall gets shut down for the winter, then I drain the bio-filter and remove the filter media. I try to keep the air pump running to supply the foam-fractionator as well as the main pump to continue circulating water, but if we start getting a heavy ice build up, then I'll shut down both of those and pull the pumps until Spring.
↑