

Roof Design
I've always been confused by how little attention folks seem to pay to their roof and how it affects the look of their home. I just don't get it. When viewed from the street or approach or whatever you want to call it - the first impression - it seems that a big part of that first look is occupied by the roof. I can see all the time and effort folks put in to landscaping and exterior finish, but it often looks like the roof plane and color are completely ignored. The roof is simply dismissed as a purely utilitarian component of the structure, and something the observer is supposed to block out when looking at a house. Perhaps it's just a pet peeve of mine, but I cringe when I see nice looking new home with carefully applied, stained wood siding, manicured lawns and walk ways, beautifully trimmed windows and doors, and then it's topped off with a black 3 tabbed shingle roof with no overhang as some sort of afterthought. Awful. When did an overhanging roof go out of style? Is it an issue of cost? A few extra feet on the rafters can't make that big of a difference in the overall cost of building a new home.
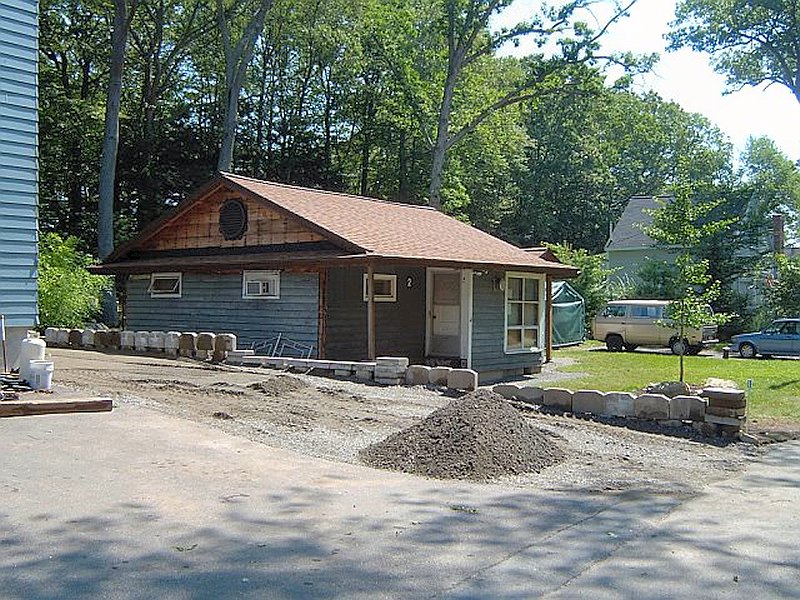
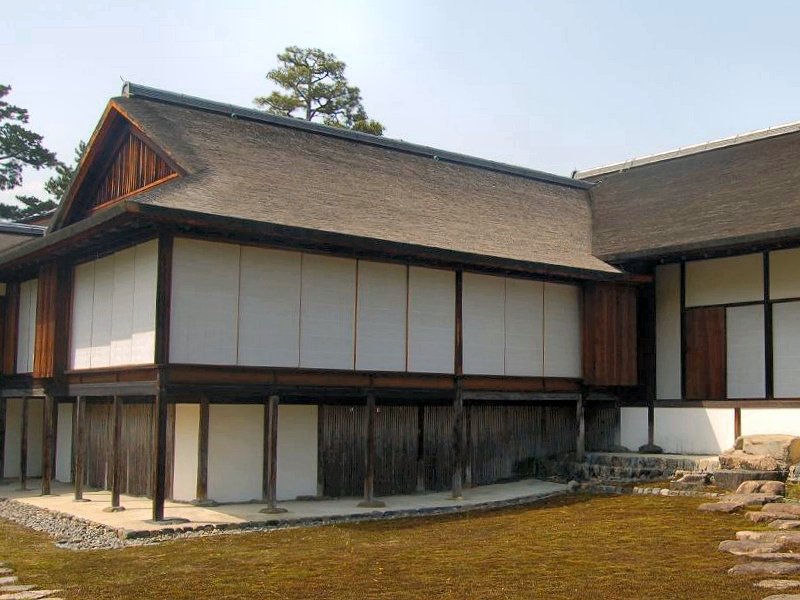
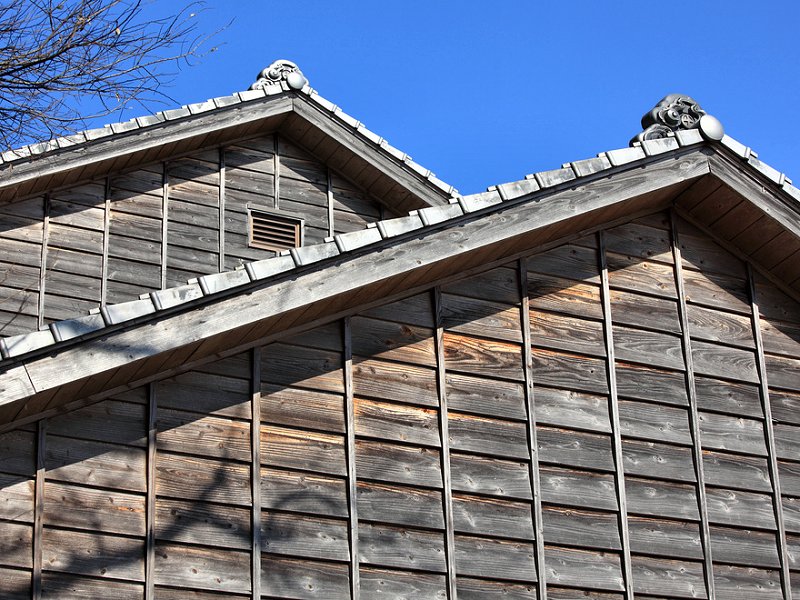
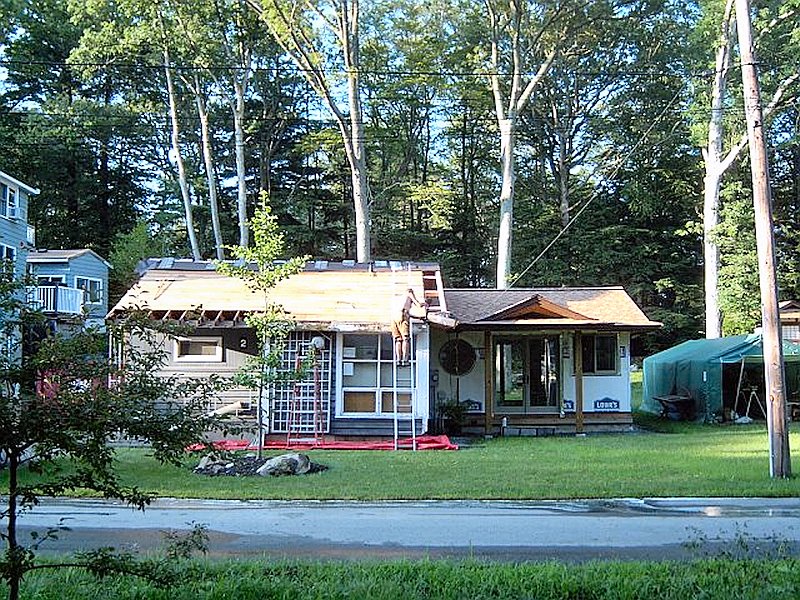
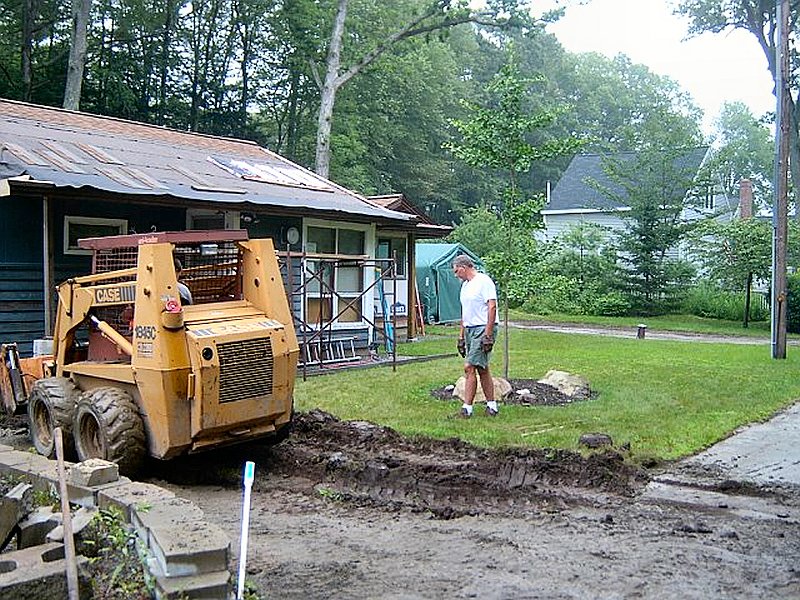
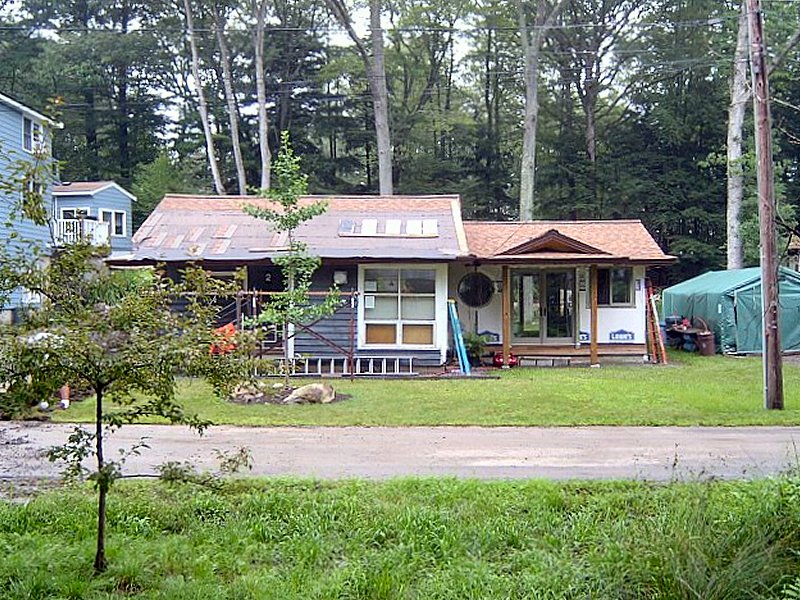
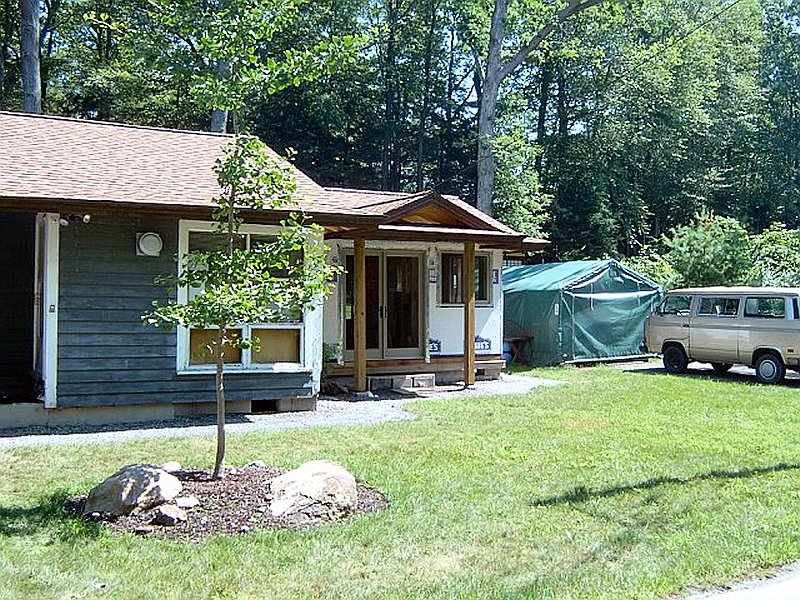
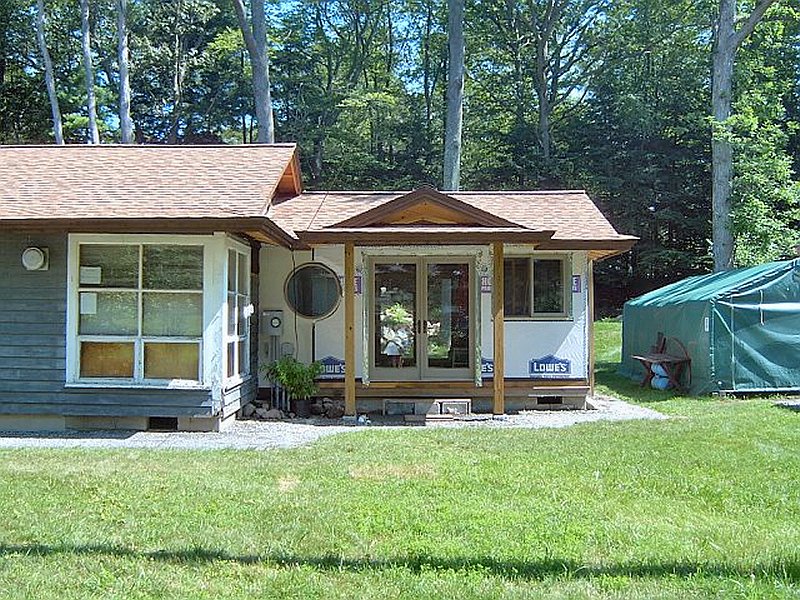
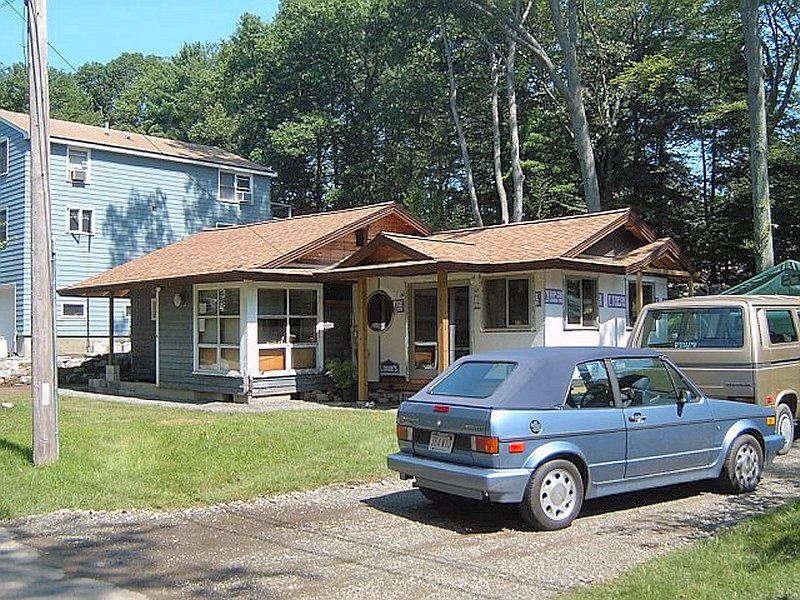
 The roof lines have a big impact on the look of the structure. (5 photos)
Whatever the reason for the seemingly abundant crop of really bad roof designs around, I knew I wanted to try my best to make the roof of our house attractive, and have a hint of the Sukiya style roofline in it. As you approach our house on the road through the neighborhood, you can see the roof long before the rest of the building or yard comes in to view, so it had to look "right". I don't think I was trying to make the roof have any sort of big impact, but I didn't want the roof to detract from the over all look of the house either, as I'd seen happen on many other new and remodeled homes in the area. I had thought about changes to the roof as long as I'd lived here it seems, and was often thinking of how I could change it without actually removing all the rafters and starting over. As the time to start roof work was drawing near, I began poking around on the 'net and reading books and magazines to try and nail down exactly what I was going to do. I knew I wanted to stick with a Japanese Sukiya style roof, although I'd need to temper that desire with the fact that I'm not in Japan, and have no intention of installing a thatched or tiled roof. I still thought I could capture the "spirit" of the style though, so as usual I hit the virtual drawing board and started working up some plans to see how things would look.
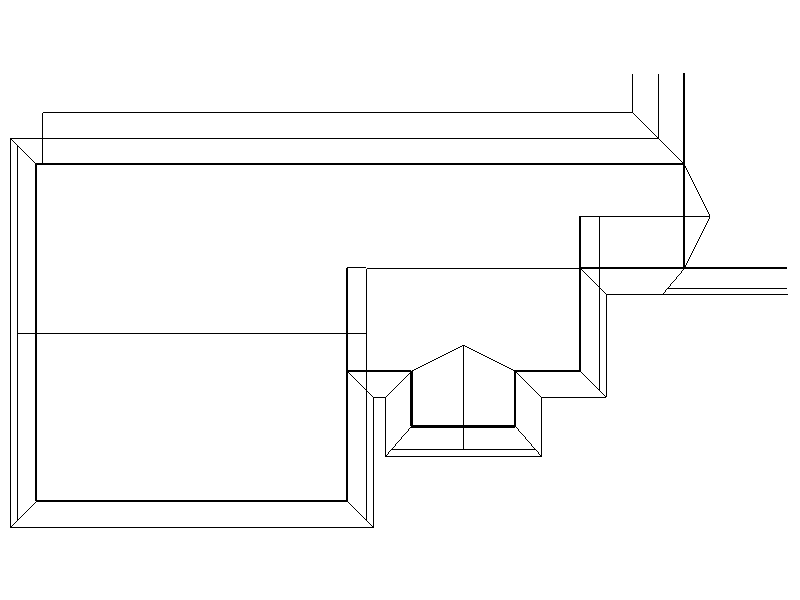
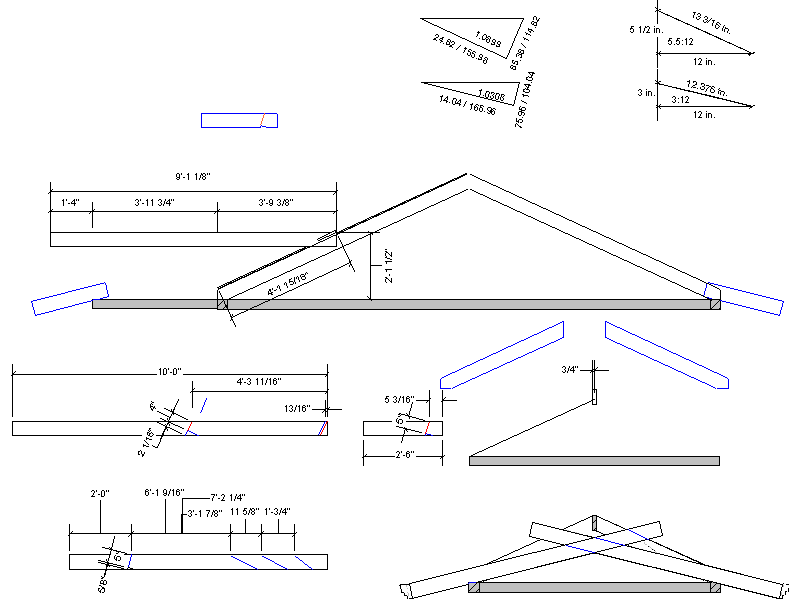
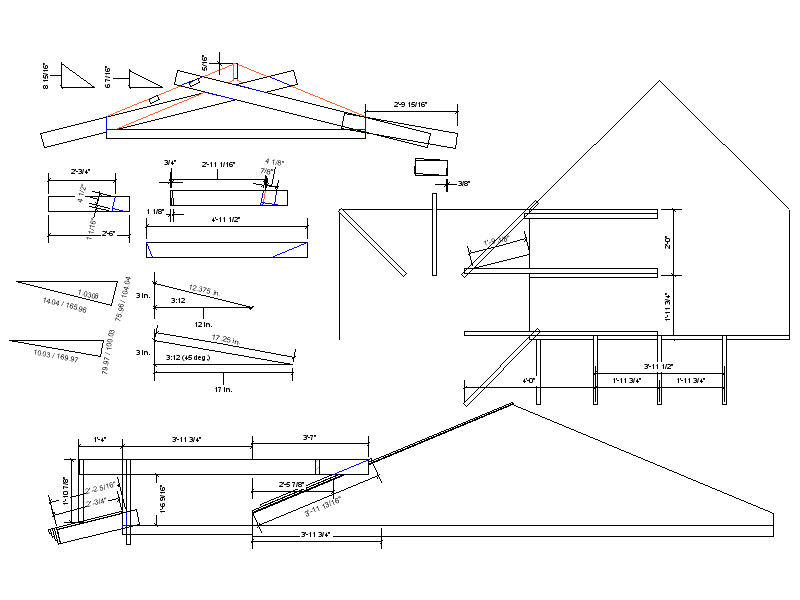
The layout for the new roof overhangs.
I began to understand why folks stuck such simple roofs on their homes and got on with their lives - trying to design "proper" roof was no picnic. I'd make drawings, then take pictures of the house and do lots of cutting and pasting to try different styles. I even made some little models to look over to try and help with the decision. Most of the trouble was in dealing with the gable ends. Do we move the ends up and in or leave them flush with the outside wall? Perhaps we should get rid of them completely and put in full hip ends? Not bad, but we also had to deal with the different roof plans between the main house and the old screen porch. Leaving the gable end flush with the outside wall of the house seemed like the way to go (and that meant less re-framing up there too), but then we had to finish off the gable ends with something nice. I wasn't too excited about continuing the stucco from the main building up into the gables (although that's a "legitimate" option in some traditional Japanese styles), but wanted to stick more with the true Sukiya style and use some manner of wood lattice or siding in the gables.
Roof Cutting & Carpentry
The house has a fairly shallow 5:12 pitch, and had about a 16 inch overhang along the front and back with enclosed soffits. There was also about a 12 inch over hang on the gable ends of the main house, although there was no overhang on the porch end. We decided to extend the gable end overhangs to 16 inches, and extend the rafter end overhangs to a full 2 feet. We would also run the 2 foot wide eaves across both ends of the house to create a separate gable area. With a 5:12 pitch and our fairly squat house, extending the eaves to 2 feet wide would have put the rafter tails too close to the ground, so we decided to change the pitch for the overhang to 3:12 where the rafters met the building. I could leave the existing rafter tails sticking over the ends of the building, then trim the bottoms of the old rafters so they'd be even with the bottom of the new 3:12 rafter extensions. The new 3:12 "overhang" rafters would get a birds mouth cut in them and extend up into the old roof about 6 inches, and get glued and screwed to the existing rafters for support.
It all sounded good and looked great on paper, but when we called a couple roofer contractors for estimates they wouldn't even come to the house. Roofing contractors want to come in to the job for a day or two, strip the roof into a dumpster, and slap down new shingles, period. When the job involved any carpentry, they didn't seem to want anything to do with it. Like most everything else I'd planned for the house so far, I was going to have to do this myself.
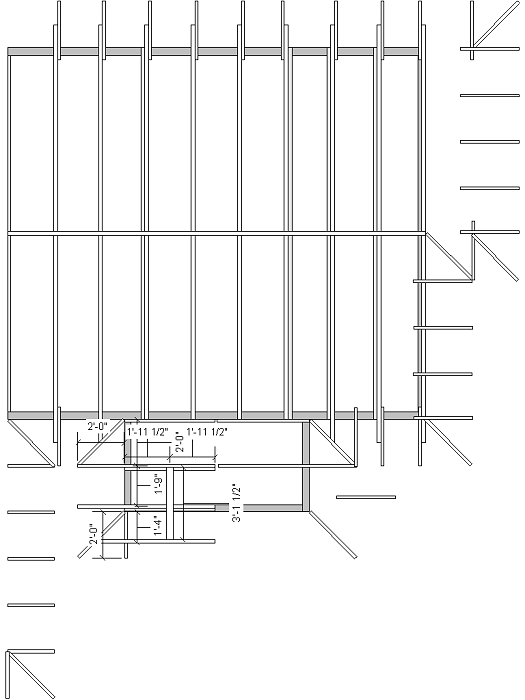
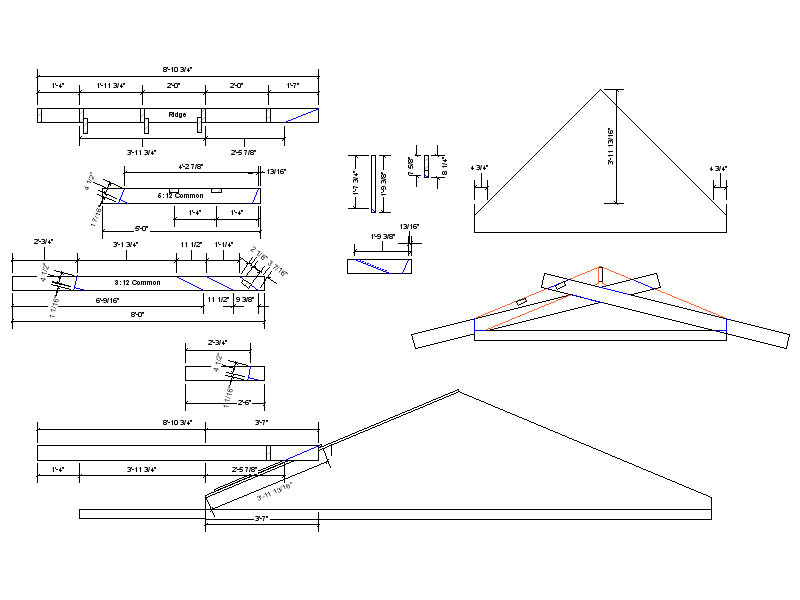
Porch & entryway roof plans (4 sheets).
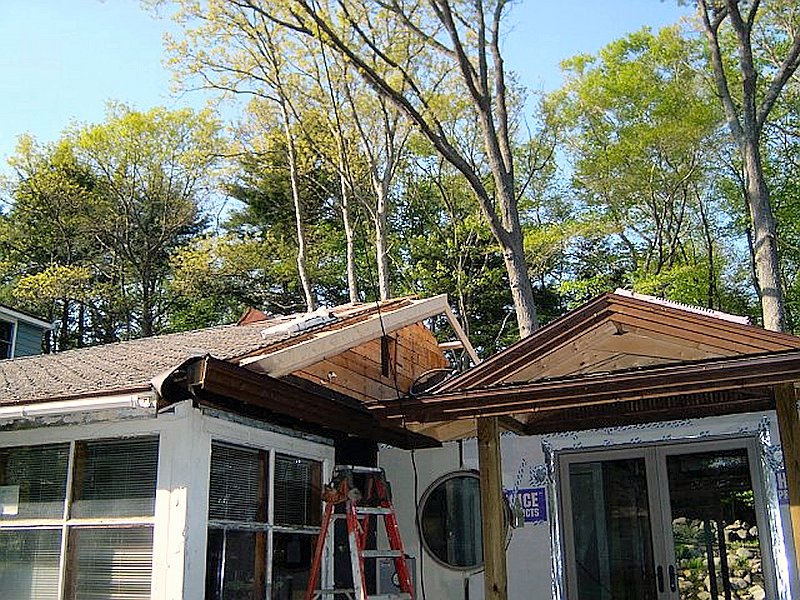
I began with what I knew would be the worst part of the job - dealing with all those existing rafter tails and installing the new overhang. Rather than attempt to do the entire house at once, I started with just the old screen porch area first (and there was that pesky hole in the porch roof from the chimney to deal with too). I stripped off the first few courses of shingles around the perimeter of the porch, then started working on the new overhang. There were no enclosed soffits on the old porch, and no facia on the back of the porch so I didn't need to do a lot of demo work before I could start cutting. I made a jig to act as a saw guide, then cut the rafter tails to the new angle using a little 6 inch circular saw that wasn't too scary to use one handed on a ladder. I couldn't make the entire cut with the power saw (since the saw body got in the way when I got close the building), so I finished the cuts using a hand saw. It wasn't exactly fun, but it progressed along pretty quickly and turned out to not be as bad as I thought it was going to be. I pre-cut all the new overhang rafters, then installed them with construction adhesive and 6 or 8 deck screws each. While the top plate of the existing exterior walls was anything but level, I wanted to make sure the new rafters (and facia they would support) was as level as I could get it so I leveled each new rafter to the previous one as I worked my way around the porch.
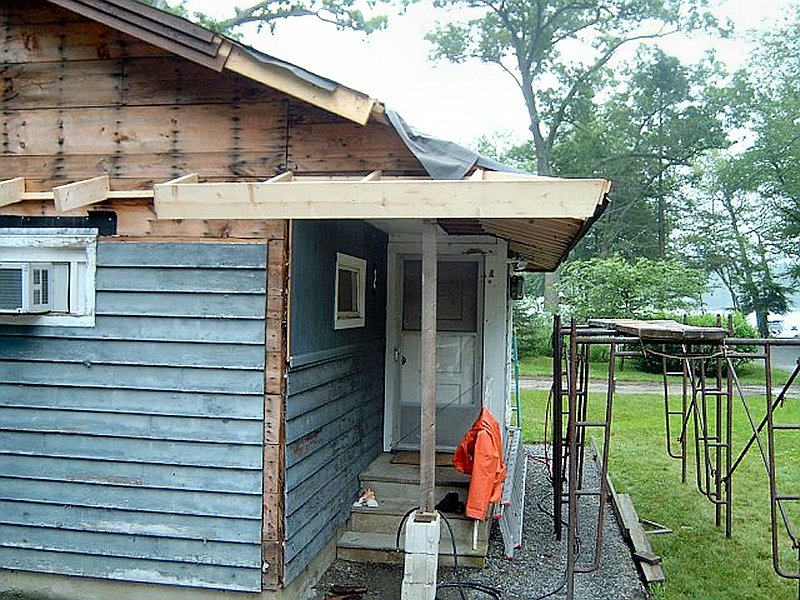
With most of the new overhang rafters in place for the porch, I stripped the remaining shingles from the entire porch and got the back side weather tight with tar paper. The next project was to build the new roof section for the entryway which had been relocated from the Southwest corner of the house to the old screen porch. The underside of the porch roof was going to be open (no flat ceiling), and just to make my life difficult I came up with a design that used crossing rafters that were all exposed. I managed to pull it off with lots of careful measuring and only destroyed two 2 x 6 in the process - not bad at all. All of the framing for the entryway roof was pre-stained before it went up, then I applied sheathing to the new sections and put down tar paper on the front side of the old porch. Then it rained.

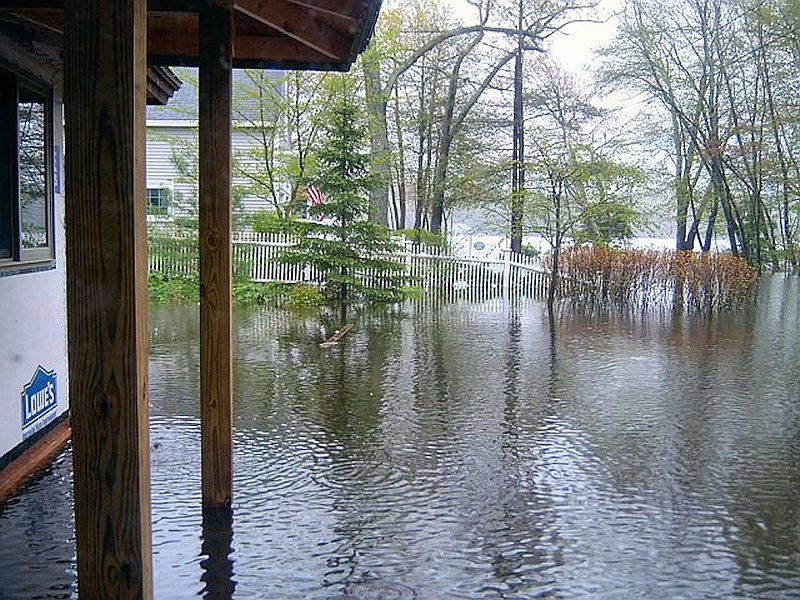
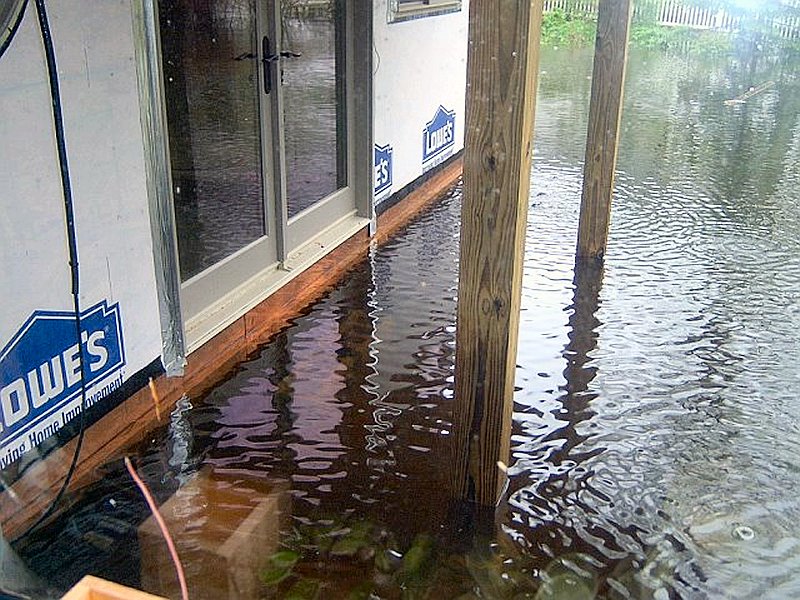
Well, at least water wasn't leaking in the porch roof anymore... (5 photos).
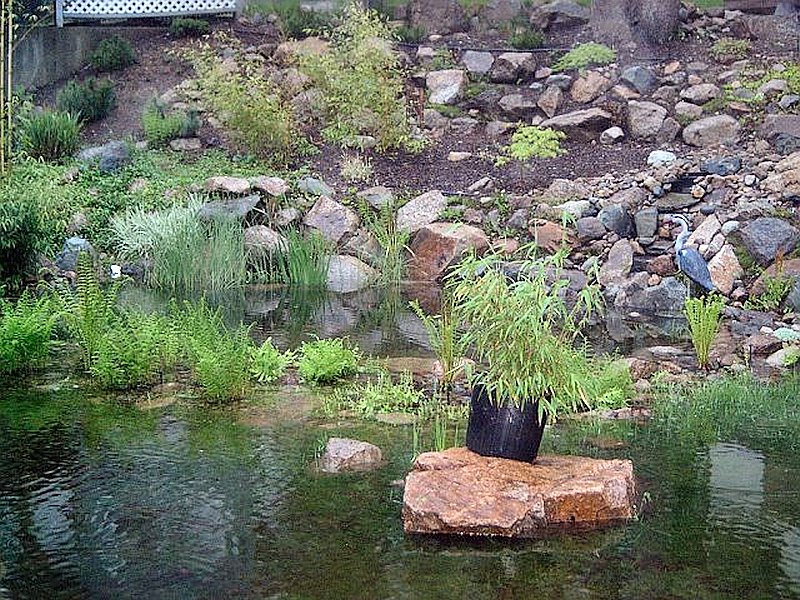
It rained a lot, in fact... We got to experience what it's like to have lake front property for a while, then we got to experience what it's like to live in a house boat. After about 4 days of steady rain, the lake rose to the a point where it completely surrounded our house . We moved all our possessions from the floor up into the attic, and I was certain I'd step into water by the next morning. Luckily, the water never came in the house, although it did get up to where the bottoms of the floor joists were under water. That was pretty scary, but we managed to make it through without any great loss. I had moved the windows that still needed to be installed from the storage tent up into the garden shed so none of those got ruined. We had about 2/3 of a lift of siding material that sat under water for a couple days, but it doesn't seem to have suffered any damage from that episode. About half the fish from the pond swam off to explore the lake, although the only ones that left were the ones that weren't born in the pond. All of the fish that had been raised in the pond apparently didn't know any better, so they just stayed put. We recovered a few fish from the yard and under the house as the water started to recede, but we still lost 3 or 4 to the lake when we finally had a chance to take stock of the damage.
Once the water receded and things started to dry out a bit, I finished installing shingles on the porch sections, then started working on the transition to the main house roof. After framing out the new overhanging end rafters, I worked my way around the perimeter of the main house, trimming the rafter tails to the new overhang pitch and adding the extension rafters to complete the new overhang. We took a short break from roof work in mid-summer after the dumpster was removed from the driveway to re-locate the neighbor's retaining wall to the actual property line, and cut our new driveway over on the side of the house with the new entryway. Carpentry on the perimeter and gable end overhangs took a few weeks to complete, and by the end of June, 2006, we were ready for shingles.
Applying Shingles & Finishing the Roof
I had managed to get a few bundles of shingles onto the roof myself and get the new entryway porch covered, but trying to lift bundles of shingles was brutal work, even with a neighbor helping. When I was in college I did some construction work for my landlord for a couple summers, and I remember being able to scamper up a ladder to work on a Victorian 8:12 pitch roof 3 stories high, carrying a bundle of 3-tab shingles on each shoulder. My neighbor had done similar foolish things in his youth, so we were both trying to figure out why we couldn't lift a single bundle of architectural style shingles from the ground to the scaffolding without nearly passing out. In our defense, it was really hot so trying to get a handle on a bundle of shingles was like trying to lift a bag of wet sand. To make matters worse, architectural style (or "dragon's tooth") shingles are double layers of material compared to 3-tabs, so each bundle weighs twice as much as a bundle of 3-tabs. Enough with the excuses though, after wrestling with the few bundles of shingles I had been able to pick up with my van, it was clear that getting another 15 square of shingles onto the roof just wasn't going to happen by myself (1 "square" = 100 square feet, or 3 bundles of shingles). I remember my brother had told me I wasn't going to be able to do the roof myself - I thought he meant I couldn't perform the work, which made no sense - he meant I wouldn't be able to get the shingles from the ground to the roof. He was right - I was going to need help.

Working on the transition from porch to main house (8 photos).
It took a little pleading (due to the small quantity of shingles involved), but I managed to convince a local building supply company
with a boom truck to deliver the shingles for me. What a difference! The guy showed up with a pallet of shingles, and lifted the pallet
up to the ridge of the roof, where I simply slid off a bundle at a time as he slowly swung the pallet from one end of the house to the other.
With all the shingle bundles spread pretty evenly around the roof to distribute their substantial weight, I still needed to take care of a
few details before I could start banging down shingles. I'd become quite a fan of the
Owen's Corning®
![]() line of building materials while
browsing roofing products, and decided to make use of their entire line of "Roof System" components.
line of building materials while
browsing roofing products, and decided to make use of their entire line of "Roof System" components.
The majority of the roof plane was covered with #20 tar paper, but I applied 2 courses of "WeatherLock® G Granulated Self-Sealing Ice & Water Barrier" to span the area from the drip edge up well past the transition from the 3:12 overhang plane to the 5:12 roof plane. This "peel & stick" stuff is very easy to work with when dealing with it on a sunny Summer day, although one must be careful not to walk on it after it's been placed on the sheathing (the granular surface tends to pull off the material where you walk). I also placed full width strips of it in the valleys of the entryway roof, as well as along the edges of the gable overhangs. It could be used to cover the entire roof plane instead of tar paper, although that seemed like over kill to me (it's expensive stuff), and I wouldn't want to crawl around on it while trying to apply shingles. I also cut a 1-1/2" wide slot out of the roof sheathing on both sides of the ridge, and installed "VentSure® 4-Foot Rigid Strip Externally Baffled Ridge Vent" to provide attic ventilation. I'd seen the corrugated and woven ridge vent stuff used on a few houses nearby, and always thought it looked a little sloppy, since it appears to mush down where the ridge cap shingles were nailed through it. The rigid stuff is a little more money, but I think the finished look is worth it. The last thing I addressed before breaking open the shingle bundles was to make all the roof penetrations for the kitchen range hood, heat recovery ventilator, bathroom vent fan and main sewage vent pipe.
If you're considering re-roofing your house, I highly recommend the purchase of a good quality coil roofing nailer. I'd done roof work in my youth with a hammer and nail pouch (as well as on the garden shed), and the difference in speed and ease of shingle application when using a nail gun is well worth the investment. I also recommend performing shingle application in the hot sun whenever possible - the shingles cut like butter when they're warm, and the seal strips on the back actually get a chance to seal and lie flat as you go. I'm very glad we used the "dragon's tooth" style shingles, since they're quite forgiving if you don't keep your layout lines perfectly straight (or if you have a funky old crooked house). We used the same Oakridge® Shingles in Desert Tan that we'd applied to the shed and teahouse, with the addition of shingle starter strips along the edge (these self adhesive shingle rolls save quite a few shingles that would otherwise have to be used up to form the "upside down" edge of the roof), and a couple boxes of "High Ridge AR Hip and Ridge Shingles with Sealant" were used to cover the ridge vent.

Nearly done, and the rain came again (5 photos).
Shingle installation is a fairly straightforward task that starts with a few chalk lines snapped every couple of courses to help keep things straight and even (use red chalk, so it doesn't disappear in the morning dew like blue chalk tends to do). I started on the back of the house at the bottom edge of the roof and worked my way to the ridge. Because I was working in the heat of Summer, I never walked on the shingles as I worked since that can easily tear up the surface and shorten their life. I was able to apply the front section of the old porch without walking on the new shingles either, first by working up and at an angle across the roof, then finishing the courses from the end of the roof. The front shingles for the main house roof would have been impossible to apply without walking on the shingles as I worked my way from the edge to the ridge, so I employed a "top down" technique to apply the shingles to this final roof plane. When working backwards (from the ridge down to the edge), the shingles are still applied with the upper course over- lapping the one below it (since that's how shingles make a weather tight seal, after all), but they're applied in sets of 4 or 5 courses or "lifts" instead of starting at the lower edge of the roof. The first lift is started 4 or 5 courses below the ridge of the roof (depending on how far you're willing to reach over the shingles you've just applied, since the whole point it to avoid crawling around on the new shingles). Accurate measurements must be made from the edge to the ridge to figure out exactly where to start the first course of the lift, and then chalk lines are snapped for the remaining lifts down the rest of the roof. Having already applied shingles to the back side of the roof makes it pretty simply to get the proper measurements from there and just transfer them to the front. The first course of the lift is fastened with 2 or 3 nails along the top edge of the shingle, rather then the usual 4 nails across the center - this allows you to slide the last course from the next lift underneath the lift you've just applied, then fasten them together across the "normal" nail line. That's the theory anyway, it gets a little tricky when it's warm since the sun tends to glue the shingles together as soon as their laid. It's critical to not lean on the first couple courses of the lift as you work, or you'll make a mess of them when trying to peel them up to slide shingles under them (not that I ever did that of course *cough*).
The finished roof (6 photos).
I applied the peak cap shingles when I finished the first lift, then proceeded to work my way down the front of the roof, and finished the final few courses while working from scaffolding. When finishing off the ridge caps, there's always a few nail heads that remain exposed and need to be sealed with a couple dabs of roofing cement - rather than finish my new roof with big black blobs of roof goop on all the ridges, I found a great way to conceal these dabs of sealant. Whenever I pulled the last few shingles from their plastic bundle, I'd sprinkle the little bit of roof grit from the plastic bag into a little container. By the time I'd finished the roof, I had at least a 1/2 cup of the grit collected. The grit is used when sealing nail heads to perfectly blend the dab of goop with the surrounding shingles - just apply the cement, then give it a liberal sprinkle of grit and gently pat the grit into the cement.
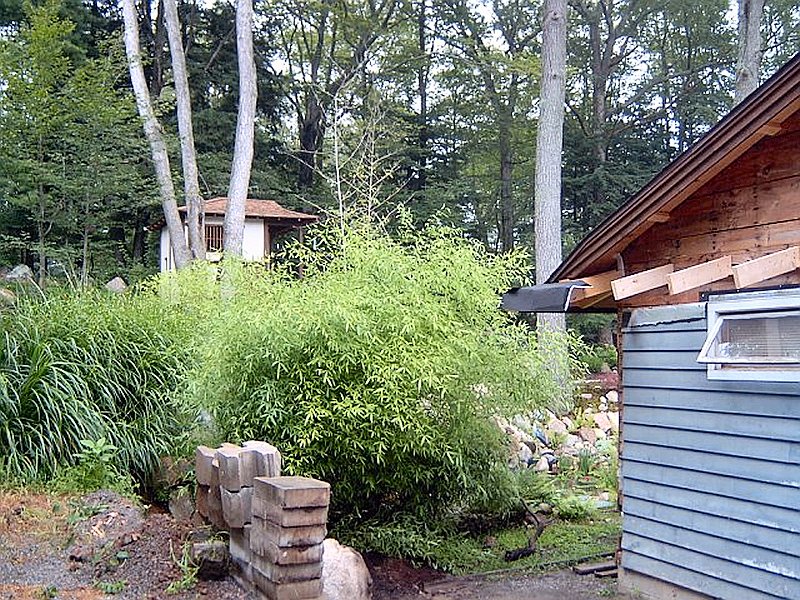
The finished roof came out better than I had hoped, and by building the new overhang sections level around the perimeter of the building the completed roof made the house appear much more level than it actually is. I ran into a little trouble in the Northwest corner, where I had to shave the original rafters down a bit in order to blend the existing roof into the new overhang, but that part of the house is not readily visible from the road or the back yard, and the bamboo is doing a nice job of hiding it now. Other than that minor error in the Northwest corner, I'm very proud of the way the roof looks, and I think the additional overhang does a nice job of giving the house the appropriate look for the Sukiya style of building I had originally intended.
A New Roof!
We've had no issues with the roof since I finished the installation back in 2006, although we've had a couple Winters with enough snow that I've needed to get out a roof rake and remove mounds of snow to prevent ice dams. I've considered adding some ice-melt cable around the roof, but there's plenty of other work to do on the property, so that can wait. Then in the Fall of 2020, one of the Red Oaks in the back yard lost a big limb. When it hit the ground behind the deck, it fell over onto the roof, and punched a half a dozen holes through the roof, mashed up one of the vents, and generally made a huge mess (have a look at the updated House page to get the full story of how almost all the trees in the back yard went away over the years). After dealing with the extremely helpful folks from MAPFRE Insurance, it was determined that we would get the entire roof replaced. This was a bit of a surprise, however the insurance adjuster explained that the policy states that any roof repairs must match the existing appearance, and any patch work they attempted to a nearly 15 year old roof would be noticeable — so they were going to replace the entire roof.
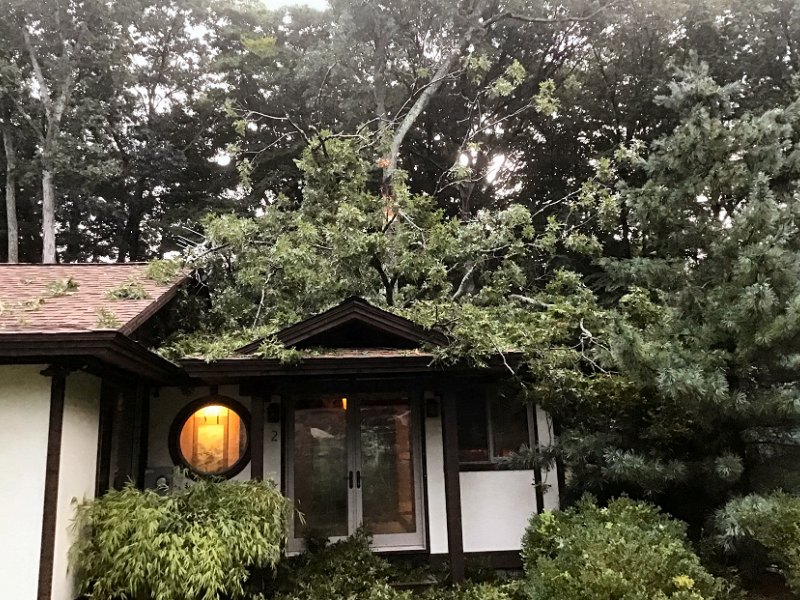
The damaged roof was replaced in a day (2 photos).
There was a little back-and-forth with the contractor they sent to quote the job, but we got it all worked out: He wanted to use GAF® Timberline shingles, some different exhaust vents, "soft" ridge vent stuff, then two courses of ice & water barrier up from the eave (as I'd originally done). I insisted on Owens-Corning Oakridge® shingles in Desert Tan, the same VentSure® rigid ridge vents, and even got him to use Owens-Corning WeatherLock® G ice & water barrier. To make all this happen, we agreed that we would use his original quote, then I would pay any cost difference between what he had quoted and the materials I wanted him to use. I also convinced him and the adjustor to not mess with the 2-foot wide flashed sections of roof below the gables at each end of the house and the porch, since they weren't damaged, are mostly covered by gable overhang, and a real pain-in-the-butt to deal with (and I didn't want them messin' with the flashing under the siding). I also asked that they skip the tar paper, and do the entire roof with the ice & water barrier instead. For the three exhaust vents, I'd never heard of the ones he had quoted, so I ordered the exact same Broan Nu-Tone® roof vents as I had originally installed. With my little "extras" to the job, it cost us around $1,500. Not bad for an entirely new roof!
A few weeks later and we had everything worked out for the costs, then the job was approved by the insurance company. He dropped off a dump trailer full materials, and his roofing sub-contractor crew of three guys showed up the next morning. They stripped the old roof, repaired the sheathing, got the new roof installed, and everything cleaned up in one day. I paid for a few pizzas to get delivered for their lunch, then rigged up some work lights as evening closed in, so that may have helped to get it all taken care of. They did a fantastic job, and with ice & water barrier over the entire roof, it's in better shape than when I had done it myself. Hopefully the roof will not need to replaced again in our lifetime.
↑