

The Bedroom & Walk-in Closet/Laundry Room
 The bedroom. (4 photos).
The bestest home remodeling webpage ever: The bedroom is a room with a bed and a closet. Eventually it will be a room with a bed and a doorway to another room that's a closet. 'Nuff said.
Okay, so perhaps that's not all I should say…
Originally the house was a two-bedroom residence, however that second bedroom was very small (roughly 7-feet by 7½-feet).
While we lived here as renters we used that little room as our office for a few years, even though it was pretty cramped. After we bought the
place and started work on the old screen porch (around about 2005 – see the Genkan
page), we moved our offices to that space, and also got the laundry off the porch and into that little back bedroom. Since then, the room has
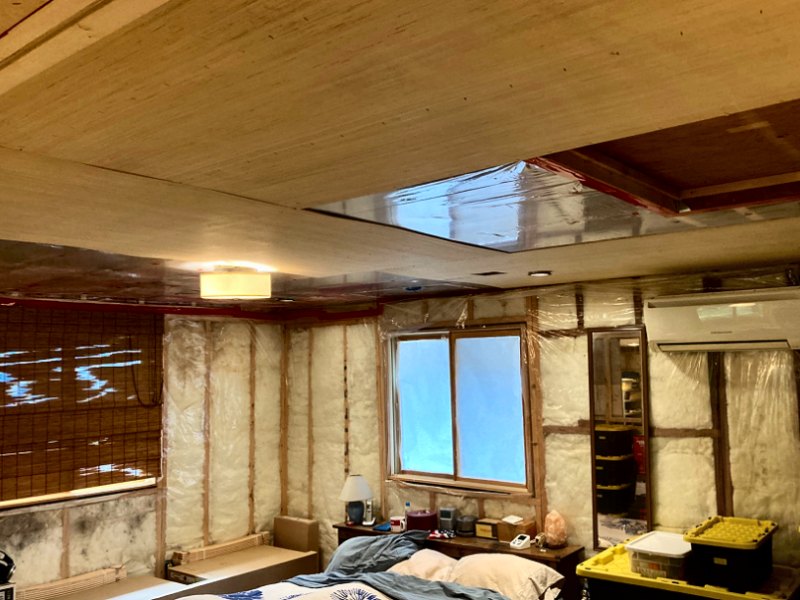
just been a "catch-all" for building supplies that needed to stay inside so they wouldn't freeze (see the photos at left).
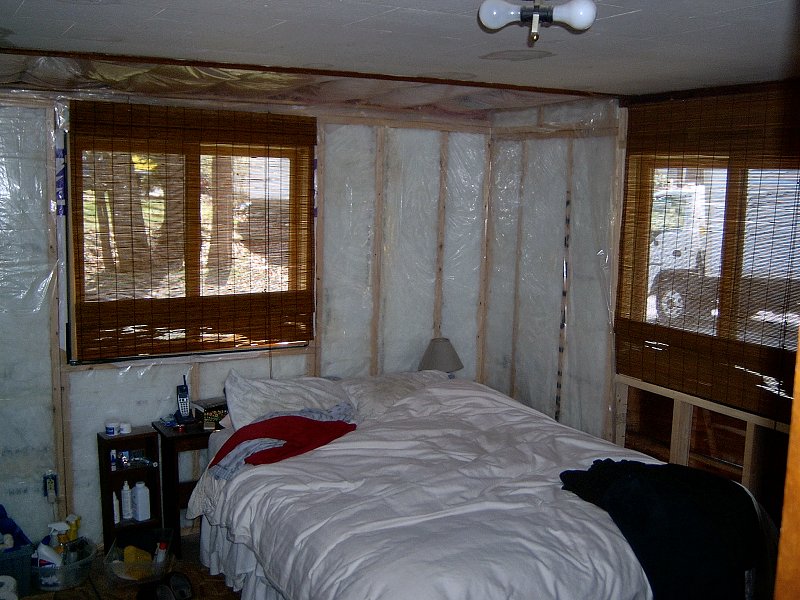
The main bedroom also got some significant changes early on, when we re-located the house entry from the living room to the old screen porch/genkan, then made the room a little over 4-feet wider, as seen in the photos on the Windows page of the Exterior section. Other than that, the room has pretty much been sitting un-touched for nearly 20 years with white insulation and sheet plastic on the walls. I'm very pleased to finally be making some progress in there.
Bedroom Design & Planning
 The original plan from 2009 (1 sheet).
Workin' Out the Details: Summer 2023
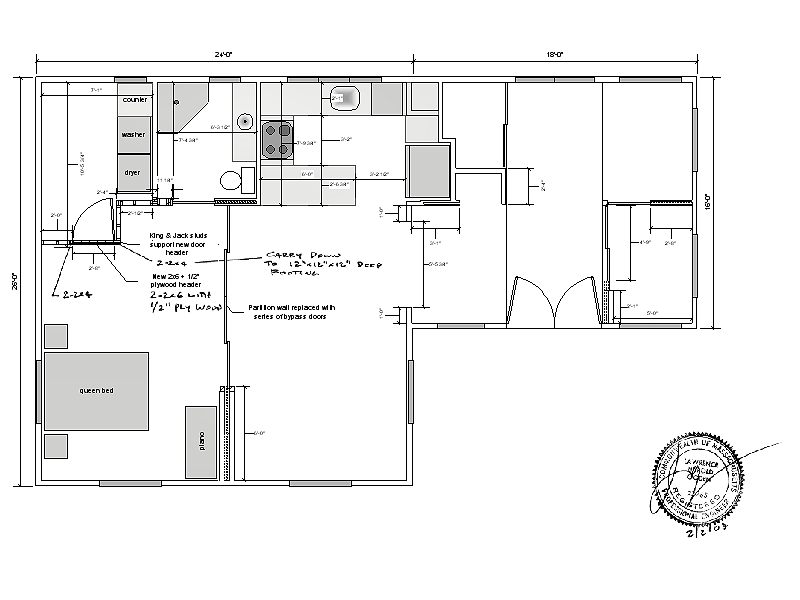
We've had a good idea of how we want the bedroom and closet laid out, and even had a couple options approved by an engineer back in 2009
which were discussed on the main Interior page. While that plan provided a general idea of where
the walls would end up, things became less straightforward when starting the actual framing work. There is almost nothing in the house that's
level, plumb, or square, so trying to lay out walls gets a little strange. I dealt with all this funkiness as best I could when working on the
living room ceiling, the fusuma door header, and the tokonoma framing (all described on the
Living Room page), which now give me a couple of reference surfaces to work from for the bedroom and
closet walls: I know the line of the kitchen floor and the bathroom wall is straight, the bathroom wall is plumb, and the
fusuma door header is perpendicular to the kitchen floor/bathroom wall, level, and centered exactly between the
living room and bedroom.
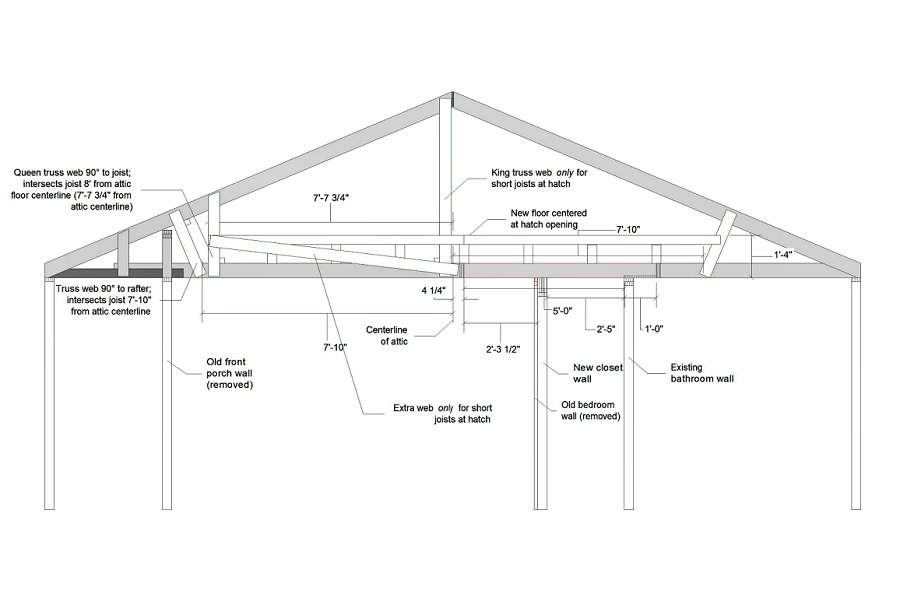
To determine exactly where the new attic access hatch would be located, along with the walls between the bedroom and closet, I would need to get a fair amount of demolition work taken care of in order to allow me access to existing framing to make measurements. The attic had to be emptied to get at and remove the old attic flooring, then the bedroom ceiling tiles and furring strips all had to go away too. The last bit to be removed is the old wall between the front bedroom and back bedroom — which is a bearing wall that holds up the ceiling joists for this half of the house. I'll get in to dealing with that below.
Once everything was stripped down to the original framing (July 2023, more or less), I then set about getting a couple sets of plans created that show exactly what is in place, as well as where the new framing needs to be. I started with the ceiling, as I want to make that level as I had done in the living room. The bedroom ceiling wasn't as out of whack as the living room, but this is where things started to get a little more complicated.
 As usual, I made some plans before getting too far along (9 sheets).
The living room ceiling joists span a roughly 26-foot opening with no bearing walls in between. They are supported from above with "Fink" style trusses in the attic. I'm pretty sure when they originally built the place they attached the ends of the joists to the rafters at the perimeter walls, then jacked up the center of the joist and attached the truss boards, which "pre-loaded" the joists so they wouldn't sag when the attic was filled with stuff. That's the only explanation I can manage for why the center of the 26-foot span is four or five inches higher than each end.
Anyway, the ceiling joists over the bedrooms and bathroom have no truss boards attached because they sat on the old walls near their centers, so
those joists are a little closer to level (they're only off a couple inches from the center to each end). The joist that's attached to
the end wall is the worst of the bunch, which is about 4-inches higher at the center. This area of the attic is also where we're going to install
a larger attic access hatch, which means cutting through a ceiling joist or two. I would also like to try and keep this half of the attic free of
the "sorta truss" boards that were in the other half of the attic (or at least do something other than "Fink" trusses) to
keep the center of this area more open for storage space. I think I've finally gotten all these considerations worked out in the plans (also
available as Bedroom Plans ![]() ).
Now I just need to get to work building the space.
).
Now I just need to get to work building the space.
Building the Bedroom
Replacing the Old Underlayment: Winter 2021-2022
Once more a friend that's also renovating his house gave me a call in December 2021 to say he was getting a dumpster, and all they had
available was a 20-yard unit, even though he only needed a 10-yard unit. They gave him the 20-yard at a discount, so he
asked if I had anything to put in it. Of course I did! I'd purchased one of those Waste Management "Bagster®"
things years ago with the intention of filling it with the Homasote® ceiling and the linoleum floor.
The same friend had already gotten rid of most of the Homasote® when he got a dumpster back in 2017.
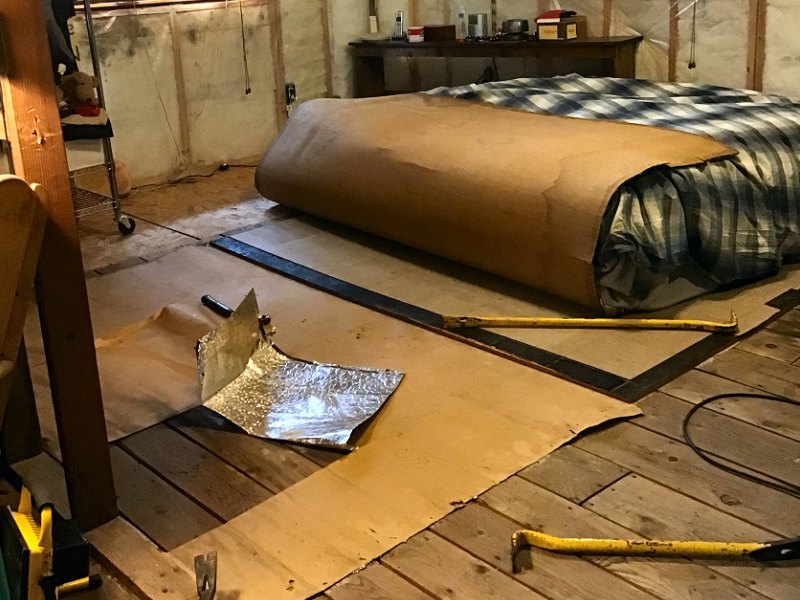
Now with another dumpster available, I could get all the linoleum tile and plywood underlayment removed, and finally get after that
foil faced tar paper that had been fighting against my radiant floor heat since I noticed
it back in 2009. All that is to say that after Christmas of 2021, the lovely bride and I got after the original linoleum floors
(yes ‐ that's what we did for our Christmas holiday — no idea why she still puts up with me).
 We finally made some progress on the bedroom (3 photos).
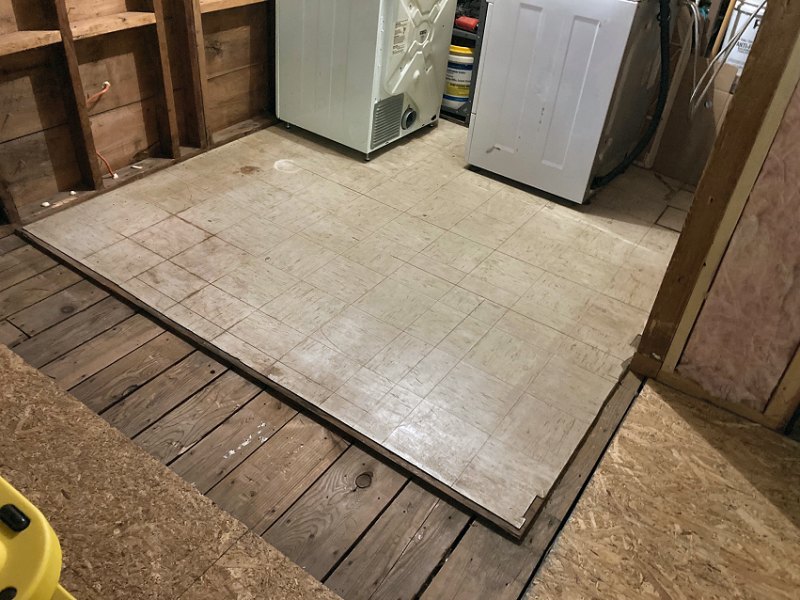
There were a couple spots in the living room and bedroom where small pieces of the old underlayment had already been removed, so those locations allowed me to get a prybar under the existing underlayment to get started. Because the paper beneath the underlayment hadn't been glued down, the old sheets of plywood came up without too much trouble. It had been nailed down with small twisted-shank flooring nails about 1-1/2-inches long, but as long as I started the prybar between the nails, each sheet popped up pretty well. It's likely that the linoleum tiles from the 1950's were made with Asbestos, but I wasn't actually cutting anything to make airborne sawdust, so I wasn't too worried about it. After re-arranging the furniture as needed, we'd pop up a sheet, then bend all the protruding nails over and carry the thing outside. The task started in the living room, then we worked our way across the house to finish in the bedroom. We didn't do the small bedroom/walk-in closet space, since I didn't want to try to move the washer and dryer, and the three shelves full of building materials and supplies (we call it "the hardware store"). That room only has two sheets of old floor in it, so I can put those in the Bagster® when work progresses to that room later on.
My friend brought over his pick-up truck and we took the stack of old flooring to his place, then we stopped by Home Depot on the way back and grabbed a heap of 7/16-inch OSB underlayment. I figured this would go down pretty fast with the medium crown pneumatic stapler and 1-inch staples. I also intended to glue it all down with sub-floor adhesive. There seems to be some disagreement on the 'net regarding whether or not to glue down new underlayment (since gluing it makes later floor replacement a huge pain — especially if installing new tile or other glued flooring). As we intend to use engineered "floating" flooring, I have no problem gluing down the underlayment. The original subfloor had not been glued down either (so it has always creaked and squeaked quite a bit), so I was planning to fill the gaps between the subfloor boards with glue where ever the gap aligned over a floor joist. That would let the new adhesive sort of squish in between and under the old boards and help eliminate the squeaking as the new stuff went down. As each sheet of OSB was going down, I'd whack all the old subfloor board nails to tighten them up, adding some 2-1/2-inch screws as needed, then apply the adhesive and staple down the new OSB. A few days later, the bedroom had the new underlayment installed (and there was a noticeable difference in the heating, now that the damn foil was gone). We got the furniture back in place and moved on to the living room, which was going to be a little more challenging (installation photos and more stuff about the underlayment project may be found over on the Living Room page.)
Leveling the Ceiling: Summer 2023
After getting the old bedroom ceiling tiles and furring strips removed to measure everything for the plans as mentioned above, I have no
intention of leaving the room with a plastic sheet for a ceiling for years like I'd done in the living room. All the old walls are gone,
but since there's nothing stored in this half of the attic, I'm going to hold off on building the new walls until I've finished leveling
the ceiling. I also think it will be a lot easier to build walls that fit to the leveled ceiling joists, so it's back to making long shims
as I had done in the living room. I have a decent pile of straight-grained Douglas Fir 2x4s from the wall studs and top and bottom plates
from the old walls, so that should provide enough stock to cut all the shims I'll need for the leveling project.
 Leveling the bedroom ceiling (11 photos).
When I did the living room ceiling leveling work, I started by figuring out where the lowest spot of the ceiling was in the room and worked my way across all the joists from there. For the bedroom however, I did things a little differently — I began by mounting the laser level near the middle of the far wall, and adjusted it up and down to try and find a good balance between getting the majority of the ceiling level, but trying to avoid making it the same level as the living room. The fusuma doors, door header, and door header trim will create a visual break between the living room and the bedroom, so making the ceiling the same level seems like it will just use a lot of wood and shouldn't be necessary (the living room shims were over 6-inches thick on the last few joists near the bathroom wall). The only real "view" of the bedroom ceiling will be from the entryway when the fusuma doors are open, so the main goal is to ensure the ceiling is level at the far end of the bedroom where it meets the end wall. If the bedroom ceiling has a little slope where the old front porch used to be, I'm not gonna worry about it — it will be difficult to get into a position where that would even be noticeable.
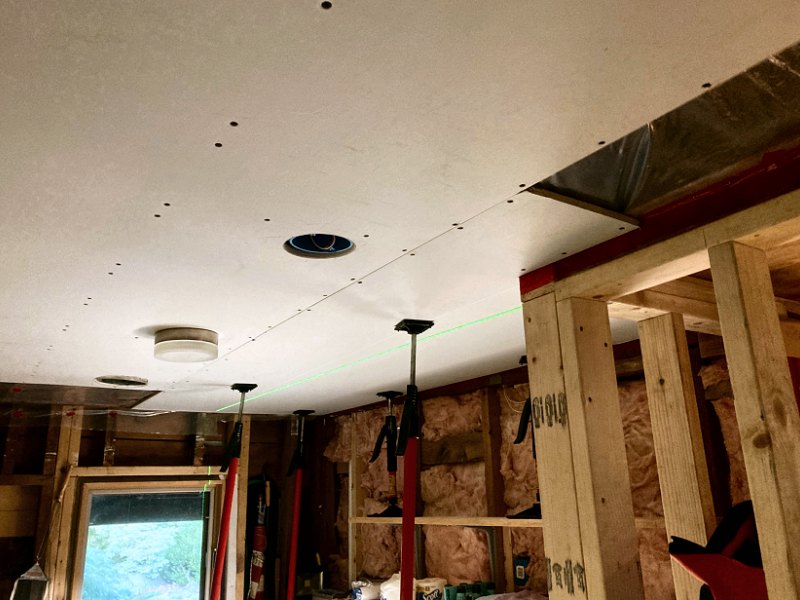
So it worked out that shooting the laser line on the far wall showed that the worst of the ceiling was in the corner where the old bedroom wall used to be. With a little tweaking I was able to make it so if the new bedroom ceiling is leveled to the top of the fusuma door header, that should make almost the entire area level, and will certainly take care of anything that's visible from the entryway. Scribing, cutting, then gluing & screwing the shims in place went along well enough without difficulty. I did have to do some careful measuring to properly mark the new hatch location (not gonna put shims under joists I'll be cutting off in a week or two), as well as to mark the new bedroom wall location (to ensure I'll have level joists to rest on the new wall top plate). After a couple weeks of this carryin' on, the bottoms of bedroom ceiling joists were all level. The final tasks for the ceiling framing was to get all the blocking installed around the perimeter, then refer back to the plans and get a handful of more blocking installed as needed to support the final ceiling panel joints. I even remembered to get the electrical boxed in place for the bedroom ceiling light and the smoke alarm strobe over the bed. I think we're going to install a pair of 4-inch recessed lights on each side of the bed as well, but those will wait until the new bedroom wall is in place (since it will have the light switches and wiring in it) and the ceiling "underlayment" is ready to go up. Now it's back to the attic to get the new truss boards and attic floor framing installed so I can cut the joists for the hatch.
Bedroom Attic Work: Summer 2023
When I re-built/raised the attic floor over the living room earlier this year, I documented that work in the Mechanical
section of the site within the Energy Efficiency page (since I basically put in the insulation
over that half of the house at the same time, so it made sense to me to discuss it over there). The work in the attic over the bedroom is a little
different however, since I first need to get the truss boards installed to properly support the ceiling joists (and then cut the new hatch opening
and build the new bedroom wall) before I can put up the new vapor barrier and ceiling "underlayment" plywood. Then I can proceed
with the attic floor rebuild and install the insulation. All that is to say that I'll be discussing the attic truss work here on the bedroom page.
 Bedroom attic work (8 photos).
Based on the first page of the Bedroom Plans (above), all of the truss layout is dependent upon establishing an attic centerline that's perpendicular to the fusuma door header (which is centered in the main house and perpendicular to the kitchen floor line/bathroom wall). When I did the attic floor work over the living room, I used the laser level to shoot a line along the ridge board in the attic and made that the centerline for the raised floor framing. That's not going to work for the bedroom, as I want the new hatch and bedroom wall to be properly "square" to the door header and bathroom wall (and I already marked the locations for the hatch and the new wall square to the header). So before I stapled up the old temporary bedroom plastic sheeting one last time, I set up the laser level in the bedroom, and shot a cross-line aligned with the center of the header, and as close as I could get it to the centerline of the attic near where I had stopped the raised floor work for the living room. This line was then marked on all the bedroom ceiling joists as the new attic centerline. That should do the job to ensure any framing and truss work in the attic will be aligned properly for the new bedroom wall and hatch opening.
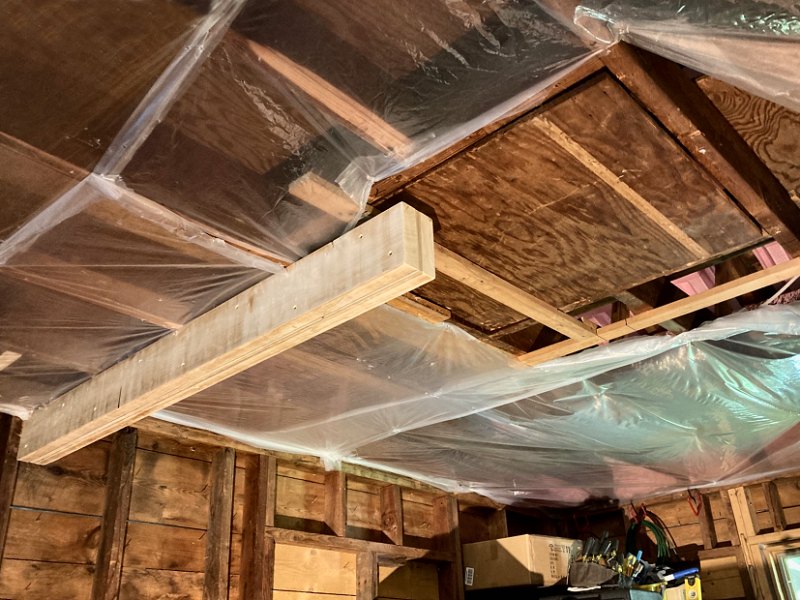
With the proper centerline established in the attic, I could then measure over to get the right location for where each angled truss board should intersect the ceiling joist (7' 10" from the centerline). I screwed down a straight furring strip to act as a guide, then it was out to the wood shop to prep all the stock for the trusses. I had a decent pile of old attic floorboards, so those were ripped to about 4-inches wide, and cut to length. I also cut a handful 8-inch long chunks of 2x4 to add to the rafters, as most of the ceiling joists have a 2x4 tacked to their side at this and of the attic (which acted as "joist extensions" for the old front porch ceiling).
Installation begin with tacking up the chunks of 2x4 on the rafters that needed the spacer for the truss board to line up correctly with the joist. These were installed with construction adhesive, clamped in place, then a few 10d nails were driven home on each side with the palm nailer. The angled truss boards went in next, first with a bit of construction adhesive, then brought up against the furring strip for alignment and attached using 1-1/4-inch long medium-crown staples. The furring strip didn't need to be re-located for the vertical trusses (the backs of the verticals are supposed to be 7' 8-3/4" from the centerline, and the furring was exactly 2-1/4" wide), so those all went in using the same method as the angled trusses. I also checked each one with the 2-foot level to ensure it was plumb before stapling it in place. The back of the attic over the closet also got a handful of truss boards installed, mostly to support the raised attic floor framing that will come later. I went through the same steps as the front trusses — screw down a furring strip for alignment 7' 10" from the attic centerline, then attach the truss boards at 90° to the rafters with adhesive and staples. This first bunch of truss boards went in without much difficulty, although working in the 90°F+ attic in August wasn't exactly fun.
 One more plan for some extras in the ceiling (1 sheet).
More Bedroom Ceiling Stuff: Summer 2023
With the initial truss work taken care of in the attic, my next task was to address a couple remaining items for the bedroom ceiling before
tackling the closet demo work and getting the new walls built. We decided to add a couple 4-inch recessed lights on each side of the bed
near the head board, and there's pretty much no way to get at the top of the fixture at the front of the house. I determined I'd need to
attach a short length of 14/2 wire to the fixture, then seal all the little openings in the housing before installing the thing (even
though these are "insulation-contact, air-tight" ICAT fixtures, I still usually slather all the little openings with foam from above
after they're installed). The window centerline had already been marked on the joists, so it was no big deal to measure and install
the fixtures once the caulk on the front unit had cured.
The other thing I wanted to get taken care of may seem a little odd, but now's the time to deal with it… If you've read through the details of the Bathroom Fixtures section of the Bathroom page (which was completed 10 years ago), you may have noticed that we installed grab bars near the toilet and in the shower, along with a fold down seat in the shower. We figured it would be good to have these available for the future, and it's much easier to get all the blocking in place to support them while doing the framing, rather than waiting until they're needed and having to tear everything apart to install them. Now we're going to do the same thing for the bedroom while the ceiling is completely open. We're not planning to install grab bars next to the bed (although that's not a terrible idea), but instead we'd like to add a "grab handle" that hangs from the ceiling on each side of the bed. If you've ever had any manner of abdominal surgery, this will make perfect sense — trying to sit-up and get out of bed during recovery is nearly impossible without assistance — or something to grab from above. The tricky part is to figure out how to install these things and not have it look like our bedroom is some manner of discipline room with straps hanging from the ceiling over the bed!
 A couple more ceiling items installed from below (6 photos).
After browsing the web a bit for various "ceiling mount overhead assist handles", I figured out these things are called "trapeze handles". Most of what I found were pretty flimsy lookin' things that mounted with a loop screwed into a ceiling joist with lags, or an actual grab bar mounted on the ceiling with a hook that slid along the bar for the handle. Either that, or they're a floor to ceiling pole with a handle on the side, or all manner of mobile stands and hospital bed mounted stuff. None of that was going to do the job as I'd hoped, until I stumbled across some mounts for swing sets and porch swings or exercise stuff. Now we were getting some where…
I selected a pair of "heavy-duty" stainless-steel, 1,200 lb. capacity, 360°+180° swing hangers with bearings for the swivel eye and bushings for the back-and-forth pivot from Amazon at about $25 each for the ceiling mounted anchors. I figured I could put each of these inside a 6-inch square box above the finished ceiling to hide them, then mount them to some 2-by stock that spans a few joists to spread the load. I placed the edge of the box right where a ceiling panel edge will be for the finish ceiling above each side of the bed, so the little 6x6 cut-out in the finish ceiling should barely be noticeable. The initial support is a chunk of 2x8 that's glued and screwed between the top edge of two joists above the box location, then another 2x4 is glued and screwed to the tops of four more joists spanning the 2x8. The mounting box was then clamped in position, marked, and cut to match the leveled ceiling joist bottoms, and finally the hangers were mounted with long bolts through the top of the box, the 2x8, and the 2x4, and cinched down with a couple fender washers, lock washers, and nuts from above. The actual handle and strap (probably a stainless-steel "swing chain" rather than a fabric strap) will have to wait until the bed is built to get the length correct, but this will do for now.
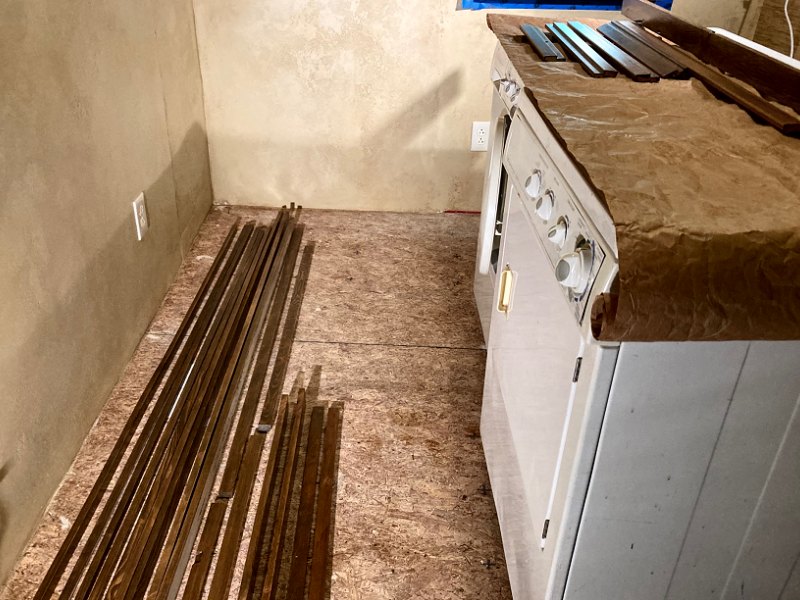
 The last of the old flooring goes away (6 photos).
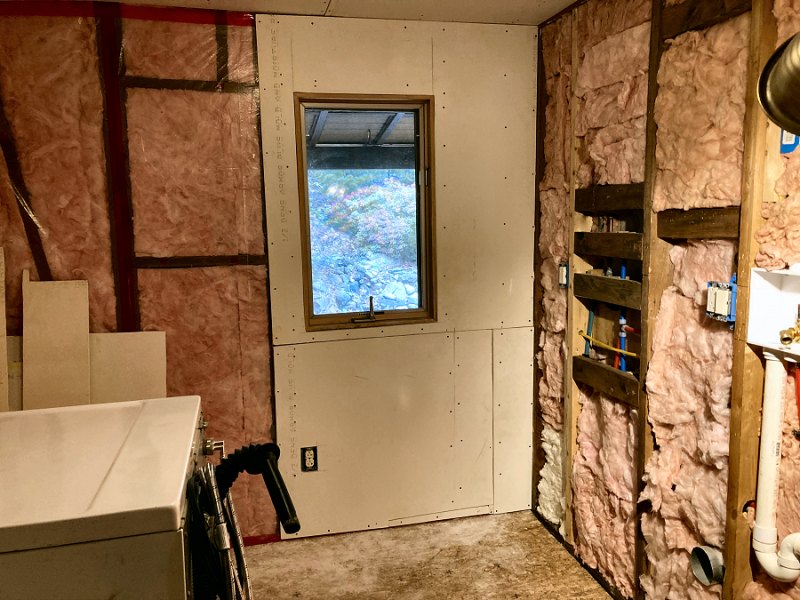
Replacing the Closet/Laundry Room Underlayment: Summer 2023
While waiting for the assist handle hangers and hardware to show up (above), I took a couple days re-arrange all the bins and shelves from
the closet/laundry room so I could finally get the last of the old linoleum tiled underlayment and foil-faced paper removed. The first sheet
popped up pretty easily with a couple pry bars and was hauled outside to get tossed in the Bagster® eventually.
However, before putting down a new sheet of OSB, I measured and marked out where the new walls are going to be. I had poured some concrete post
bases down in the crawl space years ago, which were called for by the engineer to support the king studs on the new walls. With the old floor
gone and the big gaps in between the sub-floor boards, I was able to poke a couple long wire rods (a couple Simpson®
Insulation Supports from a box of the things I've had forever) through the floor joist space and the foil insulation below to mark the
centers of the new stud locations. After the walls are built I'll get back under the house and get some posts in place, but the wire rods
should do fine as markers in the mean time.
I got the first sheet down with plenty of sub-floor adhesive and the medium-crown stapler, then moved the washer, dryer, and the couple of nearly empty shelves on to the new sheet to clear off the last couple pieces of old flooring. As long as the room was empty, I also pulled down the last of the ceiling tiles and furring strips, which means there is no longer any of the original interior carpentry work anywhere in the house! The final two sheets of 7/16" OSB went down without issues, and the space is ready for new walls — after I fiddle with the washing machine hook-up a bit, since the room is still mostly empty and now's the time.
Re-working the Closet Laundry Hook-up: Summer 2023
When we installed the new drain lines during the initial plumbing upgrades back in 2008, we
pretty much just put the washing machine hook-up near the center of the existing wall and called it good enough. That did the job to get the
laundry moved from the old screen porch utility room (where it would freeze during the Winter) into the closet/laundry room space
so we could do laundry with our new washer & dryer. As we are now ready to get after the carpentry work for the bedroom walls that define
the dimensions for the laundry room, it's time to get the laundry hook-up into its final position.
 The washing machine hook-up from 2008 gets moved (5 photos).
However, figuring out where to put the thing is a bit complicated by recent improvements to laundry equipment — LG® has some very attractive WashTower™ stacked units that combine the washer & dryer into a single unit with the controls all centered between the two components, while GE® and LG® both make "all-in-one" units that do washing and drying in the same machine. And then there's the stuff from Míele thats quite compact, and uses a heat pump in the dryer (with no vent and which runs on 115VAC). There's nothing wrong with our current laundry equipment, but we're thinking about upgrading to something different which could have a big effect on the available floor space in the new laundry room (most likely the LG® WashTower™).
Regardless of what we decide for future laundry equipment upgrades, the location of the washer hook-up doesn't need to stay in the center of wall. It can easily be moved over a foot or so to get tucked into the corner a bit more. This will still work fine for our existing stuff, but also allow the WashTower™ connection without having supply hoses run across the wall. We left plenty of extra PEX supply tubing on the original hook-up connections, and there's just enough space in the next wall stud bay to fit the P-trap in there with the drain vent pipe.
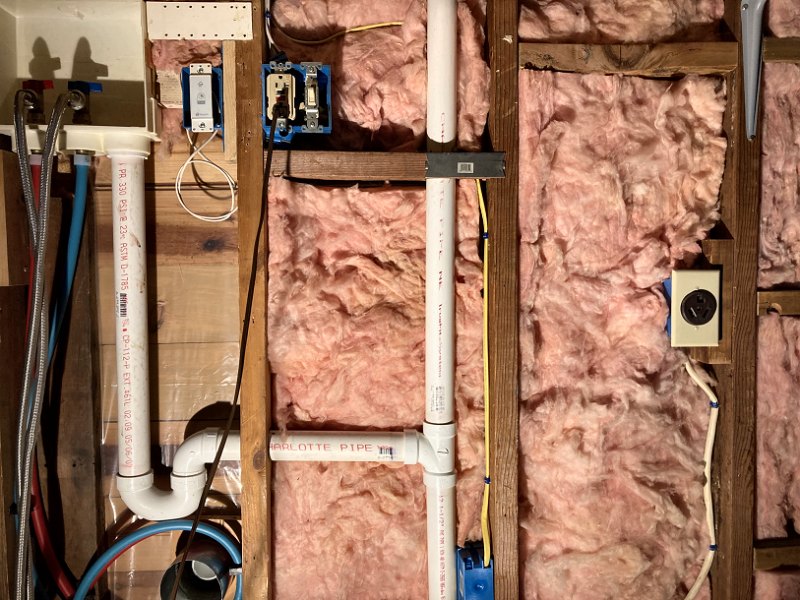
Moving the hook-up meant I needed to get a new Oatey® Quadtro® wall box (and I went for the one with the hammer arrestors while I was at it), since the existing one used the expanded PEX connectors, and I prefer the connectors that use the crimp clamps (as I don't have an expander). While waiting for that to arrive, I also had to address the wiring for the washing machine, future counter-top wall plugs, and future under-cabinet lights, since the existing electrical boxes would all need to be re-arranged as well. That meant I needed to re-route some wiring in the attic, as the junction box that provides power to the everything on this wall was going to interfere with the new hatch location too. I also wasn't happy with that power supply anyway: The washer was fed by a 15A circuit breaker (originally installed just as a "laundry room lighting" circuit), which meant I needed to use a GFCI plug for the washer. That feed is now split at the junction box in the attic to connect to the washer GFCI plug (which I'll replace with a 15A outlet, rather than the 20A one that's there now), then sent to a separate wall box to supply the hard-wired under-cabinet light's switch. For the counter-top plugs (one where the old hook-up box was, and another about a foot from the left wall corner), I was able to feed those with some new wire from the bathroom's towel warmer & floor plug circuit. That circuit is on a 20A GFCI circuit breaker which can support a couple more outlets without a problem, and I was able to add the wiring for the new outlets at the towel warmer's wall box. These few changes to the wiring also warranted an update to the wiring plans (PDFs are over on the Specifications page) to keep them accurate and up to date — something I've been needing to take care of for a long time.
The final thing to address for the laundry move was the dryer vent connection, which is usually a pain to get at. To deal with that, I
purchased a MagVent™![]() MV-180 dryer vent kit from Lee Valley Tools years ago when they first came out, and I could now get the thing installed at long last. Oh, and
these MagVent™ things are really nice, and worth every penny for the headache they remove — certainly check the link to have a look.
Anyway, all this laundry hook-up movin' stuff was to try and "future-proof" the laundry connections, so I did the same thing for the
dryer vent… I looked up the height of the vent connection for the WashTower™, then added a little framing to the stud bay where the vent
pipe comes up into the wall. Rather than later finish this section with wallboard, I then cut a piece of 1/2" thick plywood of the proper
length to cover the area (which will get covered with wallpaper, eventually). The hole for the vent works for the current location,
but then the whole thing can be flipped (and a couple feet of 4-inch pipe added within the wall to put the elbow at the top), and that'll
put the vent hole at the correct height to connect to the WashTower™ vent outlet. With the venting worked out, I swapped the 20A GFCI
for a proper 15A unit, and also put the correct "Decora" style plugs and switch in the other wall boxes. I then put some insulation
back in the wall (only a couple inches thick to help with sound deadening), and we're able to do laundry once more!
MV-180 dryer vent kit from Lee Valley Tools years ago when they first came out, and I could now get the thing installed at long last. Oh, and
these MagVent™ things are really nice, and worth every penny for the headache they remove — certainly check the link to have a look.
Anyway, all this laundry hook-up movin' stuff was to try and "future-proof" the laundry connections, so I did the same thing for the
dryer vent… I looked up the height of the vent connection for the WashTower™, then added a little framing to the stud bay where the vent
pipe comes up into the wall. Rather than later finish this section with wallboard, I then cut a piece of 1/2" thick plywood of the proper
length to cover the area (which will get covered with wallpaper, eventually). The hole for the vent works for the current location,
but then the whole thing can be flipped (and a couple feet of 4-inch pipe added within the wall to put the elbow at the top), and that'll
put the vent hole at the correct height to connect to the WashTower™ vent outlet. With the venting worked out, I swapped the 20A GFCI
for a proper 15A unit, and also put the correct "Decora" style plugs and switch in the other wall boxes. I then put some insulation
back in the wall (only a couple inches thick to help with sound deadening), and we're able to do laundry once more!
 Building the new bedroom/closet walls (9 photos).
Building the New Closet/Laundry Room Walls: Late Summer 2023
With the washer & dryer back in position, I was ready to get busy on the wall framing for the walk-in close/laundry room. Building these
walls was a little odd, in that I kinda needed to "work backwards" in order to ensure the new walls end up level and plumb — the
floor is not level and the perimeter walls is not plumb, so I started with the 2x6 header construction for the wall with the doorway. Since the
ceiling is level and the joists are marked perpendicular to the house centerline (the fusuma door header), getting
the header in position would then provide a reference point from which to get the dimensions for the rest of the wall framing. The new header was
built in the shop, then clamped in place and held in position with a couple countersunk, 6-inch long FastenMaster®
TimberLOK screws up through the header and into the ceiling joists. With the header up I could then determine rest of the framing dimensions to
cut and assemble the first wall in the shop. I also added some bits of furring strip to the ceiling joists to mark the positions for the top
plates of the other two wall sections, which I then used to create plumb marks on the underlayment for the remaining wall bottom plates.
The first wall was banged together outside, then got an angled piece of stock temporarily screwed to the studs to keep the 90° angle between the top plate and the door frame, and brought inside for installation. It slid right into place, and after a little tweaking with the 6-foot level to ensure the door frame and studs were plumb, it was fastened into position. The wall "extension" for the existing bathroom wall was next, built outside in the same way as the first wall — lots of careful measurements from the furring strips and floor marks, then assembled, braced, and moved inside for installation. However before this wall was fastened into position, it revealed a bit of a problem with the existing bathroom wall framing. The face of the end stud for the existing wall between the bathroom and closet had a pretty significant bow, and bumped out nearly a 1/4-inch along its length from the top and bottom plates along where the new wall "extension" was supposed to go. Rather than install the new wall flush with the existing proud stud (which would have put a "hump" in the wall board for that wall surface), I decided it would be best to remove the extra material from the old stud before installing the new wall. I removed the nails that held the stud in place, then got after the worst of it with the old No. 40 Scrub plane. I followed that with a No. 5 Jack plane with the new wall temporarily in place to even everything up, and then did a final surface clean-up with the belt sander before putting new fasteners back through the stud. I then put the second wall in place, again checking for plumb and square, and fastened it into final position.
The third wall section was mostly assembled inside, now that I had a more reference surfaces for dimensions. It started with the corner post for the new door and door header assembled in the shop (two 2x4s with a 1//2" ply core), but then everything else was cut outside and assembled on the floor inside. That last wall went up without much bother, was double-checked for plumb and square, and nailed into place. Now I just need to get into the crawl space and get a couple posts into position to support the new door frame, and the wall work will be complete.
After I finished the new hatch opening framing and got a fresh sheet of plastic vapor barrier on the ceiling (see below), it was down to the crawl space to get the support posts into place. You may recall I had stuck a couple stiff wires through the old subfloor to mark the locations for the posts before I put down the new underlayment, and thankfully I found that both wires were in a decent position above the footings so the posts would actually do what they're supposed to do. I marked the insulation around the wires, then removed the wires and cut through the insulation to get at the floor joists. I added a chunk of 2x8 to each side of the floor joist below the door posts, held securely with construction adhesive and a couple 4-inch long FastenMaster® TimberLOK screws through everything. The insulation was then stapled back in place, and the cuts I had made were sealed with foil tape. I then scrounged up a couple chunks of pressure-treated 6x6 I'd been saving from when I built the bamboo fence, and cut them to fit leaving both pieces about 3/16" long. The extra length should compress the double-bubble insulation and slightly pre-load the floor joists when I get them in place. It was then back under the house with the posts and a hand mallet, and the posts were knocked into place and checked for plumb. With that done, the new walls are ready for wiring and wall board!
 Cutting the ceiling joists (5 photos).
Framing the New Attic Access Opening: Late Summer 2023
With the new walls in place to support the ceiling joists, I was able to finally get after creating the new attic hatch opening. Before I got to
cutting ceiling joists however, I decided to make a minor change to the dimensions of the hatch. I had originally planned to make the hatch opening
roughly 5-feet long for no specific reason (mostly to avoid bumpin' my head into the ceiling when going up the step tansu)
but while working that out in the bedroom plans, it had been buggin' me that the seams of the finished ceiling wouldn't line up with the end of the
hatch opening. It finally dawned on me that I could just make the hatch opening a few inches longer so the ceiling panel seam ended up centered on the
joist for the hatch opening – problem solved!
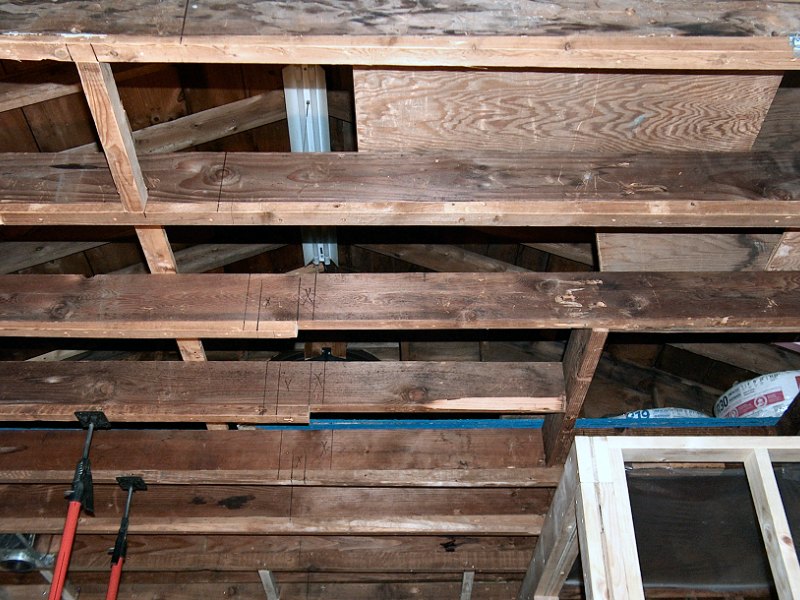
I had already marked all the ceiling joists using the laser level to create a new attic centerline, and to designate the new hatch joist position back when I was getting the ceiling level. I just re-located the hatch joist cut line to align with the future ceiling panel seams, and was ready to make the cuts, mostly… Before sawing through the ceiling joists, I got into the attic and re-arranged the sheets of OSB that were up there to get all weight off the joists I would be cutting, and then screwed down a furring strip to span the joists as well. I then put my "third hand" supports in place to hold up each joist, and grabbed the circular saw. I double checked the cut line, then standing on an old milk crate I clamped a speed-square to the joist to guide the saw, and cut through the first joist. Nothing moved after the cut (which is a good thing), so then I squeezed myself up through the old hatch opening on the ladder, and cut both joists above the laundry room. That allowed me to remove the longer chunk of the two joists I'd need to cut, along with the old short piece above the bathroom wall. I then cut off the remaining joist from below without any difficulties.
Before the new hatch opening framing continued, I then added a couple temporary, vertical "king truss" boards to the two freshly cut joists so I could get the third hands out of the way. Prior to installing the cross member that was in the bedroom, I shaved off a tiny bit of the bottom end of the new 2x6 and the two cut joists so the joist hangers wouldn't stick down below the bottom of the joists when installed (although I didn't bother for the hangers above the laundry room). The new cross members were then installed for the ends of the opening with a pair of 20d sinkers at each joist intersection, as well as the piece for the length of the opening above the closet wall. Each joist intersection then got a Simpson Strong-Tie® LUS26 hanger installed with a load of 10d nails. I then removed the temporary truss boards, and installed the proper, 4-inch wide, vertical "king truss" boards with constructions adhesive and the medium crown stapler. Making the new hatch doors will need to wait until the 1/4" thick "ceiling underlayment" is installed and the new attic floor is in place. However, getting the new hatch opening solidly framed means I'm essentially now finished with all rough carpentry work for the house.
 The bedroom ceiling "underlayment" goes up (3 photos).
Installing the Bedroom Ceiling "Underlayment": Fall 2023
Next up for the bedroom and closet was to replace that old temporary plastic sheet ceiling with a proper vapor barrier, then get the 1/4"
thick ceiling "underlayment" installed for the bedroom. A new sheet of 6-mil plastic was stapled up, taped, and caulked in late
September, then I finished up the wiring while waiting for my friend to become available for a supply run with his truck. In early October we
managed to make the time for a Lowe's run, which got us the 1/4" underlayment plywood for the bedroom ceiling, a few sheets of 1/2" GWB
for the closet ceiling, and a couple more sheets of 7/16" OSB for the attic floor.
So the reason for Lowe's rather than the usual Home Depot supply run was to get some actual 1/4" thick plywood that wasn't too expensive.
A few years ago a 1/4" thick Birch plywood sheet was around 25 bucks for a 4 x 8 sheet, and now it's over $60 a sheet! I was trying to
find something for the ceiling "underlayment" that was under $30 per sheet (and was actually a 1/4" thick, and not 5mm,
which is closer to 3/16" thick — the goal is to get close to a full 1/2" thick ceiling when the finished ceiling
material goes up, which will likely be 6mm plywood). After a bit of research I decided to go with Patriot Timber Products
SurePly®![]() Premium Underlayment, which is a 1/4" thick Poplar plywood sheet for about $28 per sheet (and Home Depot doesn't sell it).
Premium Underlayment, which is a 1/4" thick Poplar plywood sheet for about $28 per sheet (and Home Depot doesn't sell it).
The SurePly® went up without any trouble, using the 7/16" medium-crown stapler in the field, and the 1/4" narrow-crown stapler at the walls (just like in the living room, since the medium-crown stapler can't get close enough to the perimeter). Working with the SurePly® was also pretty nice, since it doesn't need a saw to make most of the cuts — you just make multiple passes with a utility knife along a straight edge to score the cut line, then the panel is bent and snaps at the score like drywall. I did use my little Milwaukee® M12 Multi-tool with a straight saw blade for a couple cuts, but even that goes through the stuff with ease. We also put all the stuff up "backwards", so all the little Xs printed on the face of the underlayment are facing up into the attic, since we don't need to look at all that printing on the ceiling before getting the finished ceiling installed.
The bedroom ceiling "underlayment" also needed the same treatment as most of the living room ceiling at all of the panel joints, as there was a little bowing present between the joists from one panel to the next (this can be seen in the first couple photos above). This was remedied by placing short piece of old 1x3 furring strip between the joists in the attic above the seam, which was held in place with a chunk of 4x4 by the lovely bride (and a little glob of construction adhesive at each end against the joists), then the plywood was stapled to the furring strip with the narrow-crown stapler every couple inches on both sides of the seam. That got rid of all traces of bowing between the joists, and the bedroom ceiling "underlayment" installation work was done in a few days.
 The closet/laundry room ceiling install (2 photos).
Installing the Closet/Laundry Room Ceiling: Fall 2023
The last task for the bedroom area (for now) was to get the gypsum wall board (GWB) ceiling installed in the closet/laundry
room. I'm not a big fan of this stuff, although I really liked working with the DensArmor Plus® fiberglass-faced stuff when
I did the GWB work on the bathroom and kitchen back in 2009. Unfortunately it looks like Georgia-Pacific is phasing the stuff out — they no longer
list the 1/2" sheets on their web site (although they do still show the 5/8" material), and Lowe's and Home Depot no longer sell it.
I've still got a couple full size 1/2" sheets of DensArmor Plus®, which will get used on the wall between the closet
and bathroom behind the laundry equipment. So, it looks like the rest of the GWB for the house will just have to be standard, paper-faced, pain-in-the-ass
GWB. I picked up four sheets of the ToughRock® "lite-weight" GWB when we made our recent Lowe's supply run, which will
be plenty for the ceiling with at least a full sheet extra for the closet walls when the time comes.
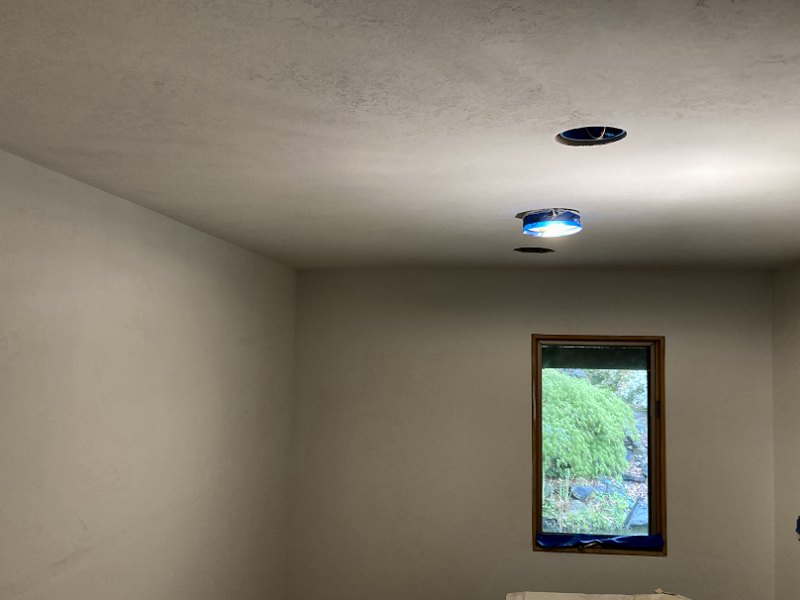
Installing the GWB for the ceiling started with a full sheet butted against the new door header, since it's one of the few things in the space that I know is straight. After a bit of careful measuring to get the holes right for the light, smoke alarm, and HRV exhaust vent, the first sheet went up without much trouble (with the help of three 3rd Hand HD supports, and the lovely bride on a step ladder). With the first sheet installed, the rest of the smaller pieces went up quick as I could measure the funky, crooked wall dimensions from the sides and end of the first sheet, and none of the other pieces have any holes.
With the ceiling up in the bedroom and closet/laundry room, I can now get back to attic work to get the other half of the floor raised and finish up the attic insulation work. More than likely finishing up the attic work will take a few weeks, and once we get all the storage bins back into the attic it'll be time for GWB for rest of the living room, bedroom, and closet/laundry room.
 GWB work begins in the closet/laundry room (1 photo).
Closet/Laundry Room Gypsum Wall Board (GWB) Work: Spring 2024
As mentioned in the Welcome page News section, I was battling the flu for most of late Winter 2024 and didn't make much building progress for a
few weeks. I did manage to get things sorted into bins and lots of stuff moved out of the way to attic storage, which allowed me to empty out the
closet/laundry room of everything but the laundry equipment, and then start working on the GWB installation for the walls in this space.
I used up the last of my old Georgia-Pacific fiberglass-faced DensArmor Plus® stuff on the wall between the closet/laundry room, then put up the extra ToughRock® "lite-weight" GWB I picked up when we made the run for the ceiling materials a few months ago. That got most of the walls for the room taken care of, although I did have to get a little "creative" with using scraps and off-cuts to get the new partition walls covered. Most all of the walls are going to be blocked by furniture anyway (laundry equipment and cabinets on one wall, then a wardrobe that'll be in front of the opposite wall and the far corner), so I'm not too worried about making these walls "perfect".
With all my old GWB stuff finally used up, I then made another run for GWB to finish the partition walls between the bedroom and closet/laundry
room. I decided to go with United States Gypsum (USG) Corporation Sheetrock® "UltraLight"
Imperial®
Gypsum Base ![]() as the GWB for the rest of the house,
as this stuff is made to hold a veneer plaster coat better than regular GWB (and most of the walls will get a couple coats of plaster).
as the GWB for the rest of the house,
as this stuff is made to hold a veneer plaster coat better than regular GWB (and most of the walls will get a couple coats of plaster).
Closet/Laundry Room Wall & Ceiling Finish Work: Late Spring 2024
After the chore of getting all the GWB installed in the space, I then got after doing the plaster work for the walls and ceiling (which is work
I very much enjoy). The first step was to get an initial coat of joint compound over all the screw holes, then take care of the corneres with
paper tape, and the GWB seams with mesh fiber tape. For compound I used the USG Sheetrock® Plus 3®
stuff, although I always thin it a bit with a little water when applying.
 Wall & ceiling texture application (3 photos).
I've already discussed the method I developed for applying the plaster wall finish over on the Bathroom page, although that work was done about 15 years ago (and there aren't any photos of that actual plaster work). Since it's been a while since I've done any "mud" work, I'm pleased to be starting in the relatively small closet/laundry room space to get in some practice before taking on the walls in the bedroom and living room. As in the bathroom, I start by getting the walls that will be textured to a "Level 3" finish (which is a minimum of two more coats of mud over all seams and screws, well feathered and sanded), and then bring the walls that will get wallpapered to a "Level 4" finish (which is another coat of mud over seams, screws, and corners, further feathered out and sanded). I then do the final texture work on the "Level 3" surfaces with more thinned mud, the big brush, and the flat trowels, working on a small section at a time — for this space the ceiling also got the textured finish just like the kitchen. After a few days of plaster work, the room was ready for primer and paint.
Getting back to interior wall paint work after so many years turned out to be a little troublesome. The good news is that Lowe's still sells
Valspar paint (although my old Ultra-Premium® stuff is now just called Ultra®),
and they still use the same color codes for mixing up the custom colors we originally selected for interior painting. The troublesome bit is that
apparently the faux-finish glaze we employed for tinting the textured/stucco wall surfaces is no longer "fashionable", and nearly
impossible to find. They do sell tiny, pint jars of "Antiquing Glaze" (at $18 each), of which I would need many to create the
gallons of glaze I'll need for my wall finishing. After lots of searching online it appeared that my local hardware store had a few gallons of
glaze available (they're a Benjamin-Moore® distributor), but after a trip to the store it turns out they
stopped making that stuff years ago, and it was merely an incorrect stock number entry on the web site. After some discussion with the paint
guys at the hardware store, they suggested I just use straight Floetrol® Flood®
(which is a paint additive I've used for many years) with a little tint added as the glaze. I still had some old containers of
tinted glaze from when I did the bathroom paint work, so I added a good amount of Flood® to those and after mixing
well the stuff seemed like it would do the job. I also still had about a half-gallon of my old Valspar wall glaze, so I added about a quart of
Flood® to that to ensure I'd have enough material to get everything done for the closet/laundry room walls and
ceiling. Finally, I managed to find a proper "Acrylic Glaze" made by Golden Paintworks® and purchased a
gallon of that stuff from Pontiac
Paint Supply ![]() in Pontiac, Michigan. That
should provide enough glaze (along with plenty of Flood®) to take care of the rest of the interior wall work.
in Pontiac, Michigan. That
should provide enough glaze (along with plenty of Flood®) to take care of the rest of the interior wall work.
 Paint and wallpaper application was next (8 photos).
The actual painting work started with a coat of Valspar® Poly Vinyl Acetate (PVA) primer on the GWB walls and ceiling. This stuff seals the GWB and provides a proper base for the wall paper paste (otherwise the GWB just absorbs it immediately and the wallpaper won't adhere very well), and also provides an even base for the topcoat color over the GWB and plaster. Even though most modern interior paints say they're "paint & primer in one", that doesn't really apply to new, unpainted GWB — it's more referring to painting over previously painted surfaces. Anyway, after everything was primed, I then rolled on a coat of "Drumskin" to the ceiling, followed by "Prairie Dance" on the two exterior walls.
The glazing work was next, which started with a liberal application of dark-tinted glaze over both the ceiling and walls. This stuff is applied to a couple square feet of surface at a time, allowed to sit a moment or two, then rubbed and patted off with a damp towel. Once all the surfaces get their first coat of glaze, everything is allowed to cure overnight before adding more glaze. The second coat of glaze (only on the walls) is the light-tinted stuff, which is sparingly brushed onto the "high spots", then soon dabbed off again with the damp towel. Another overnight cure is then followed by a final re-coating of everything with glaze that's tinted with the original wall color, which mutes the entire effect a bit, and provides a final bit of sheen to the entire surface. The result is a little more sheen than an eggshell finish, but not quite as much as semi-gloss, with all the nooks and crannies well defined by the tinted glaze.
With the wall and ceiling paint work completed, I then took care of the wallpaper application to the wall between the closet and bathroom. I used the laundry equipment, covered with a canvas dropcloth, as my "workbench" for this task so it went pretty quickly. Rather than spread the wallpaper paste on the back of the wallpaper, I'd simply go over the back of the paper with a damp sponge, then roll the paste onto the wall for each strip of paper. Getting the paper backing "pre-moistened" resulted in the fairly stiff paper softening up a bit before application, and it doesn't draw in too much paste from the surface and weaken the bond to the wall. I rolled everything down with a rubber-wheeled laminate roller, then wiped off any edge squeeze-out with the damp sponge and that was that. I only did the wall behind the laundry equipment and the turn toward the bedroom, but the rest of the partitions between the closet and the bedroom will need to wait for more GWB on the bedroom side, so I may then apply full-width strips that go around those corners.
 Closet/laundry room trim & cabinet work (4 photos).
Closet/Laundry Room Trim & Storage Cabinets Work: Early Summer 2024
The next task was to take care of the trim work so I could get the cabinetry installed around the laundry equipment. I milled all the trim over
the course of a couple days from old attic floorboards I pulled up last year. The trim dimensions were worked out back when I did the kitchen
and bathroom work, with everything at 3/4" thick, then 3/4" square for the vertical corner trim, 1-1/4" for the ceiling trim,
and 2-1/4" for the baseboards. The window side trim was more of the 1-1/4" stuff, and the window header trim was more of the
2-1/4" stuff. The vertical corner and ceiling trim also got about a 1/4" chamfer on the back so it would fit snug into the corners
over the corner plaster (which has a slighty rounded joint, and not a perfectly square inside corner). All the backs of the stock were then
hit with a coat of primer, and the show surfaces were then treated with Minwax® Water Based Pre-Stain wood conditioner,
lightly sanded with 150 grit paper, then followed by a coat their Water Based Semi-Transparant interior stain. I then top coat everything with a
couple coats of Minwax® Water Based Polycrylic matte finish, hit it with a very light scuff of 220-grit paper, then
applied a coat of semi-gloss, followed by a final coat of gloss (working up to a final coat of gloss with matte and semi-gloss is the only way
for me to see what's actually wet during the application coats — if I do all coats with gloss it's too hard to see where the fresh wet
stuff is versus what's the previous coat). All the topcoats are applied with a chip brush, then immediately dragged smooth with a dry sponge brush.
These water based finished dry very quickly, and all coats of stain and top coat can be completed in a single day.
The final task for now was to assemble the IKEA® BESTÅ storage cabinets around the laundry equipment, which would let us put away the laundry and cleaning supplies that had been kickin' around the bedroom in totes for the last couple months. I chose the BESTÅ series for the laundry storage because they have more depth than most of the IKEA® kitchen cabinets, so we can get more stuff in 'em. These cabinets went together without difficulty, although installation was delayed a week or so because they neglected to include the legs for the big floor-standing cabinet, and that cabinet determines the location for the two wall hung cabinets over the laundry (I didn't open and inspect the contents of the "accessories" box when the stuff was originally delivered - lesson learned). A brief online chat session with their customer service department got a new set of legs on the way. Once the legs arrived, the cabinets were installed and I was able to finally get the pair of under-cabinet lights back in place to finish up the closet/laundry work for the time being. The last task will be to put down the new flooring and install the baseboard trim. but that will have to wait until the rest of the bedroom wall and ceiling work is completed.
Bedroom GWB & Plaster Work: Summer 2024
As I've mentioned before, installing GWB is not one of the renovation tasks I much enjoy - it makes a mess of the work area floor and dust from cutting
the wallboard gets everywhere. I don't find the work particularly difficult, and the results certainly make a big difference in how the space appears,
so I generally just try and plow through it quickly to get on with plastering and paint work. That being said, taking care of the dozen or so sheets
of GWB for the bedroom proceeded without any surprises. The work started with some partial pieces to cover the last of the bathroom exterior wall
facing the bedroom, and then to cover the bedroom side of the new partition walls between the bedroom and closet/laundry-room.
 Bedroom GWB work (4 photos).
The two bedroom outer perimeter walls were next, with the sheets run vertically. This allowed me to minimize the number of seams on each wall and get all the GWB installed in a couple days. Each piece is carefully measured (since the ceiling is level and the windows are level and plumb, but most of the walls and the floor are not), then pencil marked and cut with a utility knife. All the openings for wall outlets are then cut out with the Milwaukee® cordless multi-tool and a little 2-inch, straight saw blade (which is a little messy, but a lot nicer than the old days of making these openings with a keyhole saw). All the cuts are then cleaned up a bit with a 5-1/2" or 10" Surform™, followed by a little touch-up with some 120-grit mesh sanding sheets on a holder to remove the extra facing paper from the cuts. The wall board is then stood in place on the lip of a roller-lift, then raised into final position and held there with a couple shims. Before placing the sheet, I also mark the ceiling and floor with a Sharpie® to indicate the center-line of the wall studs, then make pencil lines on the sheet so I know where the drywall screws will go. It then gets screwed on with 1-1/4" bugle-head drywall screws with the Milwaukee® power screwdriver, with one screw about every 8-inches around the perimeter, and a pair of screws about every foot across the field. I had enough GWB on hand that I also did all the little partition walls and the living room side of the tokonoma too, which will let me take care of the mud work on the bedroom side of the main tokonoma wall and the corner bead for the two sections that meet the tokobashira. The last step was to then nail on 1-1/2" metal corner bead to the outside corners with ring-shank nails, and the walls were ready for joint compound.
Plaster work for the bedroom started with a quick coat of all the screw heads through the field of each sheet and along the top and bottom edges. Next, all the inside corners get a healthy coat of thinned joint compound in which to bed the paper corner tape, then I go over the paper with another coat of mud using the corner trowel. This first coat of mud is also when I find any screws that are still proud of the GWB face — sometimes if the power screwdriver isn't held perfectly perpendicular to the face of the wallboard, it'll leave part of the screw head proud of the surface (which I'd rather have to deal with than if I set the screws too deep, and they blow through the facing paper). It's hard to see if this has happened while installing the screws, but it shows up as soon as the first coat of mud goes on as a little ridge at the protruding screw head. These screws get a little tweak with the M12™ hex driver in the wet compound as I find them, then a fresh dab of mud and a pass with the 8-inch spreader removes any ridge. The last task for the initial coat is to go over all the seams with the mesh tape and the 6-inch knife, and then give any metal corner bead a first coat with the 6-inch knife.
Once the first coat work has been done to all the walls and allowed to dry (which usually takes a couple days to do the whole room, and then at least one over night for the most recent section to dry completely), I go over everything with 120-grit sanding mesh and the "dust-free" vacuum sander. This removes any ridges from the initial coat of compound, and makes it easier to see where the compound has left any little "craters" over the screw heads, as it generally shrinks a bit as it dries. Everything then gets a second coat of mud with the 8-inch spreader for the screws, and the 12-inch spreader for the seams and corners. Once the second coat has dried over night, I look over everything again using the portable work light held at a close, raking angle to the wall, and sand off any high spots with 240-grit on the vacuum sander. For walls that will get wallpapered, it then gets a final very light coat with the 12-inch spreader, then checked again with the light and sanded with 240-grit as needed (this is considered a "Level 4" finish). For walls that get the textured finish, the entire surface gets a skim coat of compound with the 12-inch spreader and the 14-inch trowels. The skim coat doesn't get sanded much when dried, as the trowel finish adds a little interest to the final texture (so it's not a true "Level 5" finish, since it doesn't get a final sanding). The texturing work then proceeds with the big brush and trowels (as described above for the closet), and once that dries everything is ready for primer.
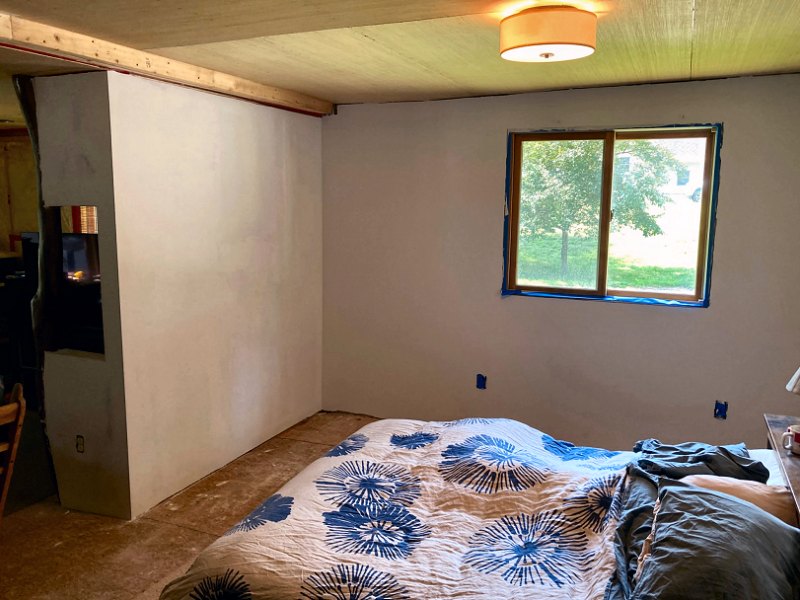 The bedroom walls get paint & wallpaper (9 photos).
Bedroom Wall Paint & Wallpaper: Summer 2024
It's hard to believe that after over 14 years of looking at plastic covered stud walls and wall insulation, this is actually happening. After the
plaster work was taken care of a couple days ago, I've managed to get all the bedroom walls primed with PVA drywall primer! I'll let this stuff
dry over night, then it's time for the initial base color coat of "Prairie Dance" on the two exterior walls. I also think we're going to make an
exception to our "rule" about interior wall finished on those little tokonoma partition walls (on the far left
in the first photo here) and not put wallpaper or any textured finish on those — wallpaper might look a little odd on those
walls when the fusuma doors are closed, and the textured finish is "supposed" to only go on exterior facing walls.
We're just going to go with an unsanded, troweled finish with paint and glaze (so the color matches the rest of the painted & glazed walls)
and see how that looks for now. Once the living room drywall and paint work is done, then we can decide whether to leave those partitions plain, or
go with texture or wallpaper.
While working on the stain and top coat application for all the finished ceiling panels (discussed at length over on the Living Room page), I found the time get the two perimeter walls of the bedroom painted with their base coat of "Prairie Dance". After that dried over night, I then got after the first contrasting glaze application with the dark tinted stuff to bring out the textured surface (the actual application technique is discussed above for the closet, so I'm not going to repeat it here). The next day I added many areas of "highlight glaze" to lighten things up a bit, then after another over night to dry, both walls got a final coat of very slightly tinted "Prairie Dance" glaze to tone down the contrast from the previous glaze steps. We're very pleased with how the room is lookin', and now I just need to get the remainder of the wallpaper applied for the bedroom and closet partition walls.
A couple days later with lots of welcome rain outside, we spent the afternoon taking care of the wallpaper application for the bedroom partition walls. Before we got started, I went through all the wallpaper I had from when I purchased it some 15 years ago for the bathroom and kitchen work. It looked like we'd have enough (just barely) to do all the bedroom partition walls, then hit the back of the tokonoma wall as well. That would leave us just enough for a little strip in the living room that goes on a partition wall between the genkan and living room (which doesn't have wallboard yet). I had tried to find a supplier for the wallpaper before we got started, but it seems this stuff hasn't been made by anyone for many years. I originally purchased it from American Blinds, Wallpaper & More back in 2009, but they're long gone - as is Steve's Blinds & Wallpaper which took over from them. I did manage to find a very close lookin' grasscloth from Wallpaper Boulevard, pattern #488-413 of the Decorators Grasscloth II pattern book (our original stuff was made by Oriental Collections, pattern #488-124, which no longer exists), and I figured we could use that new stuff on the back of the tokonoma wall if needed. Luckily we had enough of the original, and it all went up pretty quick. With that, the wall paint & paper work has been completed for the bedroom and closet/laundry room!
Working Out the Attic Access: Winter 2023-24
Installation of the finished ceiling panels is the next step to make progress on the interior work (and as mentioned above, I address getting the
stain and top coat applied to all those panels on the Living Room page), but before the installation work
can get underway, I need to deal with the big hole in the ceiling for the attic. I initially worked out most of my ideas for creating the attic access
hatch last Winter after the rough attic opening was framed (and this section was written at that time and added to the Living Room page). Since
the attic hatch opening is going to require a little work to square up the rough opening before ceiling installation can proceed, I think it makes more
sense to have this hatch information here on the Bedroom page even though it's chronologically out of order.
Anyway, the old attic hatch was a just a piece of 5/8-inch thick plywood about two and a half feet square, hinged on one edge to open up into the attic with no insulation on it. It was held flush to the ceiling when closed with some trim boards nailed to the ceiling around the opening, and that was it. The new attic opening is nearly three feet wide and over five feet long to allow access with a step-tansu "staircase", and the hatch should have 16-inches of insulation on it to match the rest of the attic floor depth. I'd also like to make it so it doesn't rest on ceiling trim around the opening when closed, as that trim protruding into the opening when open will easily get beat up when moving things in and out of the attic. That means the relatively bulky thing will need to be held in place (and air sealed) from above, which also means it will need to open up into the attic for access to the space, rather than swing down somehow.
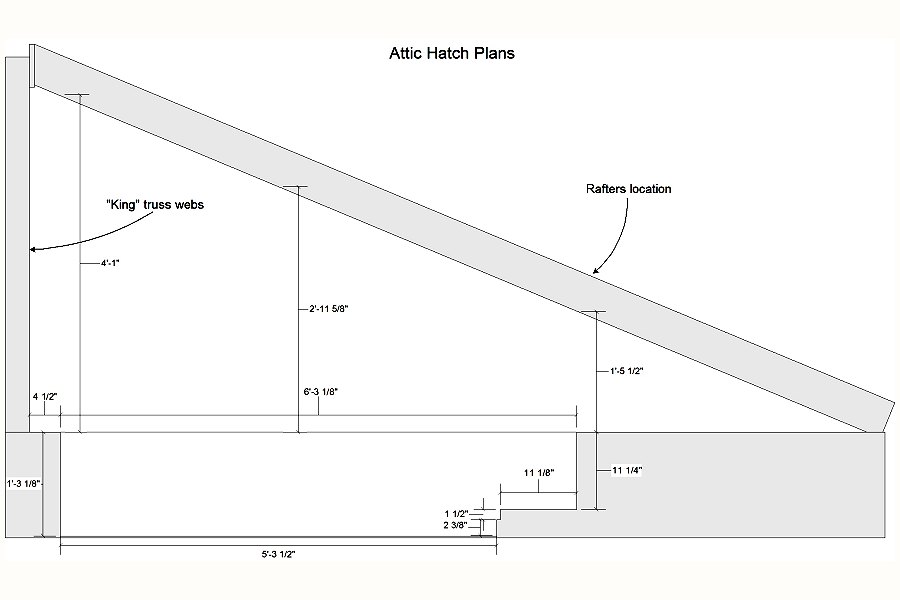 The initial attic hatch plans (9 sheets).
As usual, I started to work out how this might all happen on the drawing board. My first thought was to make it a 2-piece affair, with two sections each 32-inches long and hinged at one end, then again in the center. This hinged thing would then open up into the attic with some kinda counter-weight/pulley affair to make the weight manageable, and keep it from falling shut while in use. Once I added a basic frame for the hatch sections to the plan, it became very clear that trying to open the hatch with both halves connected together wasn't gonna work, at least not if I wanted the thing to have any insulation on it. As soon as any movement is attempted with hinges in place, the sections jamb against the end and can't move. I also considered using separate sections that are each hinged at their ends, but there's not enough room above the far end for the open piece to allow any access to the attic. I even thought of just making a plywood hatch that filled the whole opening and lifted straight up, but that would mean there'd need to be some kinda big insulation "plug" above it that would be nearly impossible to get back into place when coming down from the attic (never mind figuring out how to air seal the hatch, as well as what to do with the hatch when accessing the attic).
After working through a few of these ideas on these plans (also available as Hatch Plans ![]() ),
I got back to the original notion of using two sections that are supported from above by a "lip" around the perimeter of the opening that
will rest on the attic floor (and provide an area for weatherstripping, so there won't be any trim protruding into the opening to get damaged).
The first piece will be connected to the floor with a couple hinges and use the counter-weight/pulley system as a lift assist. The end of that
piece will need to be built at an angle, so when it swings up it won't interfere with the other hatch section. That other hatch section will then
need to be lifted out of the opening and set aside for attic access (or lifted, turned at an angle, and brought down the stairs). If I add
some old carpet to the attic floor on each side of the hatch opening, that should prevent the lift-out section from getting scratched in use, and
still allow plenty of room to get in and out of the attic. I'm also thinking about making that "top step" thing go away, even though it was
a bit of a pain to build in the first place. I added it when I built the raised attic floor to provide a little extra space when climbing into the
attic with the step-tansu, but there's so little space above it because of the rafters, we really don't make use of it.
),
I got back to the original notion of using two sections that are supported from above by a "lip" around the perimeter of the opening that
will rest on the attic floor (and provide an area for weatherstripping, so there won't be any trim protruding into the opening to get damaged).
The first piece will be connected to the floor with a couple hinges and use the counter-weight/pulley system as a lift assist. The end of that
piece will need to be built at an angle, so when it swings up it won't interfere with the other hatch section. That other hatch section will then
need to be lifted out of the opening and set aside for attic access (or lifted, turned at an angle, and brought down the stairs). If I add
some old carpet to the attic floor on each side of the hatch opening, that should prevent the lift-out section from getting scratched in use, and
still allow plenty of room to get in and out of the attic. I'm also thinking about making that "top step" thing go away, even though it was
a bit of a pain to build in the first place. I added it when I built the raised attic floor to provide a little extra space when climbing into the
attic with the step-tansu, but there's so little space above it because of the rafters, we really don't make use of it.
Finish Carpentry for the Attic Access Opening: Summer 2024
Before I can start building the hatch sections, I first need to do a little work on the hatch opening — the framing I built around it
when working on the attic floor is properly squared, but the one old ceiling joist that defines one side of the opening is not square
to the rest of the opening (all the old ceiling joists were installed at a slight angle from front to back). The point of this work
is to make the opening truly square, and to make it so the ceiling trim doesn't protrude into the opening. The two partition walls below the
opening are now covered with 1/2" thick drywall, and those will eventually also get a piece of 3/4" thick trim. That means
those two faces (the closet side and bathroom end of the opening) above the walls will need to "shrink" by 1-1/4"
to keep those surfaces of the opening even with the trim below. The bedroom end of the opening only needs a slight change to add a little
material to cover the sides of the metal rafter hangers that are proud of that face surface, and then the living room side of the opening
is the one that's not square with the other three surfaces.
To get this task started, I first did a little rummaging in the shop to see what materials I had available for the job. I had a few extra lengths of 2x4 that had been ripped in half for nailers during the ceiling leveling work, and also found a couple pieces of the ceiling "underlayment" 1/4" plywood that should work as new attic opening cover panels. As I was pretty much making up how this was gonna go together as I went, figuring out what manner of stock I had available would dictate how I proceeded. Based on what I found, I determined I could add solid wood trim around the bottom of the opening that gets a rabbet on the bottom to receive the finished ceiling panel (and leave a 1/4" surface to hide the panel end-grain), then add a rabbet to the face for the new 1/4" plywood cover panel inside the opening. I re-surfaced two of the ripped 2x4s to a final dimension of 1-1/4" by 1-1/2" for the bathroom end and closet side bottom opening trim, then cleaned up a piece of 3/4" scrap to be 1/2" by 1-1/4" for the bedroom end trim. I can then deal with the slightly tapered living room side trim to square up the opening after the other pieces are installed.
 Work on the attic hatch opening (12 photos).
Making the rabbets for the 1/4" plywood started with the Stanley No. 78 handplane working on the smallest piece for the bedroom end of the opening. The workbench is still covered with a couple 12-foot 2x12s (which will likely become temporary stair stringers, but for now are just handy covers for the bench for staining the ceiling panels), so to hold this little piece of stock for hand planing I just put a screw through each end into the 2x12 (and the screw holes will be removed when the stock is cut to final length). The other three pieces of stock got their cover panel and ceiling panel rabbets with the router table, and after a little clean-up hand sanding everything was ready for final fitting.
Installation for the bottom of the opening trim started with getting the closet side piece and the two end pieces cut to length, then a little chisel work on their back sides to clear the rafter hanger metal bits that are proud of the existing opening surfaces. The closet side piece was then installed with glue and screws, ensuring the little rabbet for the finish ceiling panels is level and even with the existing ceiling "underlayment" plywood. The two end pieces were next, and those were double-checked for square against the closet side piece. The last bottom piece was another length of rabbetted 1-1/4" wide stock, but this was the side that was out-of-square with the rest of the opening. To make it right, I carefully measured over from the two other corners, marked the final width for the tapered side piece at each end, then ripped the taper on the bandsaw. After a little clean-up with the No. 6 plane, the last bottom piece was glued and screwed in place level with the other pieces. The bottom of the opening was now truly square.
Next, I used a bunch of scrap bits of 2x4 to make the inset "step" go away, as it really serves no purpose now and will make construction of the actual hatch a little easier if it's gone. While installing the framing to fill the step area, I also worked on the stock to hold the liner panel for the bathroom end of the opening, making sure it was even and plumb with the bottom trim rabbet. That led to doing the same for the other three vertical surfaces of the opening – a bunch of scrap bits of 2x4 were ripped on the bandsaw then fed through the thickness planer to create vertical supports for the 1/4" plywood liner panels. All those were installed with glue and the brad nailer, spaced about 8-inches apart and even with the rabbet in the bottom trim and then shimmed as needed to ensure they're all plumb. I then prepped some more stock to trim the top perimeter of the opening. The top perimeter trim received rabbets on the bits that extend into the sides of the opening to receive the cover panels, flush with the vertical supports, as well as under the top of each piece so the lip of the hatch will rest on solid wood when it's closed (rather than the somewhat ragged edge of the OSB flooring). To get these top pieces installed, I then needed to cut away a little of the OSB around the top of the opening, which made quite a mess. I then fitted the top perimeter trim pieces with a little touch-up to their rabbets to get them flush with the vertical supports, and again attached them all with glue and screws.
The last thing to do was to then get the 1/4" plywood liner panels installed. I first stained the bottom edge of the lower perimeter trim to match the ceiling panels, then got the liner panels cut to size. I want to keep the interior free of anything that might snag clothing when getting into the attic, so rather than nail or screw the panels in place, I decided to just glue each panel to the trim and vertical supports with no other fasteners. Since there as no way to actually clamp the panels while the glue cured (and they all had a little bow to them), I simply used a bunch of scrap wood cut to the proper length, then used them to hold pressure on the panels with shims and ensure good surface contact for the glue. I don't plan to stain any of this new attic opening trim that's above the ceiling, although I may add a coat of clear to the plywood to seal the surface and make it easier to keep clean. I think this opening trim stuff may be one of the oddest little projects I've undertaken recently, but it worked out pretty well. With the attic opening trim work completed, the finished ceiling work for the bedroom can now begin.
 A quick "cheat sheet" to get things started (1 sheet).
Finished Ceiling Panel Installation: Late Summer 2024
The design of the ceiling for both the bedroom and living room is something we've struggled with a bit for a long time. The look we're trying to
achieve is a sort of "board & batten" suspended ceiling (saobuchi tenjou) that became common in Sukiya style
homes early in the Edo period. This ceiling layout consists of long, square cross-members (saobuchi) that span the room and
are mortised into a supporting ledge (mawaribuchi) at the perimeter walls. The saobuchi are then
covered with wide, thin planks (tenjou-ita) that are nailed perpendicular to the saobuchi from
above, and held down with wedges into blocks along the back edge of the adjoining boards. These boards each overlap the next board along one edge
(hence the blocks & wedges), with a shallow cove ploughed just off the edge of the back of the overlapped board so its edge can bend up
and over the next board. The whole works is also supported from above (since the saobuchi aren't actually strong enough
to do so by themselves) with "ceiling joists" (nobuchi) that are connected to the roof rafters with vertical
members (tsuriki).
We knew we wanted to create the look of the traditional saobuchi tenjou, but the trouble has been how we could actually pull that off without resorting to traditional methods (including obtaining nearly 600 square-feet of 14 or 16 inch wide Hinoki Cypress planks – "prohibitively expensive" doesn't begin to describe the cost of that stuff). So, the compromise we came up with was to use stained 1/4" plywood, cut into 16-inch wide strips to emulate the tenjou-ita planks, then add small trim boards every 2-feet across the ceiling to create the look of the saobuchi boards. The overlapping edge bit is the part that's been of the most concern. I considered ploughing a small cove in the back of each panel near the edge, then rabbetting off the rest of the back between the cove and the edge (basically just leaving the face veneer at that edge). The edge of the next panel would then get a little chamfer to receive the relieved edge of the first panel so it looked like one panel overlaps the other. That sounds reasonable but after a little experimenting with some scrap plywood, the most likely result was that the thin edge would simply split off, or the chamfer would just stick down while the other edge remained flat. We determined the most reasonable approach was to just leave the panels flat with a tiny 45° chamfer sanded into the face veneer (so each plank would still be noticeable) and not bother with the overlapping edge business.
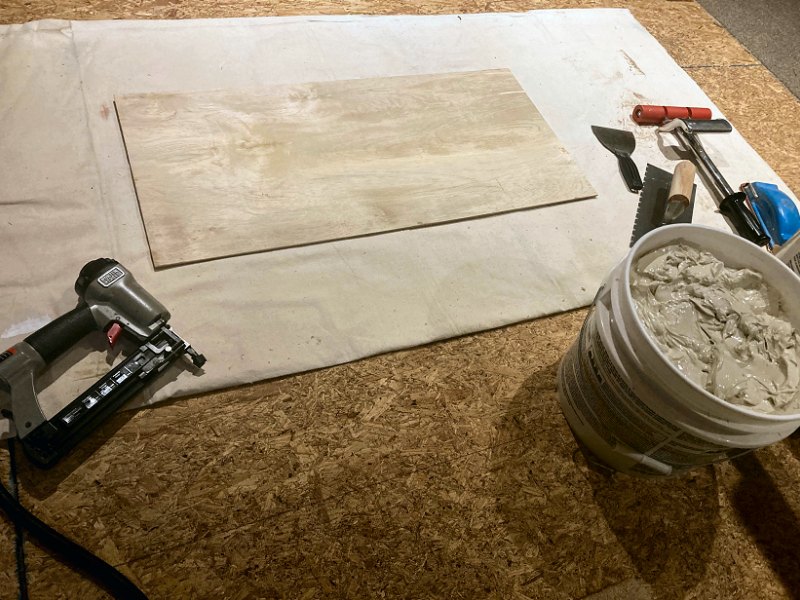 Finished ceiling installation work begins (7 photos).
With the decision to not make overlapping edges worked out, I still needed to take care of a little prep work before the ceiling installation work could begin. My small Porter-Cable® BN125A brad nailer stopped working while taking care of that attic opening work so I ordered a re-build kit for that (I was able to finish the job with the larger BN200A nailer, at least), and I also wanted new blades for the sliding compound miter saw and the 5-1/2" Skilsaw™ to ensure I'd get clean cuts in those freshly finished ceiling panels. While waiting for that stuff to show up, I pulled up the bedroom ceiling plans and put together a new sheet that shows where each of the ceiling panels is supposed to go, as well as the location of all the little nailers I added to the ceiling framing back when I was doing the leveling work. I'll need to find and mark each of the nailers before I get started, but having them visible on the plan sheet should make that a fairly simple task. I also added a few measurements for the first few panels that will determine how the rest will be placed.
Panel installation started in the corner next to the fusuma door header between the bedroom and living room, as that's the closest thing to a square corner in the room. After getting the first couple panels between the header and the hatch opening installed, work continued across the ceiling starting with a short piece with an end against the header, then the remaining pieces for that row to span the room. The adhesive was spread on each panel on a dropcloth on the floor, then the panel was placed in position and immediately held there with one or two of the 3rd Hand braces (the adhesive is sticky stuff, but it can't hold the panels up without some help). I then go over the thing with a wide laminate roller to ensure good contact for the adhesive, followed by a handful of 18-gauge, 3/4-inch brads from the nail gun. The idea was to just use a couple brads where the trim strips will end up (the saobuchi "support" pieces, spaced every two feet over the panel end seams), but I needed to add a few more brads here and there to prevent the bigger panels from sagging before the adhesive started to hold. Once each panel was secured, I then went over the edges with a damp sponge to remove any adhesive that may have squeezed out when I went over it with the roller. I also found I needed to clean off all the adhesive from the trowel between panels, otherwise the stuff would start to cure in the notches and prevent them from leaving appropriate ridges in the stuff on the next panel.
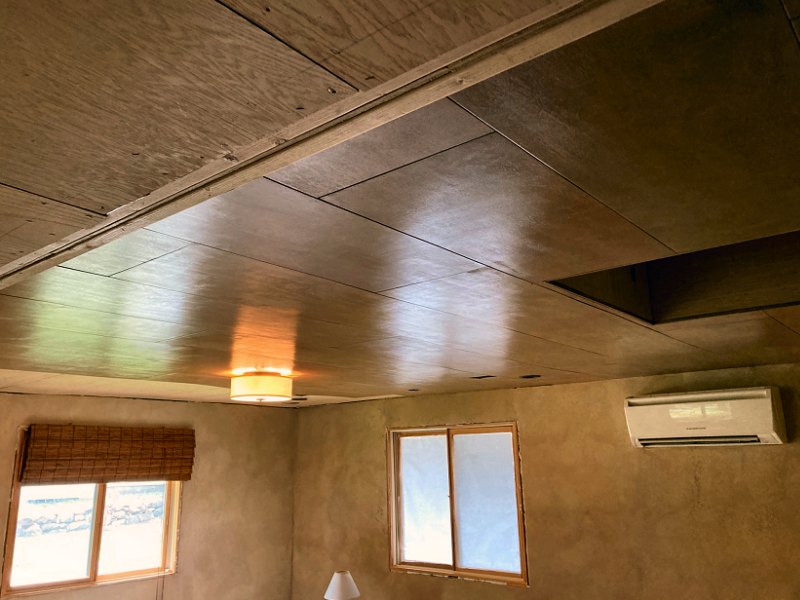 Fussing over the details (8 photos).
I then noticed that the panels weren't all perfectly aligned as I worked across the room, despite my best efforts keep everything square and tight. There's only a couple spots where things are off (by no more than 1/16 of an inch), so I just grabbed some dark brown paint and hit the gap with a tiny little brush to prevent the lighter ceiling "underlayment" plywood from being visible in the gap. Next, I hit all the little brad nail spots with a dab of Minwax® Wood Putty®, which is a non-hardening, pre-colored putty (as opposed to hardening, sandable wood "filler"). I've found this stuff to work very well for trim brad nail filler – it can be thinned with mineral spirits, and the color can even be altered a little with a few drops of Minwax® oil-based stain. It shrinks a bit after application as it dries, so after I go over all the spots with mineral spirits for clean-up, I then hit 'em again with more putty as needed. This is slow work but I think the results are worth it. I don't add a second applcation to the brads I know will be covered by trim, but any nail spots that are going to remain exposed do get that second dab and later clean-up (which is why this is a fairly lengthy process — one can only rub a rag with solvent and firm pressure on the ceiling for so long at a time).
The final task for the ceiling panels was to then go over the whole surface with a Scotch-Brite® type woven, abrasive pad and knock back a little of the gloss. The dual-brush application technique I use for clear coat application leaves a fine finish, but I feel it's a little too glossy for the ceiling. The satin finish is too dull, so I've found the lightly scuffed, semi-gloss finish looks just right. I use the maroon colored abrasive pads (which are generally considered equivalent to 320 – 400 grit) with a pole-mounted, swivel-head drywall sander pad and just go over everything with light pressure. I then go over the whole surface one last time with a barely-damp towel to remove any dust from the abrasive pads. We're very happy with how the ceiling is lookin', and the slight variation in the ceiling panel color adds some interest (certainly more than if I'd just slapped up full 4 x 8 sheets of plywood and called it good). I'll still need to fiddle with those little assist handle hanger doors, but I'll deal with those when the time comes for ceiling trim installation.
Closet/Laundry Room Flooring Installation: Late Winter/Early Spring 2025
After the living room finished ceiling panel work was wrapped up over Winter 2024/25, we returned to
working to finish the bedroom & closet/laundry room spaces, which meant it was time to get the final flooring installed. We decided to go
with Pergo® Outlast+ "Cocoa Walters Oak" 12mm with attached underlayment laminate flooring, after
ordering a few samples of various colors from Home Depot. I picked up a few boxes of the stuff to get started with the closet/laundry room floor,
and plan to order the other 29 boxes we'll need for the rest of the house to get delivered. I also ordered a handful of tools to make the installation
go a little easier, including a new soft-faced mallet, a stout "pull bar", a tapping block, and some Bessey®
AV-2 adjustable flooring spacers (since most of the walls in here are anything but straight, so simple wedges won't do).
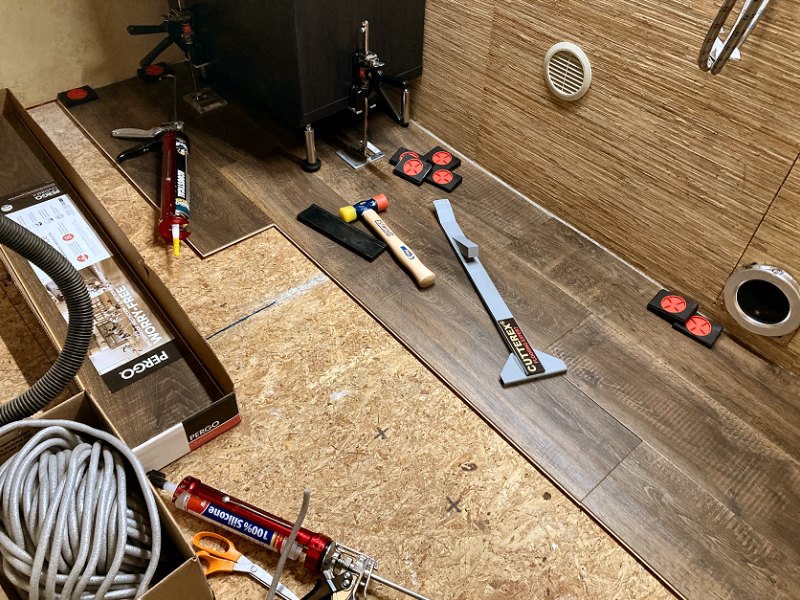 Closet flooring installation (4 photos).
Installing this stuff also requires a fair amount of caulk – Pergo® documentation states that the entire perimeter must have a 3/8" PE foam backer rod between the flooring and the walls, and that must be covered with an application of 100% Silicone sealant to maintain the lifetime warranty on the flooring. I also wanted to add a final bead of caulk at any "transitions" between wall surfaces (so the gap where the GWB meets the finished ceiling panels at the top, and where it meets the OSB underlayment at the bottom), as well as to fill all the gaps between the OSB underlayment on the sub-floor. For those areas, I chose Titebond® Acoustical Smoke & Sound Sealant (and because it's non-hardening, I couldn't put it down when the underlayment was installed as it would've just been tracked all over and made a mess). Once all the tools and supplies arrived, it was time to get this project underway.
The first couple planks to be installed were along the wall behind the laundry equipment, so that was disconnected and moved to the other side of the room. Next, rather than just start slappin' planks down, it was time for some careful measurements to ensure the finished flooring would all be properly aligned. We've already determined that about the only thing inside the house that's straight and square is the edge of the kitchen floor, with the fusuma door header straight and perpendicular to that floor line. In order to align the flooring with that door centerline, which had been marked on the floor with the laser level, I had to make a new parallel line that I could extend into the closet/laundry room. I could then measure from the edge of the first row of planks to that new straight line, and use the adjustable wall spacers to ensure that measurement was perfect. With that first row in place, the rest of the flooring should align properly with the fusuma door track as I work my way out of the closet/laundry room and across the rest of the bedroom. We'll see how that goes soon enough…
The planks for the rest of the room went down without any trouble, although I wasn't in any real hurry to get through this project. Once I had about half the floor down, I then spent some time getting the laundry equipment back in place, and also cut a piece of lumber to create a shelf to sit at the back of the washer & dryer along the wall. I also started working on the window shade for this room, which needed to be cut to the proper width and length to fit within the interior window trim. I'd get down a couple rows of planks each day while fiddlin' with these other little tasks for the room, and after a few days the floor was installed. Because the plan is to just continue the rows out the doorway and into the bedroom, I installed "filler" pieces at the doorway to keep the planks aligned, but left a little gap at each end joint so the "filler" piece can be slid out of the row and be replaced with a full-length plank when the time comes for bedroom flooring work. I then installed the perimeter backer foam and caulk for the rest of the room, and took care of the last of the floor and corner trim pieces that I'd been kickin' around since last Summer. With that, the walk-in closet/laundry room work was finished!
Bedroom Ceiling Trim Work: Summer 2025
As I mentioned recently on the Welcome/News page, I've been spending a lot of this Summer working outside, as the yard &
garden needed some attention. I've gotten things in decent shape outside, so it's finally time to get back to working on the bedroom
— with the next thing I want to address being the installation of the saobuchi ceiling trim "cross-members",
since I had managed to get all of that stock sanded, stained, and clear-coated earlier this year. Rather than keep working on the finished flooring
for the bedroom, I decided to get the trim work taken care of first. Addressing the ceiling and window trim before putting down the new floor
will ensure I don't damage the floor while doing finish carpentry on the rest of the room (and I still haven't ordered the rest of the flooring,
so that's one less stack of boxes to deal with while installing trim).
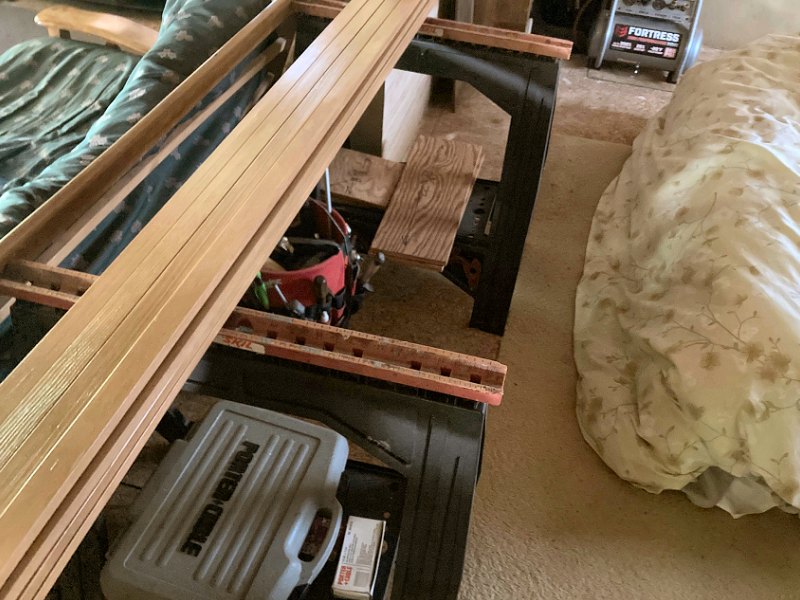 Bedroom ceiling trim work gets started (6 photos).
Before I could get started, I also needed to rebuild my Porter-Cable® BN200A brad nailer, as it had started hissing air constantly when I used it on the closet trim work. After getting a re-build kit to get that thing working again, I brought all the stock inside and set-up a little work area in the bedroom. I wanted to have all the stock stacked inside, so I could go through the wood and find pieces that grain matched well as I worked on each length. Of course, I also fiddled with the ceiling plan sheet again to work out where the seams from one piece to the next would end up. The last bit of prep work was to cut a couple of spacers from the old attic flooring 5/8" plywood to ensure all the trim went up straight and square. As you may recall, the perimeter walls are not square with each other, so everything I'm building in this space uses the long door header, which is perpendicular to the bathroom and kitchen walls, as a guide to keep things lined up. The first trim piece next to the header (to cover the first set of ceiling panel end seams) is at a rather odd distance from the header of 9-1/4", so I cut a pair of 8-5/8" wide pieces of plywood for that section (the trim is all 1-1/4" wide, so I reduced the distance by 5/8" to center the trim under the seam). All the other ceiling panels seams are 24" apart, so I cut another pair of guides that were 22-3/4" wide (24" less 5/8" on each side) which should do the job for the rest of the ceiling trim. Next, I grabbed the Titebond® Acoustical Smoke & Sound Sealant caulk and ran a bead all along where the walls meet the ceiling on the two walls at each end of the trim runs (I'll do the other two walls when it comes time to install the mawaribuchi around the perimeter). I got out my 3rd Hand HD supports to use to hold the spacers and trim pieces while I tacked each piece in place, and I could finally get started.
The actual installation work moved along pretty quickly, considering how much time I'd spent doing prep work… I begin at the front wall, and cut each trim piece at a 30° angle with the cut centered under the long panel seams (the plans in the set of photos above show how these cuts were laid out, and the cuts were arranged so the angled ends would pretty much hide each seam when viewed from the bathroom/kitchen, if that makes any sense). Each cut end was then dabbed with a little of the ceiling panel stain color and wiped off, then it was tacked in place every 16-inches with the brad nailer while being held against the spacer plywood. I got about half the ceiling done the first day, then took care of the rest the next day. After that I then turned my attention to the trim around the hatch opening, and for that I took a little time to cut half-lap joints for all those pieces to add a little interest (instead of plain butt-joints).
With everything up I then pulled out the Minwax® Wood Putty® and got the first coat applied to all the nail spots (and their "Cherry #935" is a very close match to the ceiling trim color), and then hit each seam with a dab of their "Ipswich Pine" oil-based interior stain to make each cut blend with the rest of the trim stain color. After that all set overnight, I then wiped down all the putty spots with mineral spirits and applied a second coat of putty to everything. After that cured overnight once again, it all got another wipe down with mineral spirits, then I did a very light scuff sand to all the bottoms of the trim with 220-grit sandpaper. All the trim was then vacuumed with a brush to remove any sanding dust, and I then applied a final coat of semi-gloss Minwax® water-based Polycrylic™ Protective Finish to complete the job.
Bedroom Window Finish & Trim Work: Late Summer / Early Fall 2025
Before getting after the mawaribuchi ceiling perimeter trim, I decided it was a good time to finally address the finish work
for the bedroom windows. We were having some very nice weather during late August, and in order to get stain and topcoat on these glider windows
the windows need to be open all day, so it was time to deal with them while the weather allowed.
Window finish work can be boiled down to three major steps: First, the two window panes for each unit are masked, stained, and topcoated, with the glider half removed from the frame, and the stationary half masked and worked on in place. Next, the window frame gets a sill piece added at the bottom of the frame, then it all gets masked, stained and topcoated. After all that stuff has been done, the masking is all removed and the trim pieces are installed, which have their finish applied at the bench before installation. All nail holes are then puttied and everything gets a final topcoat, then the windows are ready to get their window shades installed. Easier said than done…
 Window finish & trim work (3 photos).
To move things along and avoid having to leave the windows open all night, the window panes are stained with Minwax® Wood Finish® Water-Based Semi-Transparent stain, which also requires a coat of their Pre-Stain Wood Conditioner. Everything gets a light sanding with 150-grit first, then it's all vacuumed of dust and gets masked off as needed (and that masking work takes a while to get right). The Pre-Stain then goes on, sits a few minutes, and then any excess is wiped away. After that has dried for 15-30 minutes, it gets another light sanding to remove any raised grain, and the Wood-Finish® color stain goes on (which is supposed to happen within two hours of the Pre-Stain application). This water-based stain stuff is very different than "normal" oil-based stains, in that it's about the consistency of pudding, and needs to get wiped away almost as soon as it's applied. They say remove the excess "within 2 minutes", but in reality it needs to be wiped pretty much as soon as the brush gets put down. It sets almost instantly, and if it's not wiped down immediately, it'll leave a splotchy mess. The good news is if it sets too quickly while wiping, more can be applied to loosen it up again and get it wiped down correctly. After the first coat has dried for at least an hour, I then repeat the whole process to get a second coat applied and darken the color a bit. The Pre-Stain and color coats can all get done in an afternoon, then the panes go back into the frames for the night.
The next day the panes are pulled again and topcoat work begins. For the topcoat on all interior trim I use the same "two-brush technique" that I've been using for years for application of Minwax® Polycrylic™ water-based Protective Finish. I start with their Satin finish, brushed on evenly to cover each piece of the frame, then dragged over with a dry foam brush to remove any brush strokes and any excess from the edges and ends of the wood. This stuff dries in about two hours for handling and re-coat, and I usually do three coats of the Satin (and I use the Satin so I can see where the fresh coat is going on – if using the Semi-gloss or Gloss for initial coats, it's very hard to tell what's wet and what's the previous, coat due to the shine). After the third coat of Satin has dried a couple hours, it gets a very light sanding with 240-grits, then gets a coat of Semi-gloss before re-assembly. While working on the panes, I also mill the rest of the trim stock, and glued and nail in place the bottom sill extension.
After topcoat is done, all the masking is removed from the panes, and the whole process is repeated for the window frame and sill in the wall — a day for a coat of Pre-Stain, then sanding and a couple coats of stain. The day after that, the topcoat work gets underway on the frame, while the rest of the trim gets cut to size and finish work starts on that too. Once their frames are finished the rest of the trim is installed with the nailer, gets putty on the nail holes over a couple days, and finally everything is hit with a final coat of Gloss finish. Getting all this finish and trim done for the two bedroom windows took nearly a month, and then it was time to deal with getting the window shades installed.
Bedroom Window Shades: Fall 2025
The window shades need customization to properly fit in all our windows, but we really like the finished look of these things so I think
it's worth the hassle. I bought enough shades to do all the windows back in 2005, when it was time to get a few installed for the office
windows when working on the genkan back then. I've been moving that heap of shades around the attic for the past
20 years, and was pleasantly surprised to find I hadn't lost any of the little mounting hardware kits, and the shades were still in fine shape
in their original plastic bags. These shades are made with dark tinted Bamboo slats, and are all "Roman Shades", which means they fold
up as their raised, rather than the more typical roller shades. Because of how the little slats all overlap each other, they're also very good at
blocking outside light and providing privacy when down.
 Window shade work (3 photos).
To get them to fit in between the vertical window frame trims, they need to lose about a 1/2" of width, which I used to attempt by just rolling the thing up as tight as I could get it, then taking a bit off each end with the sliding compound miter saw. The trouble was that usually resulted in a fair number of ends that ended up a little ragged and splintered. I'd then individually sand and try to stain each end to match the original finish. Not fun. This time around I tried something different – I still started by rolling them up tight, but then I put a couple wraps of masking tape around each end, a 1/4" from the end. I then stood the thing up and clamped in the leg vise of the work bench, then used the Porter-Cable® 4 x 24 belt sander with 180-grit belt to just sand down to the tape line. It worked very well, and left no splintered ends.
Next, I basically completely disassemble the shade and rebuild it. Where the shade and front valance is attached to the top mounting bar, it's got fairly bulky folds front and back to cover the fasteners. Both those pieces are removed then re-attached without the folds. Next, all the little rings the lift cords go through are removed and relocated to work properly with the shorter shade (I think they started as 6-foot long shades, and I only need 'em to be 3-1/2 feet long). They're then cut to the new length, with a couple extra inches at the bottom that then gets folded up and glued in place with a load of spring clamps overnight. I also use clear caulk for the top sections when those get re-attached, as well as within the bottom fold to ensure there's no loose strings that would let the whole works unravel. The mounting brackets are then hit with some black spray paint to hide them, and the things get mounted to those with their original wingnuts. The final step is to mill a couple 1/8" thick strips that get stained and topcoated, then get glued and attached with the pin nailer as a new top valance. Like I said, it's a bit of a hassle, but they do the job nicely when they're installed, and it's very nice to have some properly fitted window treatments at long last.
More Bedroom Ceiling Trim Work: Fall 2025
With all the fiddling around with window trim and shade customization done, the last thing I wanted to take care of before tackling the bedroom
floor was to address the rest of the ceiling trim. As mentioned above, our goal is to create the traditional saobuchi tenjou
ceiling, but we're basically creating the thing in the reverse order of how it's actually supposed to go up. Traditionally it would start with
the perimeter support members (mawaribuchi) installed first, which then have the cross-member supports
(saobuchi) fit into evenly spaced notches in those on opposite ends of the room. The last step is to then place the
tenjou-ita planks on the cross-members, nailed to the cross-members and wedged to each other from above. We're doing
everything backwards (so panels first, to look like planks, then "cross-member" trim pieces attached from below), so the last step
is to get the perimeter trim milled, finished, fit, and installed to complete the desired saobuchi tenjou appearance.
 Prep & installation of the mawaribuchi (4 photos).
For the mawaribuchi perimeter trim, the first question was to determine what material to use to create the trim stock. I didn't want to use plain 3/4" thick stuff, as I felt that would look too flimsy. I then briefly considered using 2 x 6 stock that would get planed down to 1-1/4" or 1" thick, then ripped into 1-3/8" or so wide strips to create a little more substantial looking support material. After having a look through the available 2 x 6 stock at Home Depot (and not looking forward to the amount of milling it would require to get right), I figured there had to be a better way. The good news is while grabbing some 3/4" stock for the window trim, I noticed they also have some very nice 5/4 x 6 stuff available that will do the job nicely, and only need to get ripped into smaller widths to make proper looking mawaribuchi.
I bought a half a dozen boards of the 5/4 x 6 stuff, which is more than enough to take care of the bedroom ceiling perimeter. I then ripped each one into three pieces, which ended up with each piece just over 1-5/8" wide. Those were then clamped together on edge and got a couple passes with the No. 6 plane to remove any saw marks, followed by the belt sander to get them all the exact same width. For the finish color, we decided not to go with the "Dark Walnut" stain that we've been using for most of the interior trim, as that would be too much of a contrast to the rest of the ceiling stuff, but also wanted this stuff to be a little darker than the saobuchi (which is already a little darker than the ceiling panels). The ceiling panels are a mix of Olympic® "Desert Sand" and "Aspen Tan". The saobuchi all got an initial coat of that same mix, then got a second coat with Minwax® "Ipswich Pine", which was spread on then immediately wiped off to just give it all a little bit warmer tint. For the mawaribuchi I started again with the base mix from the panels, but after that dried overnight I used the slightly darker Minwax® "Early American" as the second "tint" coat (which is the color we used on the tokobashira and daikokubashira, so it still works to tie everything together). All the stock was then given a few coats of the Minwax® Polycrylic™ clear stuff, ending with a final topcoat of that in Semi-Gloss. Getting these multiple coats of different colors stains applied takes a while to get right, but we're very happy with the how the different finish colors all work together.
Installation of the mawaribuchi began with the short piece over the closet/laundry room doorway, with that piece getting cut to length, then it got a little hand tool work to get it ready to put up. I decided to use half-laps for the inner and outer corner connections, so those were carefully marked then cut and chiseled out by hand. Then the piece is held in position and the notches for the saobuchi are marked, then those get the same treatment. The last tweak for each piece is to then plane off a small 45° chamfer on the top outside corner to ensure there's no interference from the corner caulk bead between the wall and ceiling. For the area under the hatch opening, I couldn't use the 5/4 stock as it would've protruded into the hatch opening (and likely get beat up when moving stuff in or out of the attic), so I milled down some 3/4 stuff to be thinner than the existing hatch trim, then had to stain and topcoat that to match the rest of the perimeter trim. The 5/4 stuff was attached using the 15 gauge angle nailer, which allowed me to use 2-1/2" fasteners driven in from below to attach to the 2x nail blocks above the ceiling panels. The run along the West wall got a 30° angle cut for the butt joint above the window, along with the matching half-laps for each end. The South wall pieces also got the same end laps and 30° butt over the window, along with the top corner chamfer and all the little hand cut notches for the ends of the saobuchi.
 Trim work along the fusuma door header (7 photos).
With most of the ceiling perimeter trim up, I then had to deal with the run along the fusuma doors header between the bedroom and living room (along with the two end pieces for the North and South wall runs where they meet the header). Rather than just put the mawaribuchi up in the corner between the ceiling and the header, I wanted to get the header 3/4 trim up first, then the 5/4 mawaribuchi would go up against that trim and the ceiling. That is to say, I wanted the full thickness of the mawaribuchi visible along the door opening, rather than being partially obscured by having the header trim attached below it, if that makes any sense. That meant I needed to get the 3/4 trim for the header finished and installed before I could continue with the mawaribuchi work.
I first did a little measuring of the existing bathroom door opening to figure out how wide the header trim needs to be to cover the door track and roller mounts, as I intend to use the same track and rollers for the living room/bedroom doors. I worked out that about 3-1/4 inches will do the job for the header trim on the track side, which means I'd need 6-3/4 inches to cover the header on the bedroom side (since the 3-1/2" header is exposed on the bedroom side). Rather than cut the 1 x 8 stock I had to meet that 6-3/4 inch requirement, I cut some scrap 3/4" stuff down to 1-1/2" wide and put that up first (since it will be covered by the mawaribuchi), then ripped the 1 x 8 down to 5-1/4 inches to use as the actual header trim (and I ripped off 3/4" by 3/4" strips to get it to 5-1/4", as I can use those clear, 3/4" square pieces for wall corner trim later). I also needed to plan accordingly to make the 6-foot long section of header trim that goes on the bedroom side of the tokonoma wall removable, so I'll have a place to install and adjust the fusuma doors when the time comes for that. I then spent a few days getting the header trim sanded and stained with a couple coats of "Dark Walnut ", then topcoated with five coats of clear – which took a while as these pieces needed finish on both faces and one edge, rather than the usual one face and edge. The prep for stained & clear coated wood trim work just doesn't happen fast, that's for sure.
After the 3/4" stuff was installed then got nail putty and a final coat of clear, I could finally get the last of the mawaribuchi for the bedroom installed along the header and the last two corners. With those pieces up, I then went around the room and did the nail putty work for mawaribuchi, and with that the ceiling work for the bedroom was done! I think I actually managed to create a proper lookin' saobuchi tenjou ceiling, and we're very pleased with how it looks. Time to get busy on the flooring now…
The New Bedroom Floor: Fall 2025
As long as I was in "finish carpentry mode", I took a little time to install the first length of mawaribuchi along with
the header trim on the living room side of the fusuma door header. After a few days
to take care of that, it was finally time to deal with installing the finished flooring in the bedroom. Of course, that meant I had to actually get the
flooring, so it was off to Home Depot for a materials run. When I put down the closet/laundry room floor
back in March, I had also figured how much flooring would be required for the rest of the house. The plan at that time was to order all if it
online (since they offer free delivery, and I have that discount coupon from when I ordered flooring samples), but that would also mean
I'd need to find some place to stack 29 cases of flooring while working on the bedroom and living room – and I've already got enough boxes
and bins stacked in there so I certainly don't want to add more. Instead, we just went and picked up the 11 cases that would do the bedroom in the
Vanagon, and also grabbed a couple nice, straight 2x4s, that I'll get to in a sec.
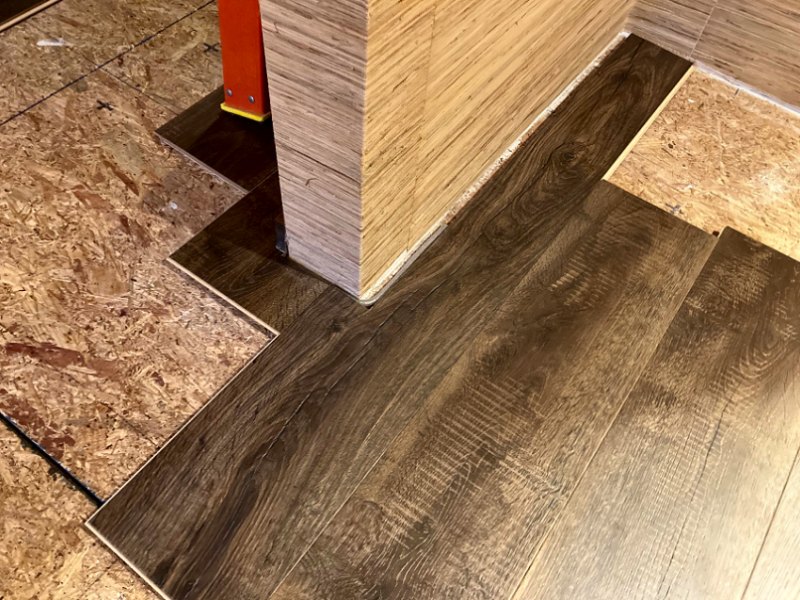 Bedroom floor installation (9 photos).
Because of how I put down the flooring for the closet/laundry room (starting at the bathroom wall, not the outer wall), and because I'm not installing a "threshold" break in the doorway to the closet, I needed to sorta work backwards from the closet doorway, across the width of the bedroom, to reach the location of the fusuma door track to start laying the bedroom floor. I started by cutting a piece to connect with existing closet floor next to the doorway, then used short cut-offs and a few new boards that were snapped in place temporarily to reach the area of the door track. At the door track location, I then pulled out the laser level to cast a line on the floor that was aligned with edge of the header (again, because it's one of the few straight and square reference things in the space). I then screwed down those 2x4s along that line so I'd have a solid, straight edge to butt the first length of floorboards against as they get installed. See the photos here and they should help illustrate what I'm attempting to explain.
With the 2x4s in place as the new starting point, I could then begin the actual floorboard work. I started with a set of ripped boards along the 2x4, then worked across the space at an angle from the corner where the door track meets the bathroom wall. I used a full length board right at the corner (in this case, the one that was ripped down to about 2-3/4" wide), then continued with a 16", 24", or 32" length to ensure I keep all the end seams staggered as I work across the room. After getting a couple cases of boards done, I then had to deal with another issue that's been botherin' me a bit since the new subfloor was laid down – the squeaks and creaks.
Since getting all the OSB underlayment material installed a few years ago, we've noticed some areas of the floor that still made noise (even though I used plenty of subfloor adhesive and staples during the installation). It was certainly much better than the old linoleum floor and nailed-down 3/4" plywood underlayment, but a couple spots still squeaked, most likely because a staple may have been driven near a gap in the subfloor boards, or creaked a bit, possibly from a lack of adhesive between the sometimes-cupped subfloor planks and the bottom of the OSB sheets. I determined the best way to address these noisy spots was to drive a few short screws in around the areas that made noise to tighten up the underlayment-to-subfloor connection. I picked up some #8, 1" long, self-drilling "deck screws" (and they're only an inch long to ensure they wouldn't go all the way through the 7/16" underlayment and 3/4" subfloor into the radiant heat tubing below the subfloor), then peppered the areas with a new screw every four to six inches apart. Sometimes the screw wouldn't pull its head all the way down (meaning I likely hit a gap or crack in the subfloor boards), so I'd back it out and try it again an inch or two away. We'd then walk around on the underlayment some more and try to find any noisy spots, then drive another handful of screws until everything was silent. The last bit of work before working across the rest of the room with new flooring was to go over all the gaps between sheets of OSB, as well as the space between the bottom of the GWB and the underlayment, with a liberal application of Titebond® Acoustical Smoke & Sound Sealant to finally seal up everything.
We then would open two or three cases of floorboards and stand them all along one wall of the room to get a look at their pattern and ensure we didn't install floorboards with the same pattern near each other. I was pretty impressed with the variety of patterns in each case of 10 boards, and we often only found one or two of the same pattern across every few cases. The floorboards then went down very quickly, with more than half the room finished on the first day. After a little break for Halloween weekend (and I don't work on Sundays) we got all but a few pieces that needed cuts done on the following Monday afternoon. The next day I ripped the last few pieces to fit the final gap along the West wall, then installed the PE foam backer and caulked the perimeter (except along the temporary door track filler piece) with 100% Silicone caulk, just as I'd done for the closet/laundry room floor. With that, the new bedroom floor installation was finished!
More Bedroom Trim Work: Fall 2025
Before getting into all the new bedroom furniture assembly, I decided to take care of some more finish carpentry work for the bedroom. I want to
get the floor trim and a couple of corner trim pieces installed before working on the furniture, so I won't have to move all the furniture to install
this trim later. I've got a few new 1 x 8's sitting in the shop from the last time I made a run for ceiling trim stock, but before I started cutting
those up for baseboards, I figured this would be a good time to go through some of the stuff that's packed on the lumber racks in the shop and see how
much of that stuff is useable for baseboard trim (and I'd rather save the new, wider stuff to mill into door trim for the closet and bathroom
doorways). One of the shelves on the rack is full of various bits of 3/4" stuff that's been sitting out there since I finished the
bathroom trim work back in 2013 (so that's far too long to be moving stacks of scrap wood
around). There was a lot of short bits of trim that had stain and clearcoat from the bathroom, so that could all go away, but I also found
a bunch of original interior door trim that I'd been keeping since I first started on interior work back in 2008 or so. I've never been
a big fan of just tossin' wood in a dumpster when doing renovations, but then again keeping a handful of boards around for 17 years seems
a little silly.
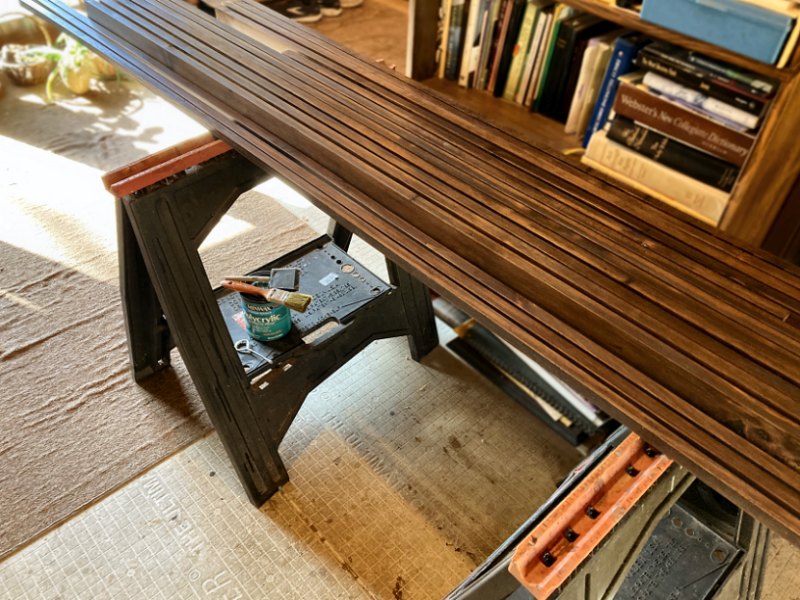 Bedroom floor trim work (3 photos).
Anyway, I found a had saved ten pieces of the old 6-foot, 8-inch long, 1 x 4 door trim, which was very straight and almost completely free of knots. It was clearcoated on one face and both edges, and had a few holes from the original 8d finish nails, but otherwise was in fine shape. Nothing wrong with re-using some 75-year-old lumber that was still in good shape, so I ripped everything down to be 2-1/4" wide for baseboards, then filled the nail holes with some wood filler and hit the back side and one edge with some 120-grit on the belt sander. I also re-filled the lumber rack shelf with a couple of the old attic floorboards, then put back a handful of pressure-treated, 1/2" square, knot free stock I'd milled down at some point long ago to use for kumiko for the tea house shoji screens, since I still need to make those some day. The rest of the stuff from the rack shelf was all cut into short lengths, then a friend with a wood stove stopped by and collected it all to use as kindling this Winter (again, no sense just puttin' it in a dumpster, since even the scrap wood is useful for someone).
I then got a couple coats of "Dark Walnut" Minwax® Wood Finish™ Oil-based stain applied outside, then brought everything inside for a few coats of Minwax® Polycrylic™ clear coat (as it's getting too cold outside to get that stuff applied in the shop). In between the finish coats of stuff on all the baseboard trim, I also finally went around the bedroom ceiling perimeter and cleaned up the last of the wood putty on the mawaribuchi and fusuma header trim that I had applied nearly a month ago.
Installing the baseboard and corner trim was uneventful, with the first bits going down where I had left off with the closet/laundry room floor trim at the doorway. I worked around the rest of the bedroom room from there, with butt joints on inside corners, 45° miters on outside corners, and my usual 30° over laps at the ends of each piece for the longer runs. I also put a little cardstock shim under the baseboard every foot or so when attaching the stuff, just to ensure it wouldn't actually touch the floor and possibly make noise later when the floorboards expand or contract. I occasionally needed to hand set the 2" brad nails as I worked along, and then I also got the wood putty applied to all the brad heads as I worked along. The next day I went over everything again and cleaned up the wood putty, and with that the floor trim work was completed.
You'll note in one of the photos that I also made up a little trim frame thing to hang on the indoor wall unit of the Mitsubishi® heat pump, and I'm still considering what I might do to further hide that big white plastic box — perhaps some manner of shoji screen, or just a wood box from ceiling panel stock. Not anything I'm gonna worry about right now though, as it's time to make some new bedroom furniture!Assembling the Bedroom Dressers: Fall 2025
A few years ago I got an e-mail from IKEA® announcing a promo they were running at the time offering free shipping for
"IKEA® Family" members. I've built plenty of their furniture in the past and have no problem with the quality
of their products – the trouble for me has always been finding stuff of theirs that "looks right" for the space I need to furnish. Their
kitchen cabinets have held up just fine (with a few tweaks during assembly), so we did a little browsing and decided their "SONGESAND"
series of bedroom furniture would work very well for our bedroom. We ordered two of the wide 6-drawer dressers, one tall 6-drawer dresser, a bed frame
with storage drawers, and a nightstand to go in a corner with a chair. A few days later the 14 heavy boxes of veneered particle board showed
up, and we've been re-arranging those boxes while working on the interior since we made the purchase five years ago, which has been no picnic.
Now with the bedroom floor and baseboard trim work finished, we can finally start getting all that furniture assembled and placed in the bedroom.
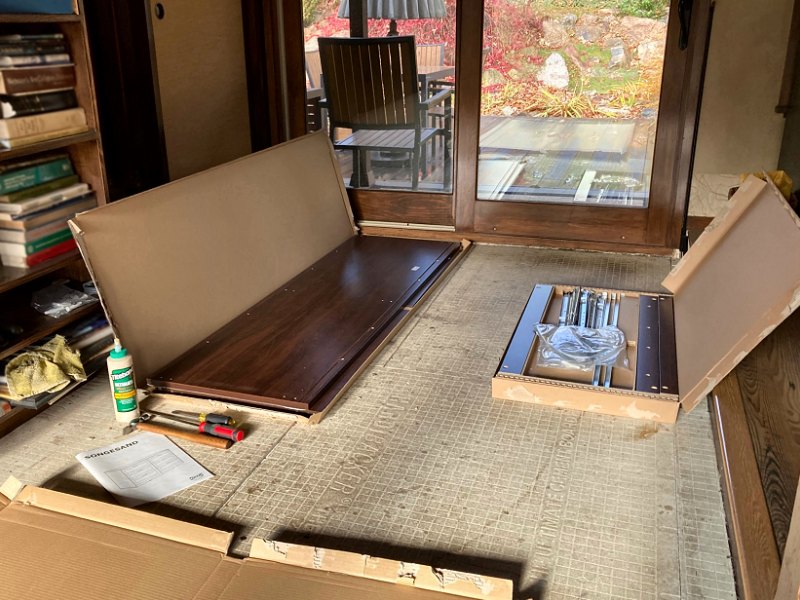 Bedroom dresser work (6 photos).
As I mentioned above, I usually do a couple "tweaks" when assembling IKEA® cabinetry: before assembling the boxes, I go over all the spots where two pieces come together and sand off the paint where they join. That way I can run a glue line along the joint, and with the paint gone it will actually bond the end of one piece to the surface of the other. All the little dowels also get glue during installation, then those little half-turn fasteners pull the two pieces together and act as a clamp for the glue. The box then gets a couple 90° corner braces clamped inside to ensure the thing is square, and left overnight for the glue to cure. The back panel then gets the paint removed around a 1/4" perimeter strip, and that gets glued into the rabbet around the inside of the back edge of the box and attached with the narrow-crown stapler (and not those little twist-shank brads they supply). The result is a very solid box that won't "wobble" if one happens to handle it poorly before hanging (if a box is even slighty "racked" before it's hung or otherwise attached to the wall, it essentially self-destructs as those metal, half-turn end fasteners get loose or pull out and cannot be re-tightened, hence all the glue during assembly). That all worked very well for the kitchen cabinetry, the wall storage units in the closet/laundry room, and the desk and drawer units I got for TLB's office a couple years ago. When I opened the first box to get started on the bedroom furniture however, I found my approach was gonna have to change…
What I discovered was that this SONGESAND stuff all appears to have a veneer finish (they call it "paper foil") applied to the particle board core of each piece, so the approach of sanding the joint surfaces down to bare wood was simply not going to be an option (and the finish is really nice, so I wasn't even gonna try to mess with it). The only thing I could actually glue together were the dowels for each joint, which is better than nothing I suppose. The backs for each piece, which generally work with all the little corner joints to hold the whole thing together, don't actually get fastened within a rabbet around the back perimeter like it does on their cabinets. On this stuff, the back slides into a small dado, and then gets held in place with little plastic fasteners that receive another plastic wedge pushed into the fastener to hold it in place. It looks like the main support to keep the whole thing together is a stout, folded metal bar that spans the interior and connects to each side with a pair of hefty, 6mm screws. With all the joints getting glue on their dowels, and then using care to not rack the box until that metal bar was installed, each piece felt very stable once it was all assembled.
The boxes went together fairly quickly, but before I could start assembling all the drawers, I had to put each unit in position and deal with the very wacky floor. As I've addressed in other interior work sections, when dealing with renovation within a 75-year old house, certain compromises have been made – the ceiling was made level, and any new partition walls were built plumb and square, but existing walls were left alone (so most of them are not plumb), and I made no attempt to correct the out-of-level floors – I built up the floors to have even transitions from one space to the next when installing all the new underlayment, but they are certainly not anything close to level. That means when placing new furniture, the furniture will need to have its legs or feet modified to keep the furniture level and plumb. Accomplishing this wasn't too bad for the kitchen cabinetry and storage for the closet/laundry room, since all those units had adjustable legs. However, this bedroom stuff just has a couple holes in the bottoms of the panels and crossmembers that get little plastic feet snapped into the holes. To make the stuff level, I put the dresser in position with one of the feet installed at the highest point of the floor where it sits, then used shims to determine the amount I'd need to raise the rest of the unit for all of the remaining feet to get it level. I then put the foot under the edge of the dresser at each position and used little "peel-a-shim" cardstock shims to determine how big a spacer would be needed for each foot. Then it was out to the shop with the feet and shim stacks to cut and hand-plane down a little piece of scrap wood to install as a spacer for each foot (see the photos above for details). The new spacers were then stained to match the furniture, attached to the bottom with a couple brads, then the feet were snapped into the spacers and the furniture was placed in position. It was pretty fussy work, but it does the job nicely and the furniture is plumb, level, and feels very sturdy.
Time for Dresser Drawers: Fall 2025
Once the dressers were assembled and in place, it was time to put together all the dresser drawers. As with the dressers, this work started out in
the genkan to have plenty of space available to layout all the parts. Each dresser gets six drawers, which came in six more
boxes of three drawers worth of parts per box. The actual assembly work was pretty simple, and again, the only parts that could get glued together
were the four dowel pins that aligned each drawer's face with its two side pieces. The rest of the drawer components are held together with the
1/2-turn connectors, so everything went together pretty quickly.
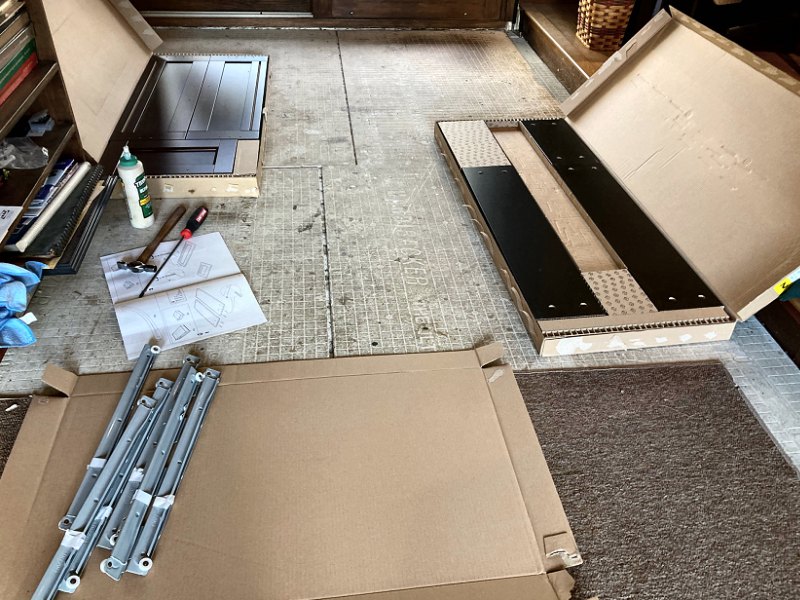 Building the drawers (3 photos).
One thing I had been curious about since purchasing this stuff was how the drawer handles were attached – I assumed they would each get a pair of screws through the face into the handle, but I was wondering whether or not the faces would be pre-drilled for handle placement. The hope was that they would NOT be pre-drilled (most of their kitchen cabinet doors and drawer fronts have no handle holes, so you can position the handles as you like), which would allow us to use a proper tansu style "bail" pull in the center of the drawer front, rather than the traditional "Western" style handle placement at the top of the drawer front. Unfortunately, the drawer fronts already each had a pair of 8mm holes at the top of the drawer fronts, so we were going to have to stick with the handles that came with the drawers (which are simple, black metal pulls, so at least they're more appropriate for us than some fancy, brass thing).
Once all the drawers were assembled, we then wiped down each one with a micro-fiber cloth and a little spritz of Scott's Liquid Gold® to remove any fingerprints or smudges, then put a single drop of oil on each of the drawer runner wheels before putting each one into the dressers. I'm also considering adding some "sachets" of Red Cedar shavings to these things to give them a proper clothing storage aroma. Years ago I collected a bunch of little mesh, draw-string "favor bags", a chunk of 4/4 Eastern Red Cedar about a foot long, along with a box of moth balls. The intent was to fill each bag with a few Cedar shavings and a couple moth balls, then hang 'em off the rafters in the attic to discourage clothing moths and silverfish (since we were storing most of our clothes in bins in the attic). I'll likely still do that now that the attic work is finished, but it may be nice to add a few sachets to the interior of the dressers as well (although I won't put moth balls in the dressers, just the Cedar shavings). We'll see if that actually happen soon.
So, after many years of dealing with plastic storage bins full of clothes, we were finally able to actually get much of our stuff organized into proper bedroom clothing storage furniture. I think I'm going to pick up some stick-on felt pads for the feet to ensure these things don't scratch the new floors, but for now the bedroom dressers are good to go!
Assembling the Rest of the Bedroom Furniture: Fall 2025
Next up was the task of putting together the new bed. After getting all the cardboard packaging from the dressers cut down to fit in our recycling
bins and out the door, we got into the two big boxes for the bed frame. Rather than put the thing together in the genkan, we
moved the coffee table out of the living room and worked on initial assembly in there. The way the thing goes together is to build the headboard
first, then put that in position in the bedroom before adding the side rails and foot board in place (so we won't need to try to carry the
assembled bed frame from one room to another, which would likely result in "racking" the frame and destroying the corner joints).
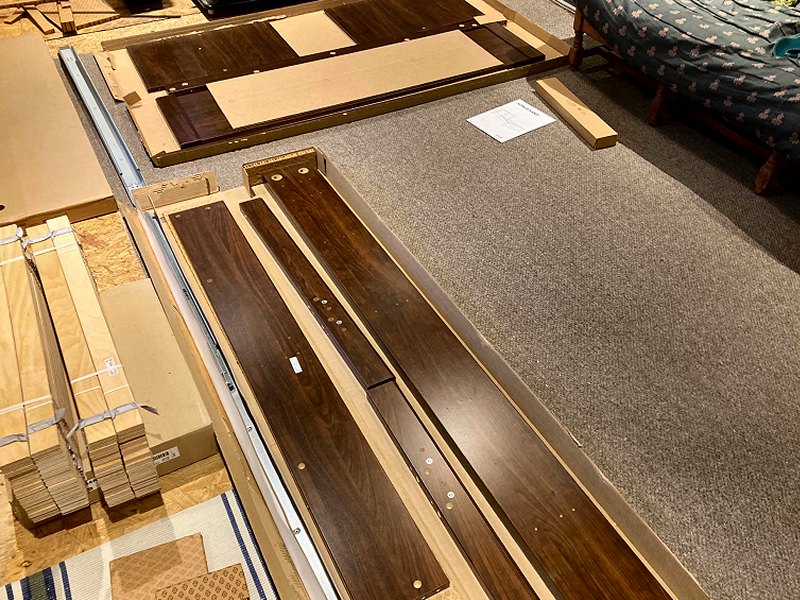 Assembling the bed (4 photos).
The item of concern with building the thing in place however, was that of how I was going to deal with making the thing level on our very wonky floor. I was also thinkin' I might do some pre-assembly cutting to reduce the height of the headboard to ensure the headboard doesn't block the bedroom window behind the bed. We started by checking the headboard height with one of the corner posts before anything was put together, and it looked like it would only stick up about an inch and a half above the window sill, so not too bad. Cutting the tops off the corner posts and the bottoms of the two headboard pieces would also require drilling lots of new holes for all the dowels and connectors, so the notion of altering all that stuff to change the height was pretty quickly abandoned. Once the frame was assembled and in place (and after a break for a day to enjoy our Thanksgiving dinner and some football games), we re-visited how to get the bed level and possibly lower the overall height a bit – perhaps by shortening the legs at the headboard then adding some material at the foot board to level it out. The limit for shortening the headboard legs was going to be dictated by the available clearance with the under-bed storage drawers, so we broke into that box and got those things assembled. We were a little disappointed to find we only had two drawers (for one side of the bed, but not both), even though I thought we had purchased the bed that came with four drawers. It looks like we'll be picking up another pair of drawers the next time we make the trip down to IKEA®.
Once ther storage drawers were assembled, we got all the bedding and mattress off the frame, put the drawers in place under the bed frame, and investigated our options with the 4-foot level and a tape measure. The right side of the headboard was over the highest spot of the floor, and it worked out that we could shorten that leg height by about 1-3/8" and still clear the top of the storage drawers, then take 3/8" off the left leg to get the headboard level (and much closer to being even with the window sill). I could then cut that 1-3/8" cut-off into two equal pieces, and those could go under the legs at the foot board to make that thing level across its width too. From head to foot the frame drops less than an 1/8" over its length, so we can live with that – the main thing is that it's not twisted and it's level from side-to-side,
With the bed level and in its final position, we then put together the last bit of furniture, which was the little nightstand that goes in the corner behind the tokonoma. I then finally opened the boxes and set-up a couple nifty "Weave" lamps I'd purchased when they were on sale from Crate & Barrel® a few years ago, and added a pair of Lutron® Caséta® plug-in lamp dimmers with a Pico remote to run those new lamps. We'll also need to pick some manner of "slipper chair" for that corner, as well as a couple new area rugs, and that will take care of furnishing the bedroom.
More photos and updates to follow as work progresses…
↑
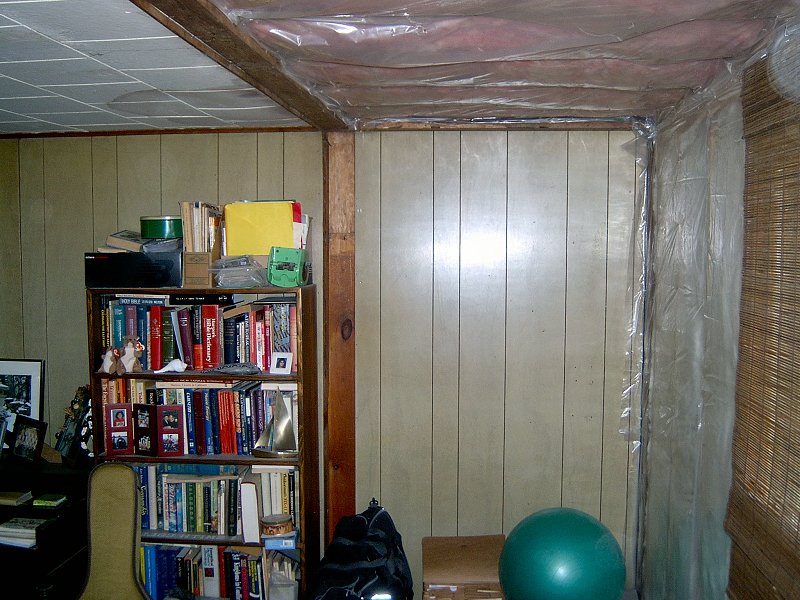
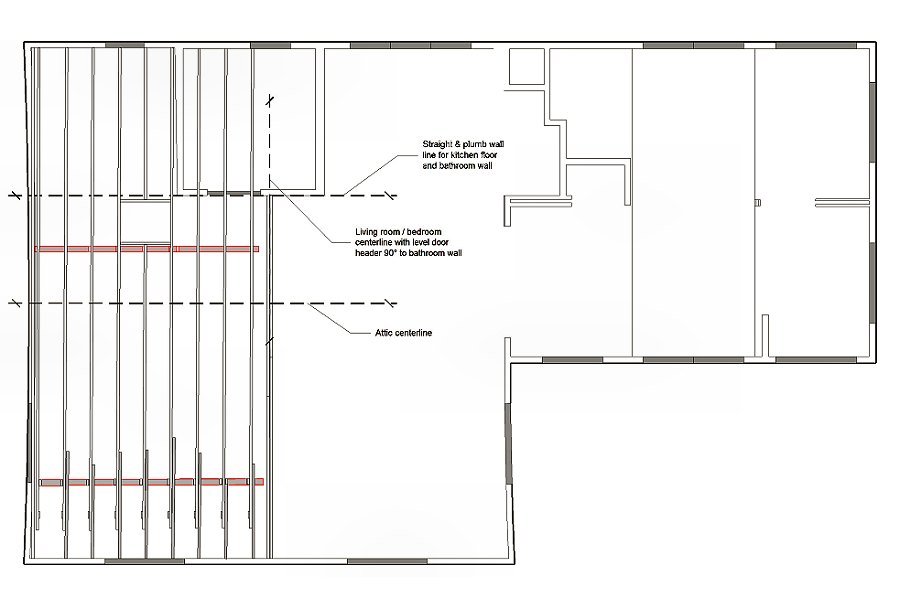
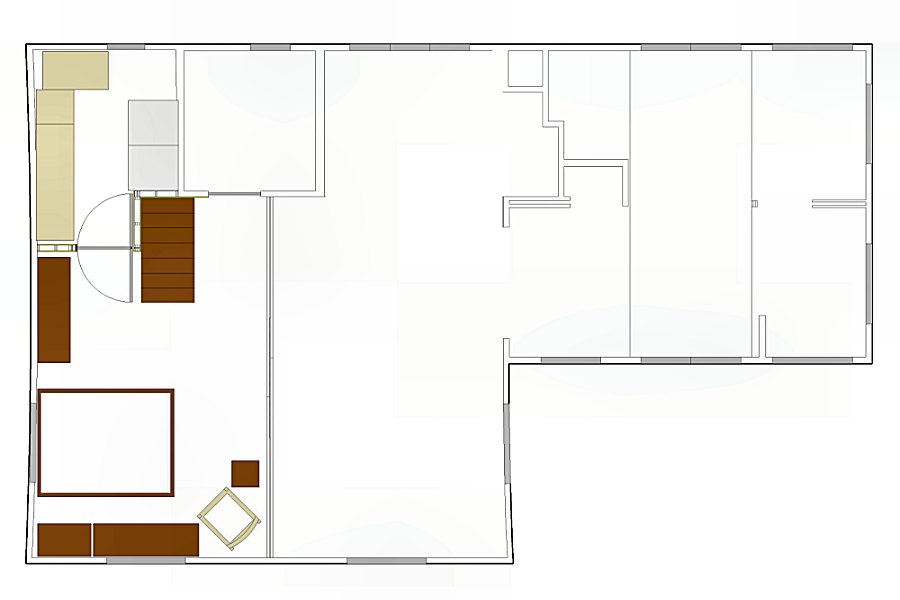
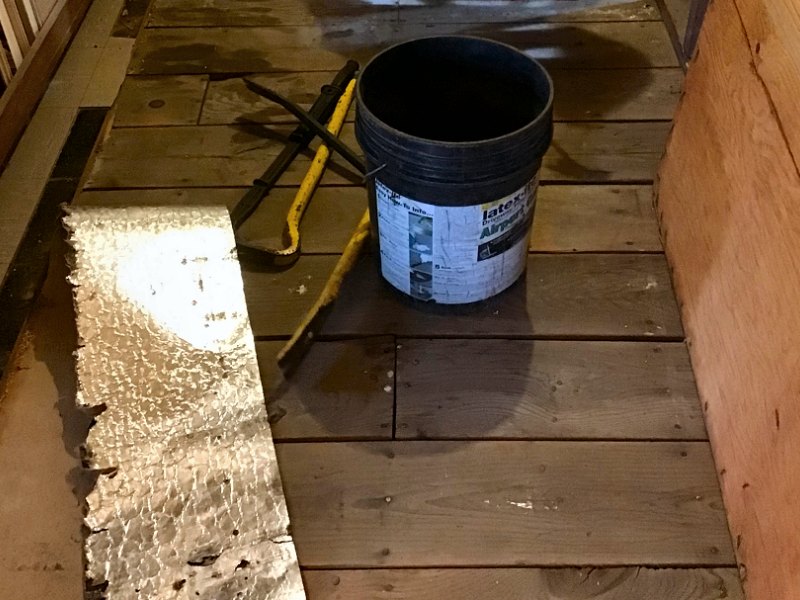
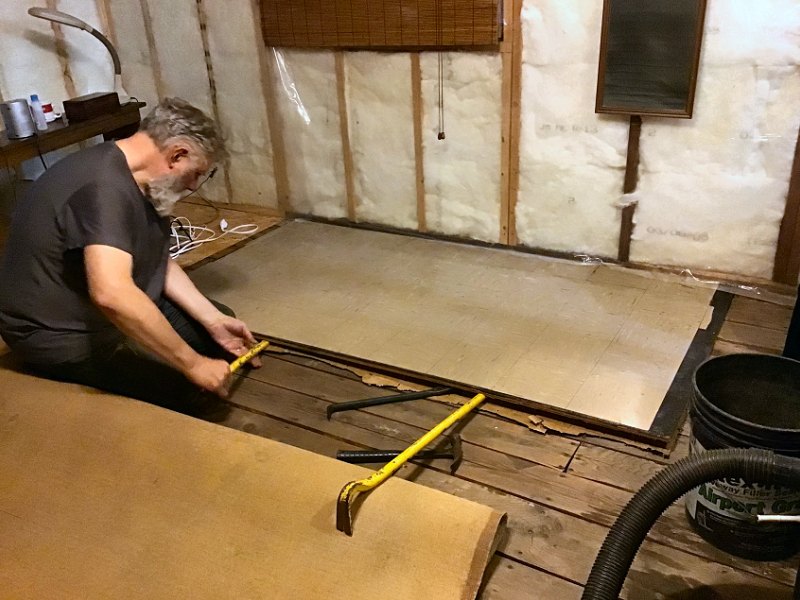
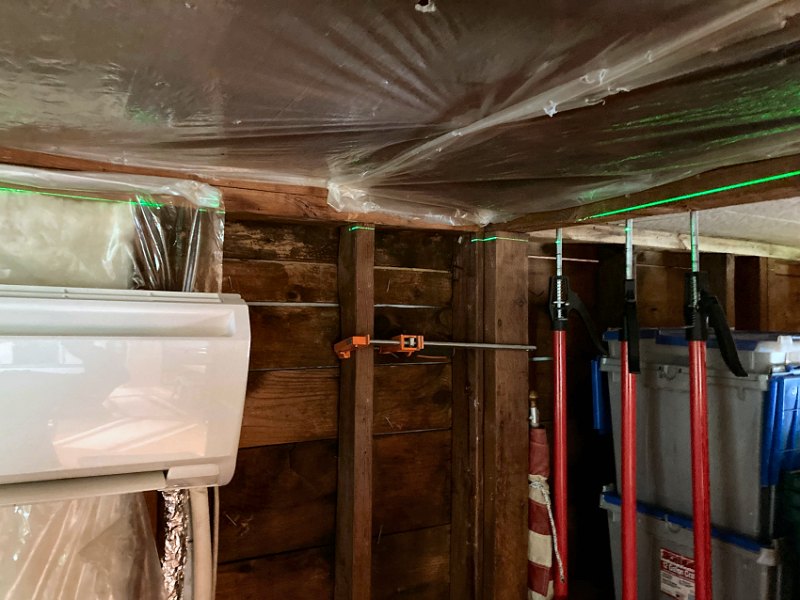
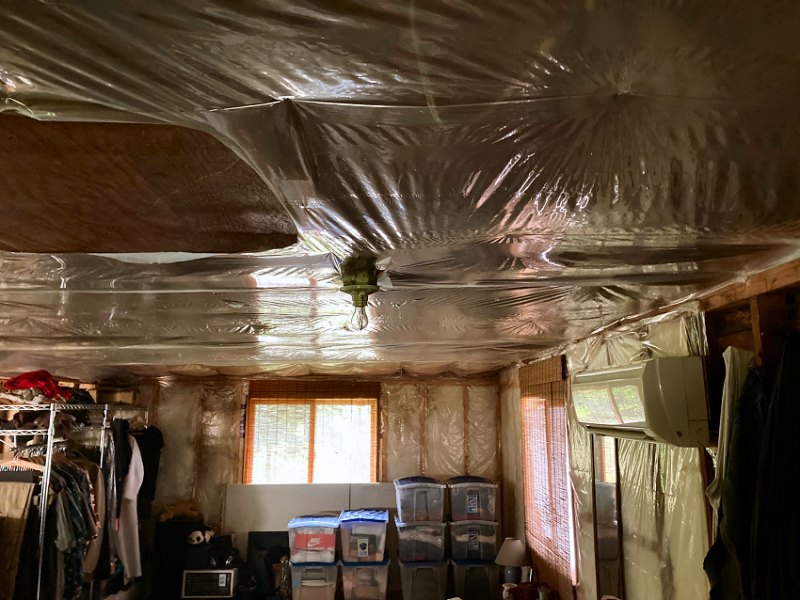
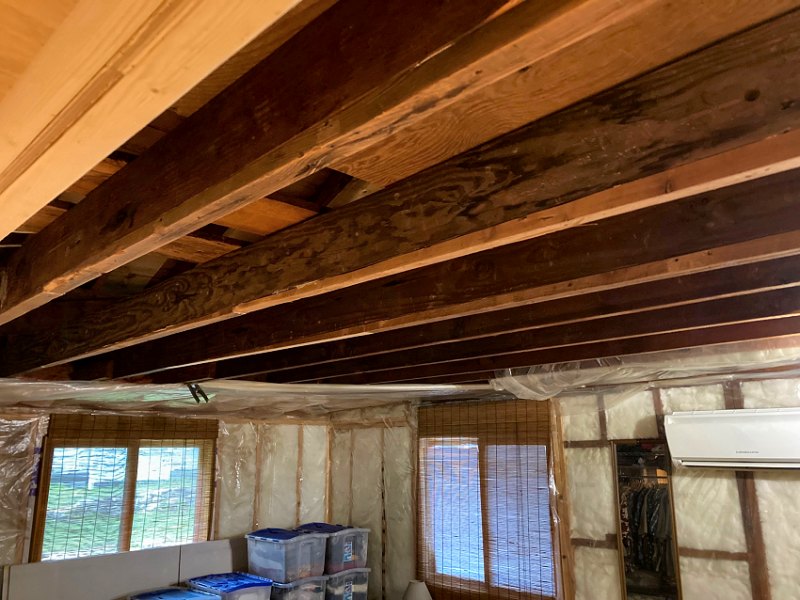
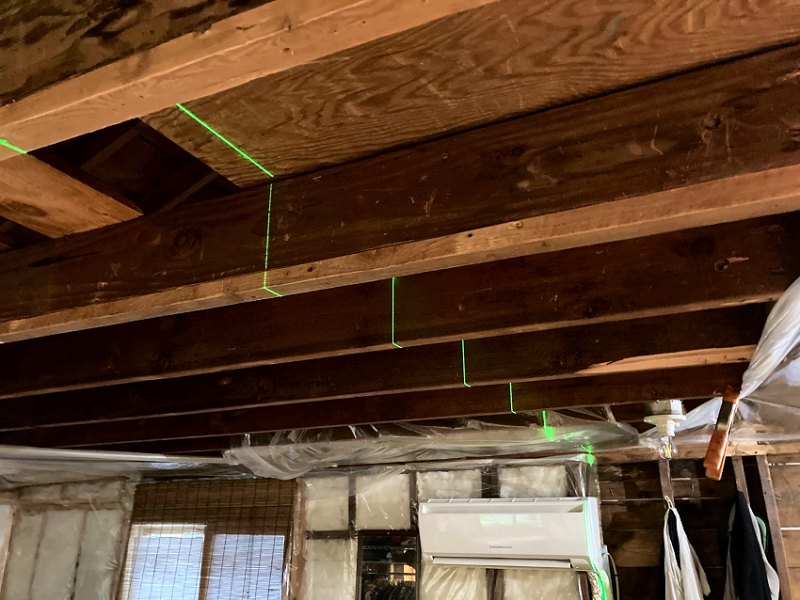
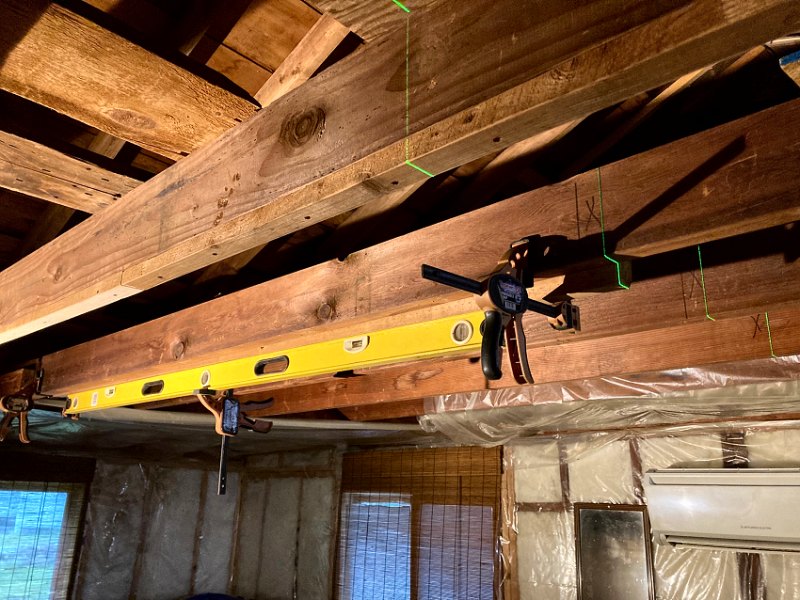
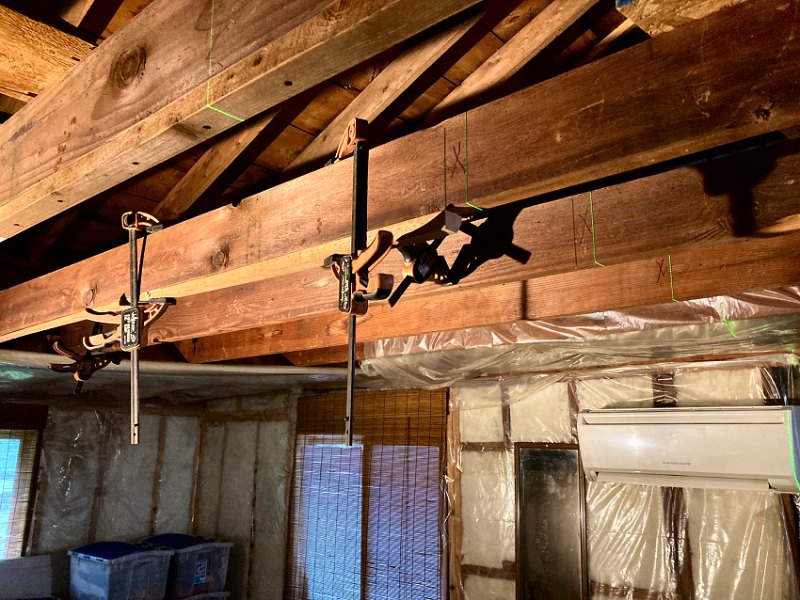
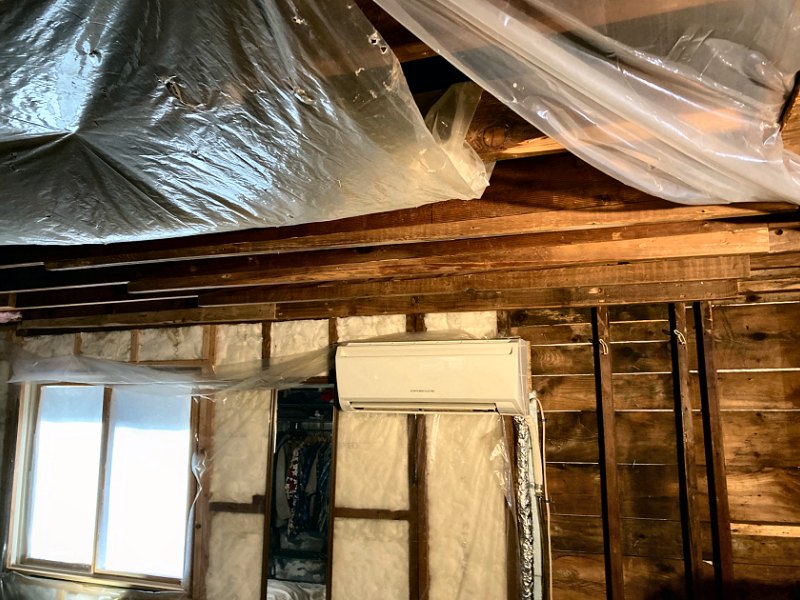
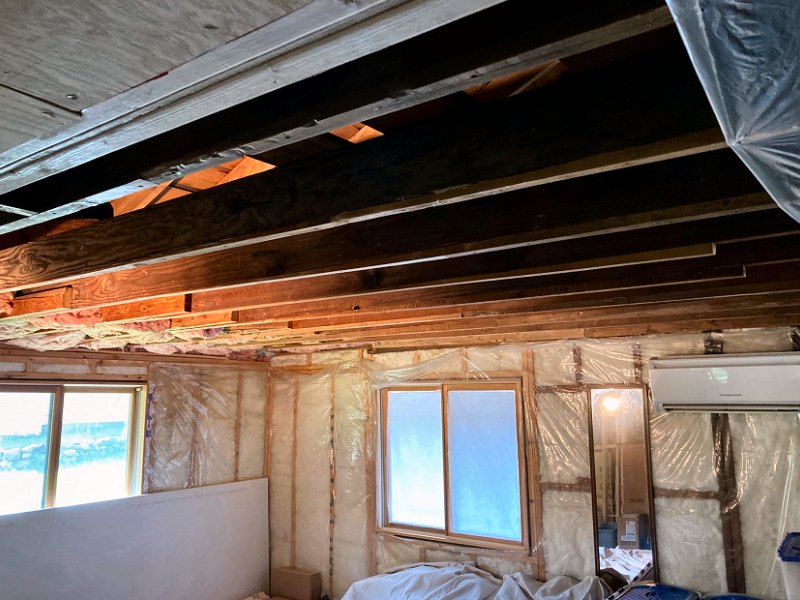
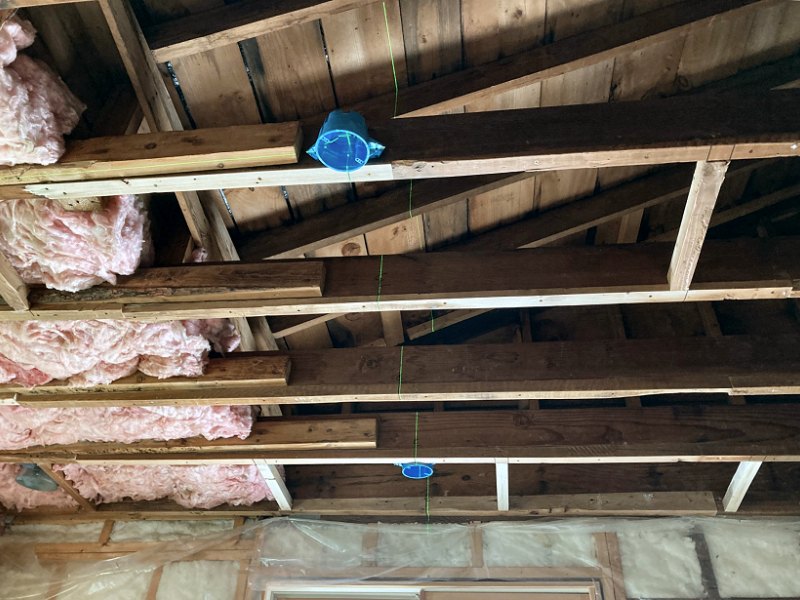
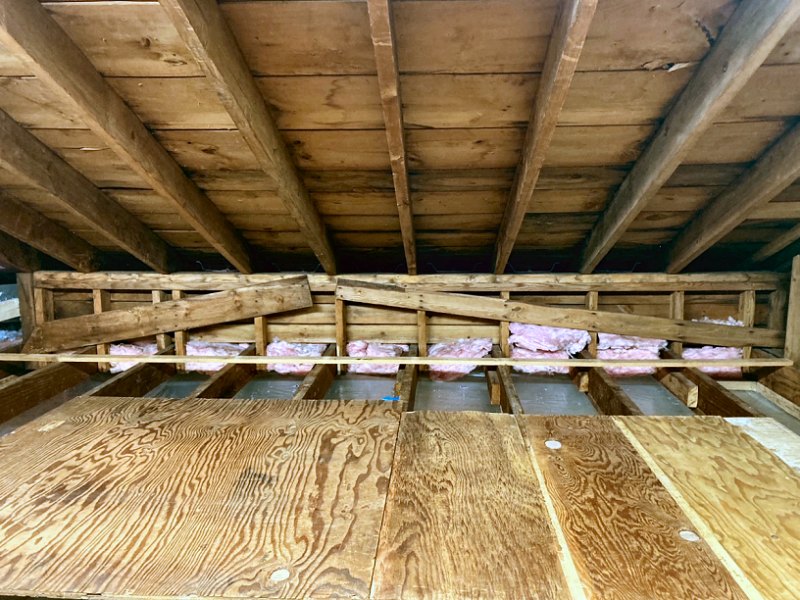
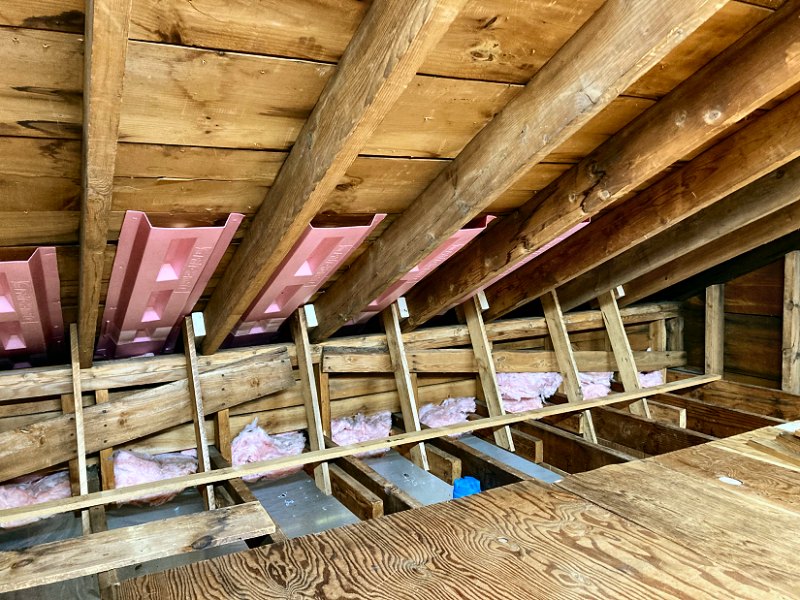
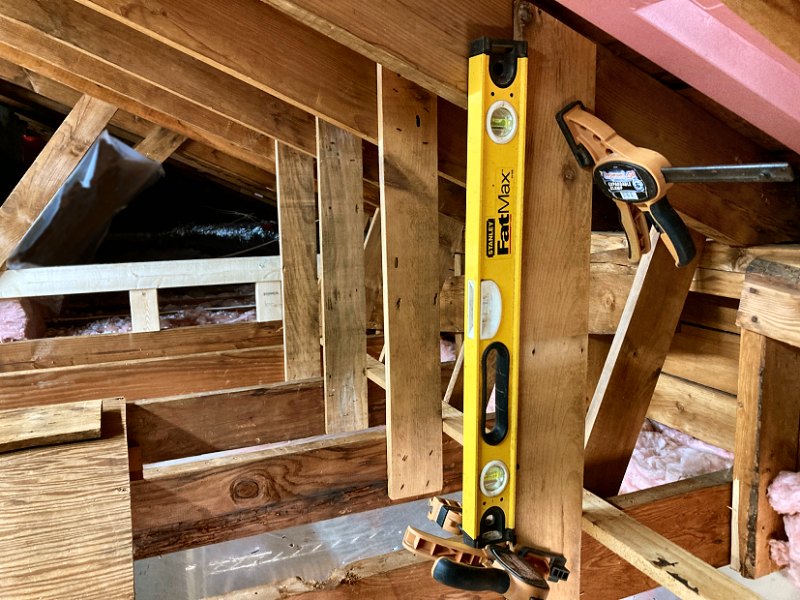
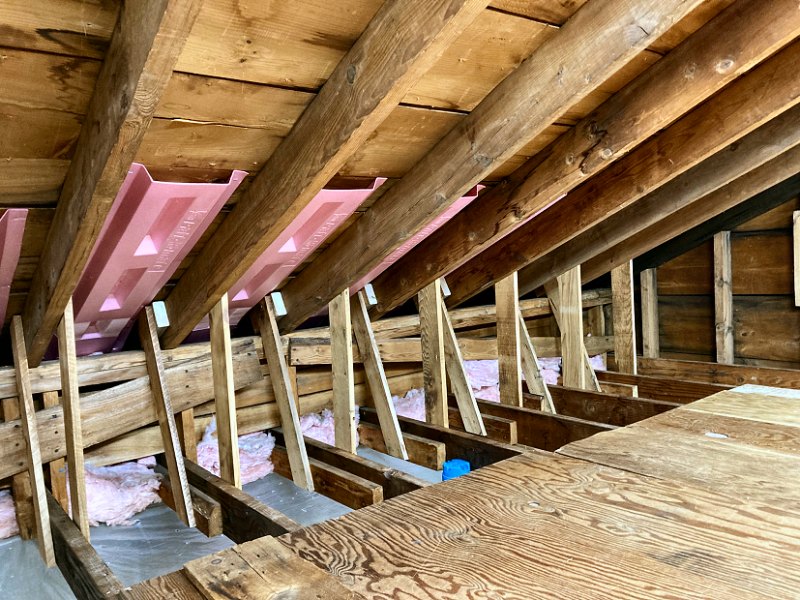
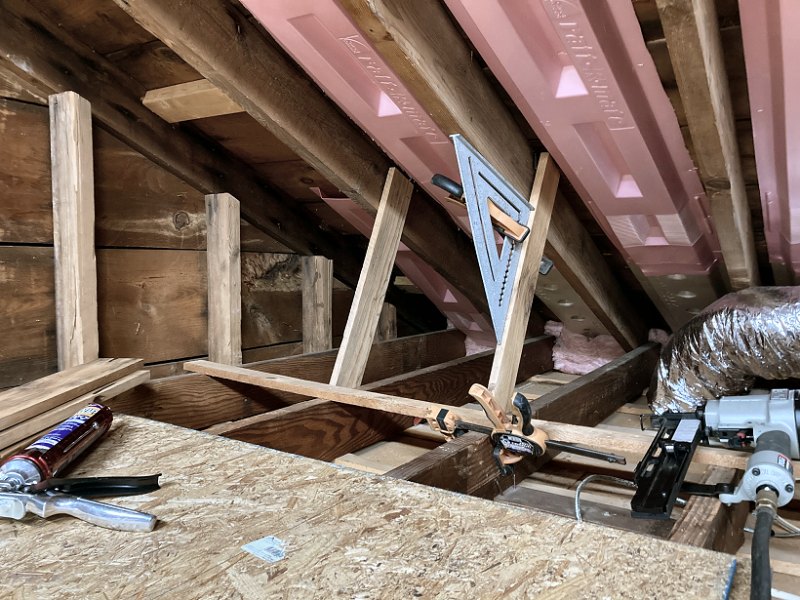
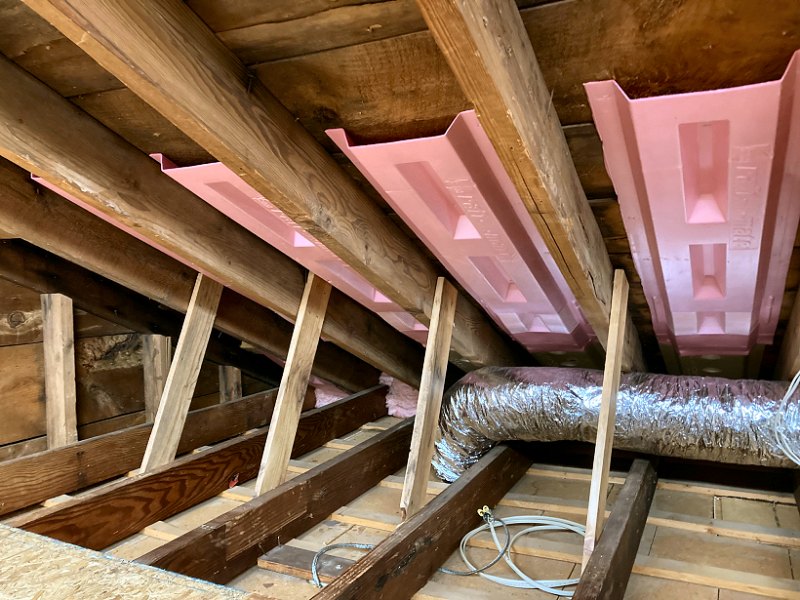
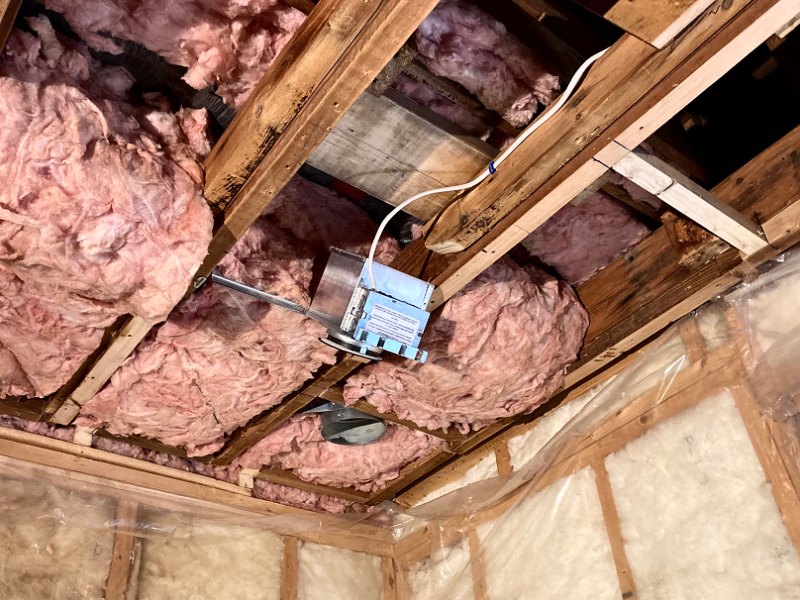
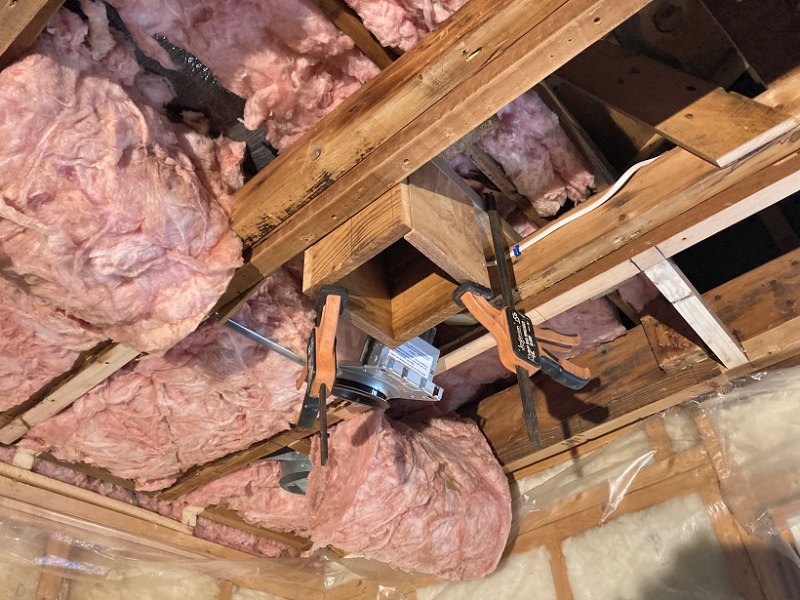
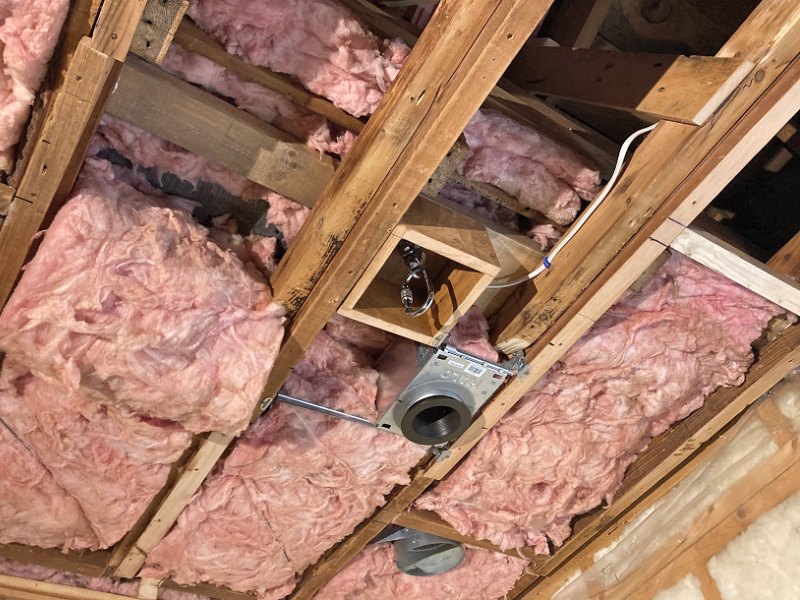
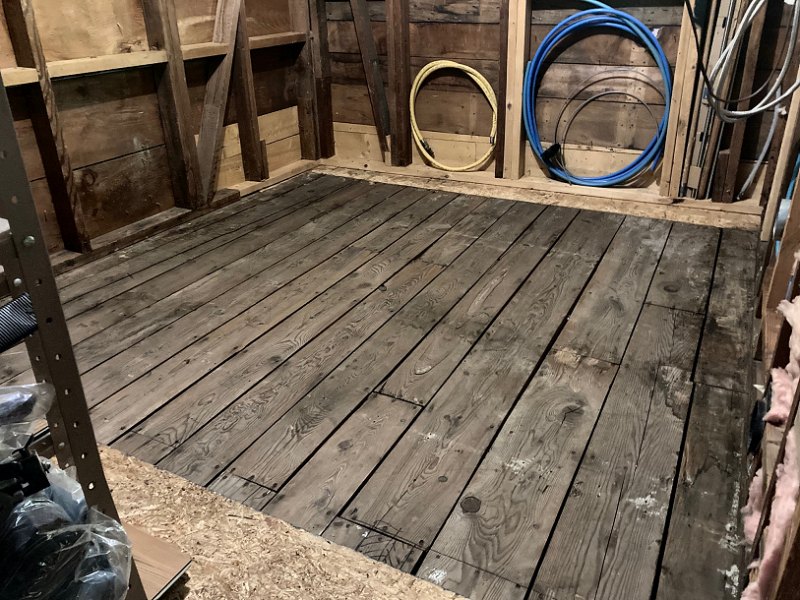
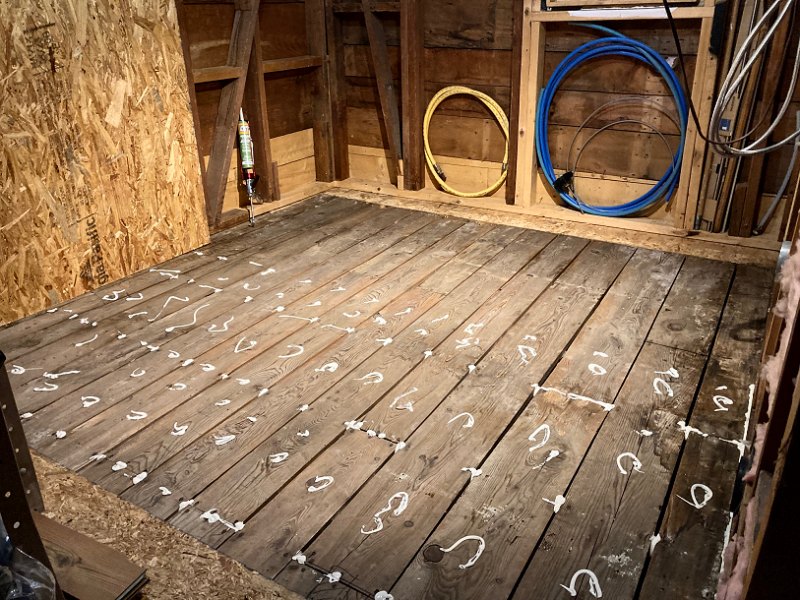
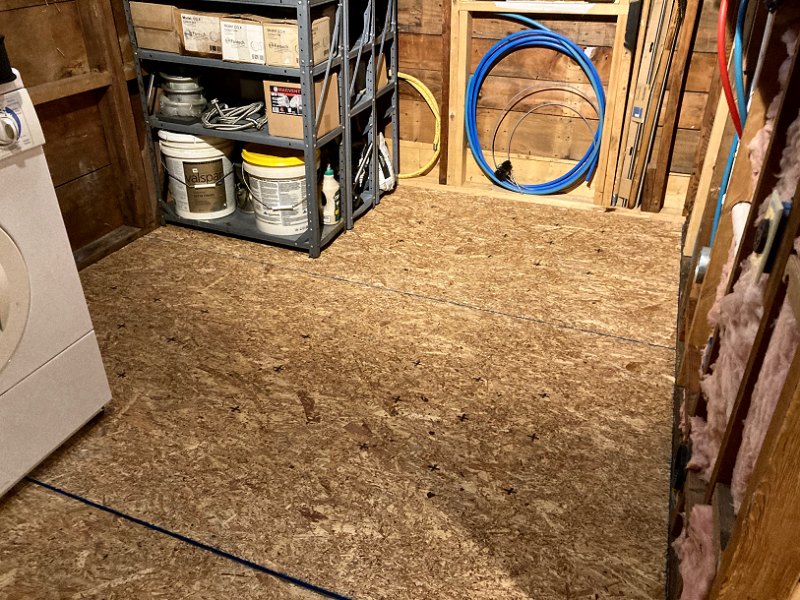
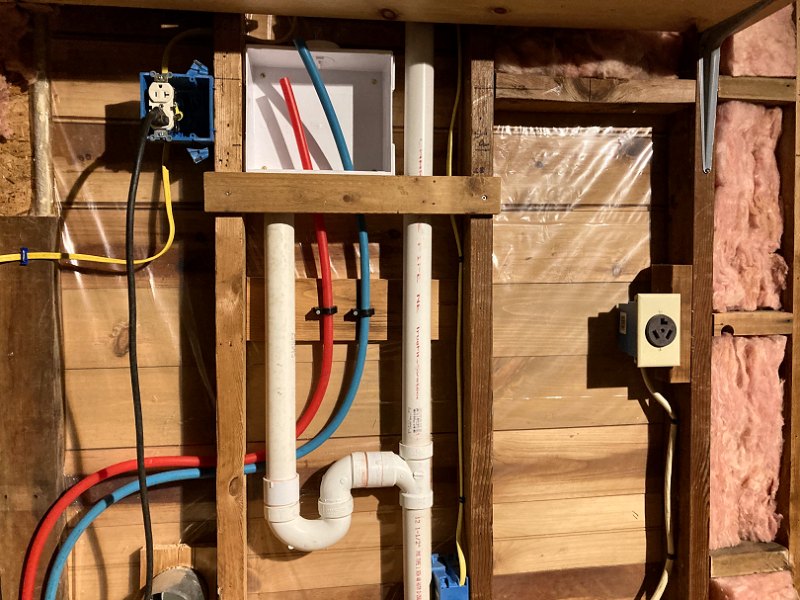
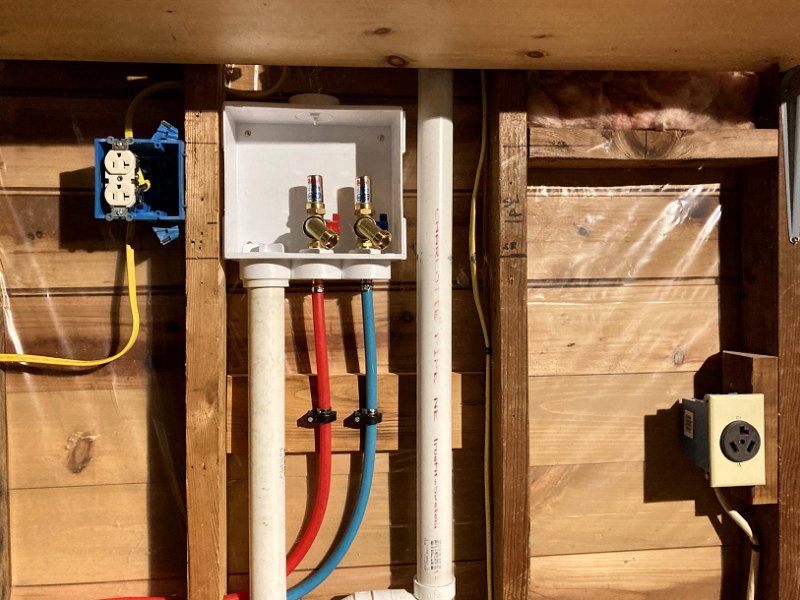
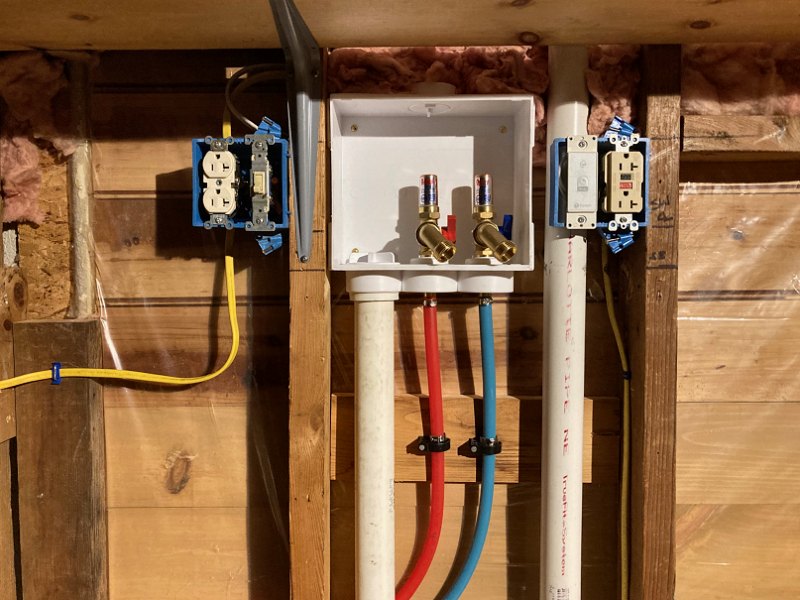
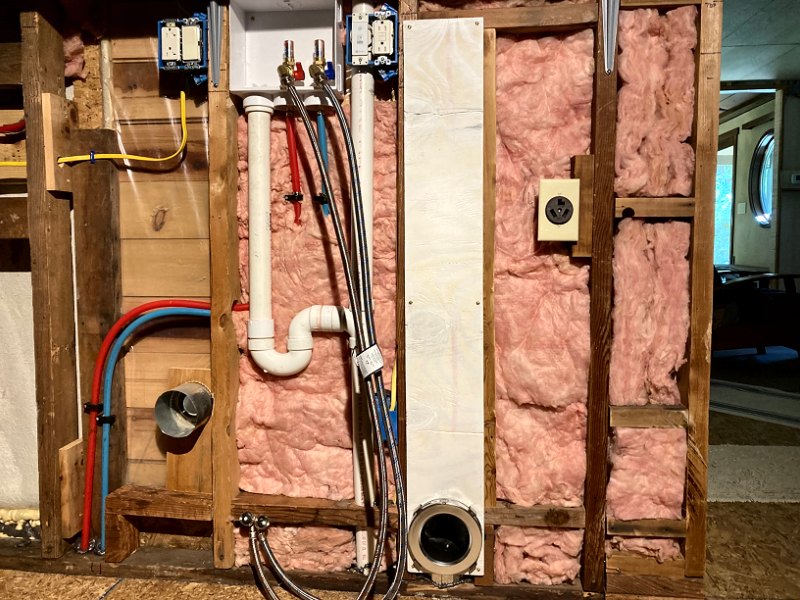
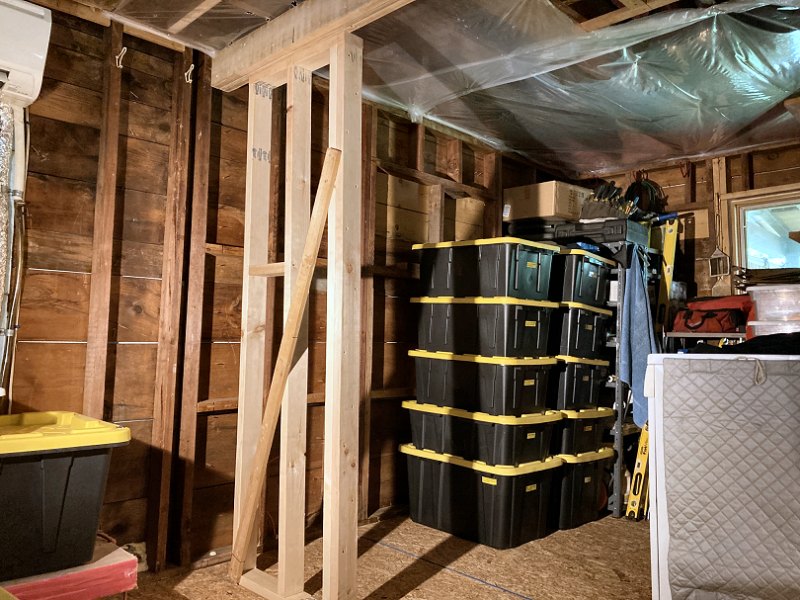
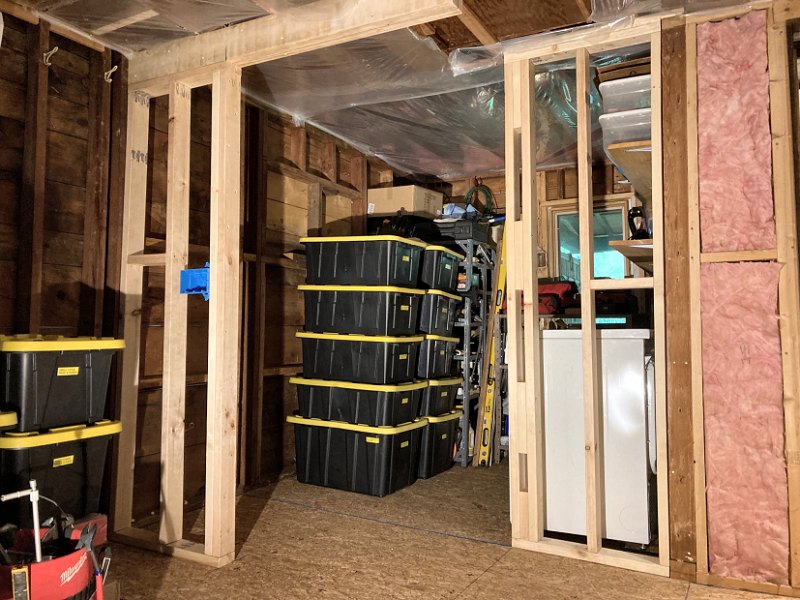
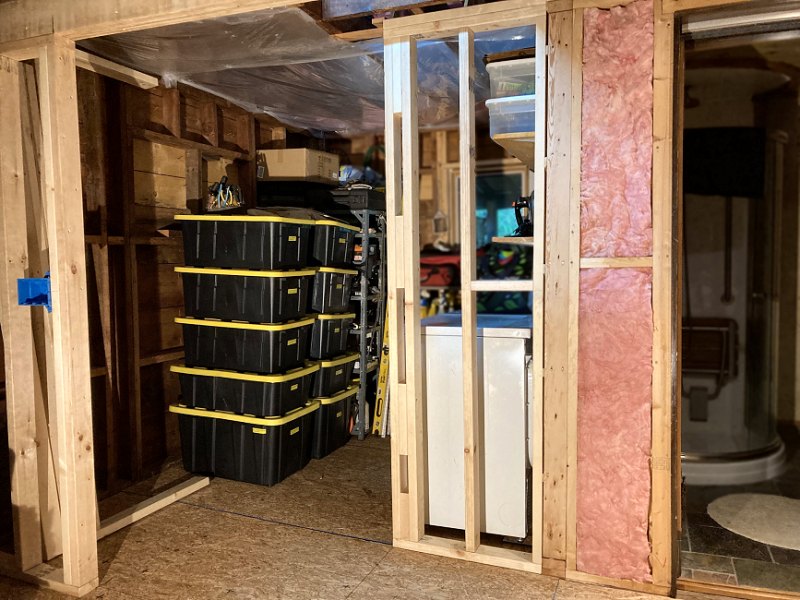
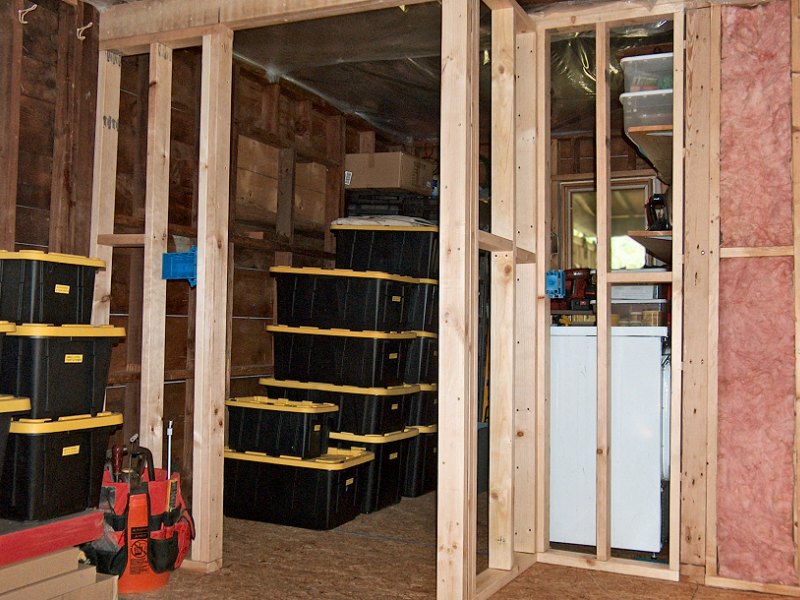
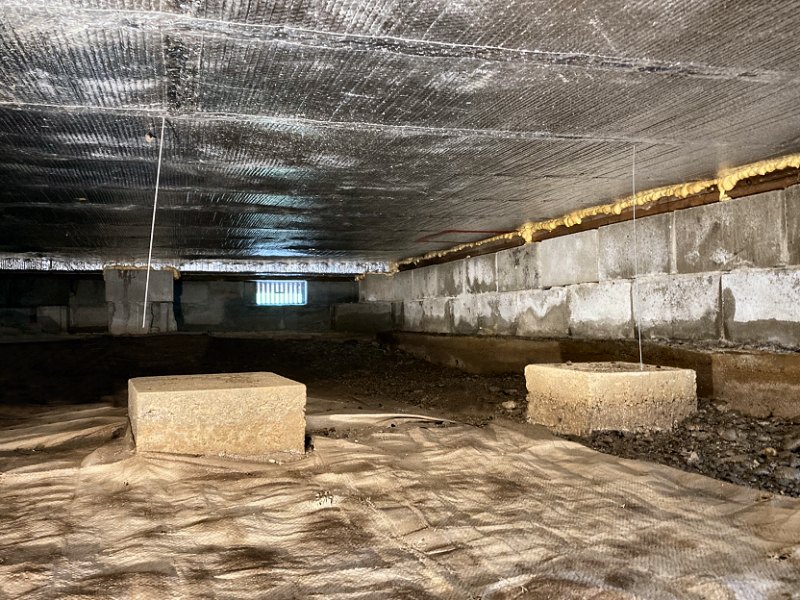
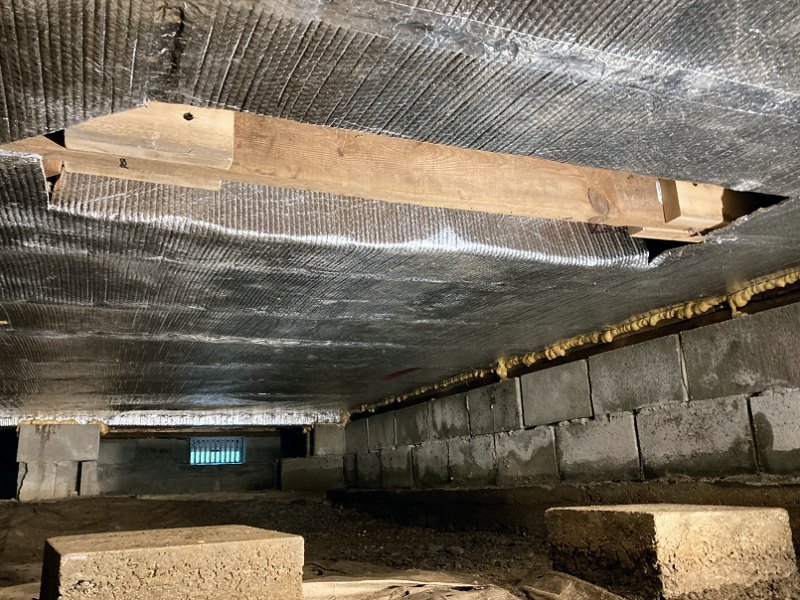
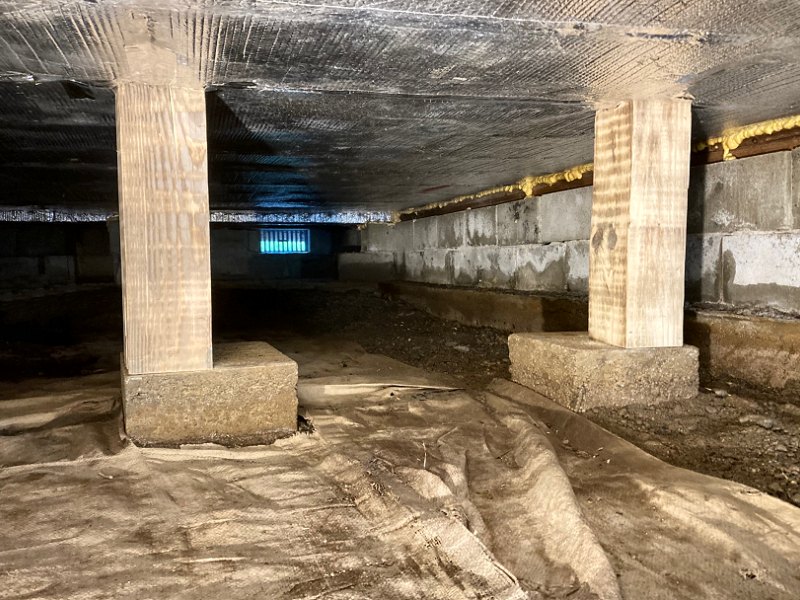
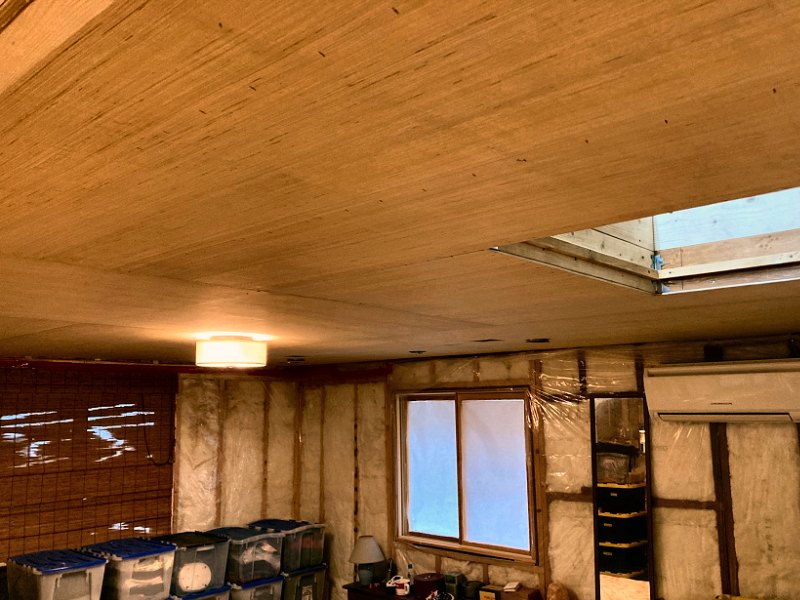
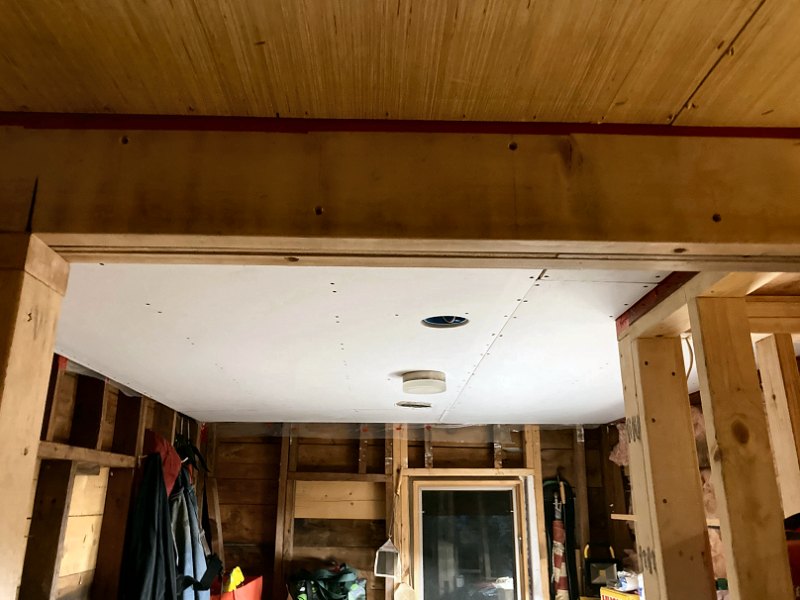
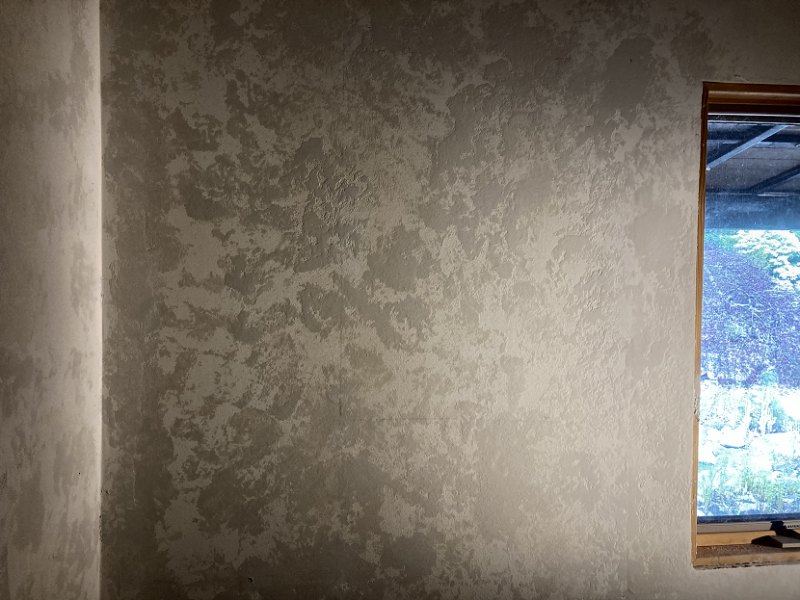
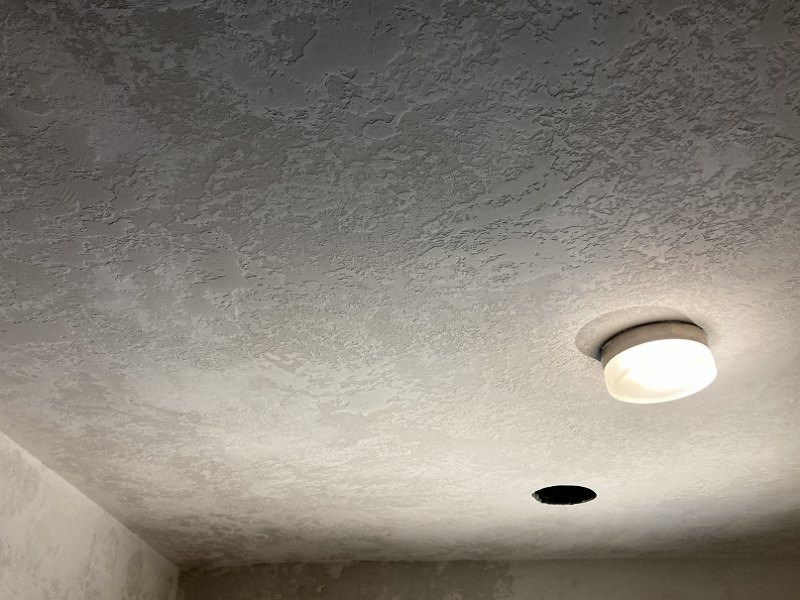
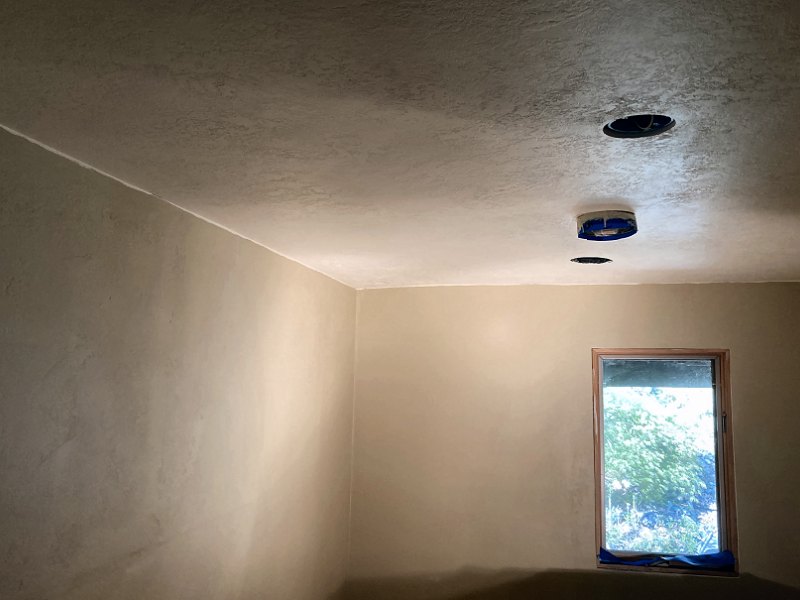
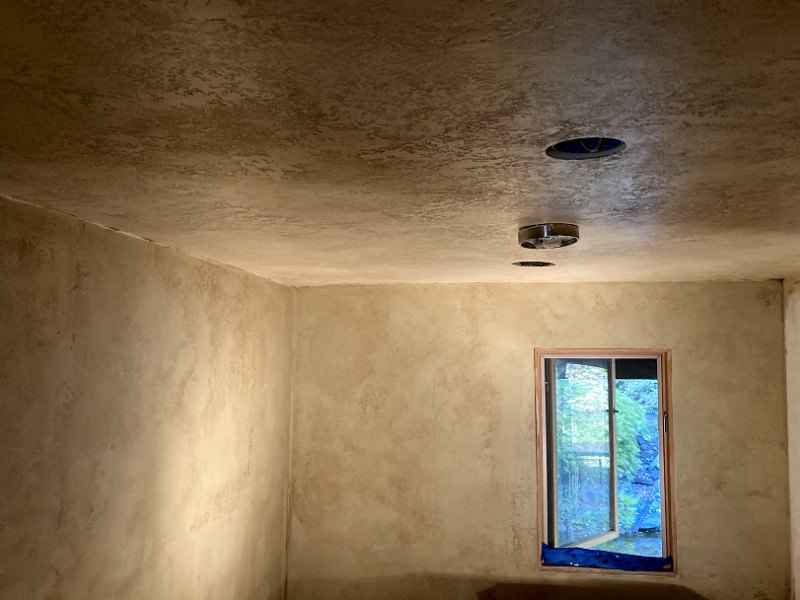
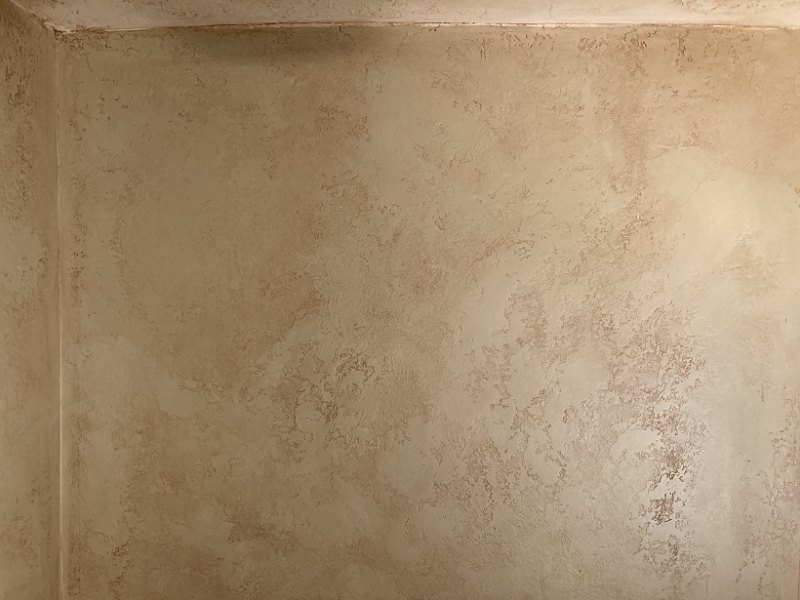
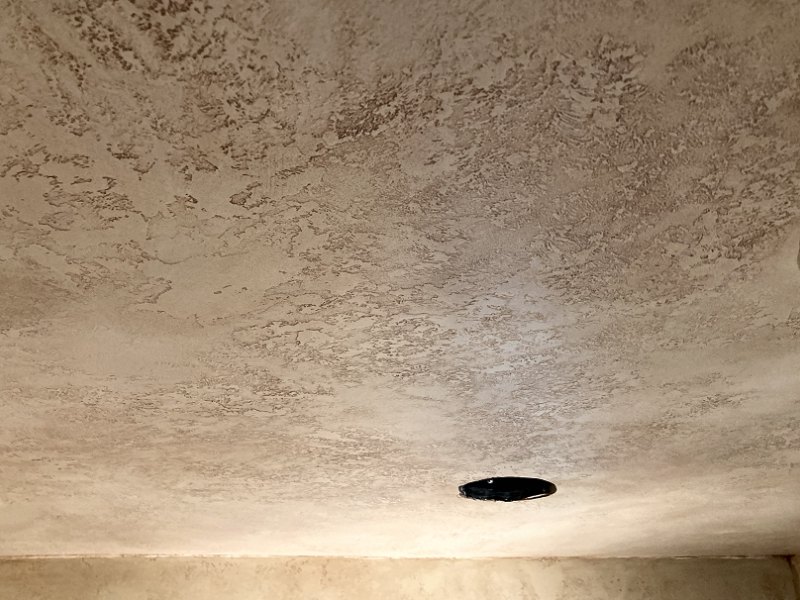
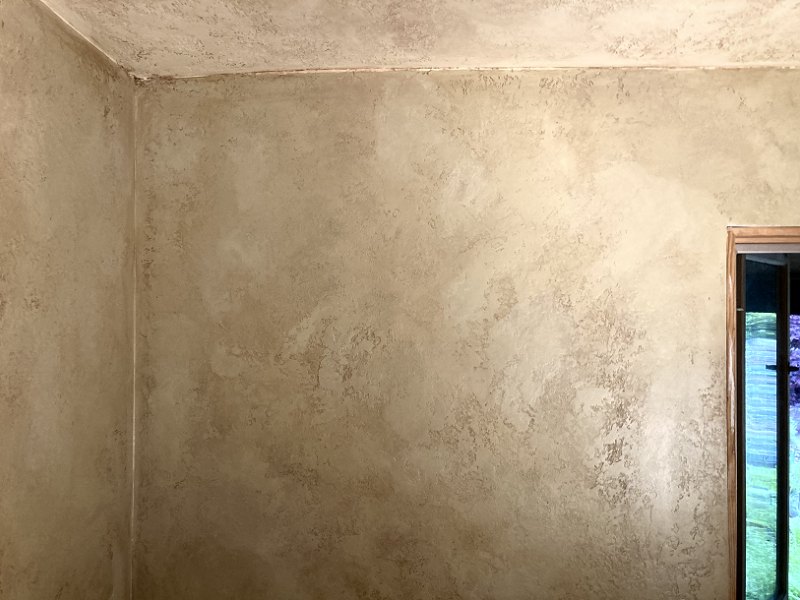
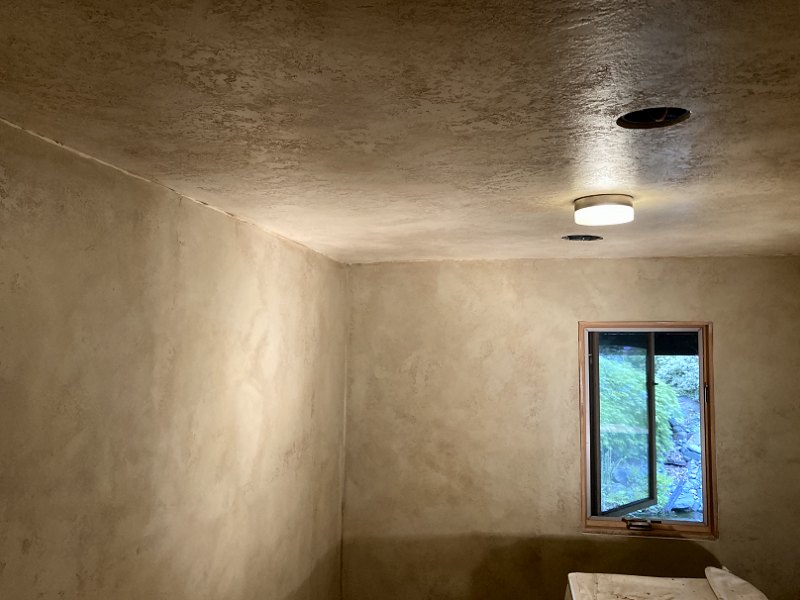
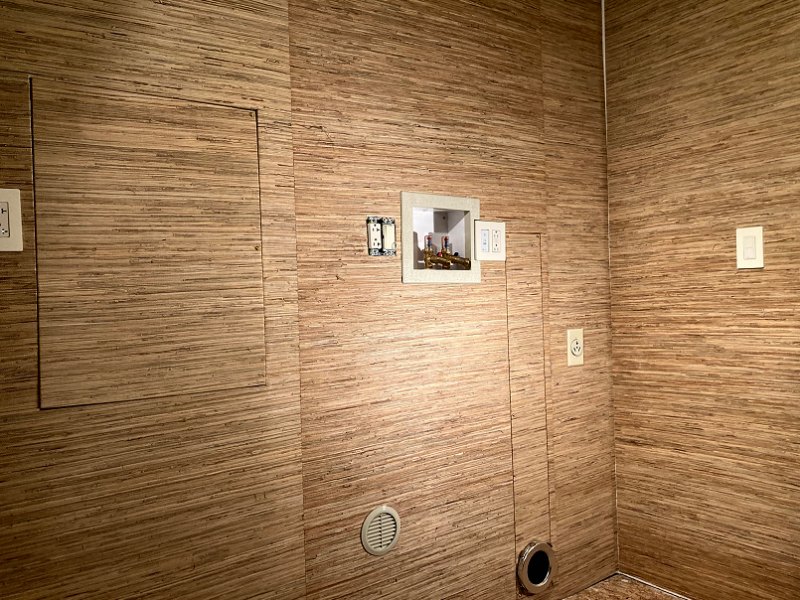
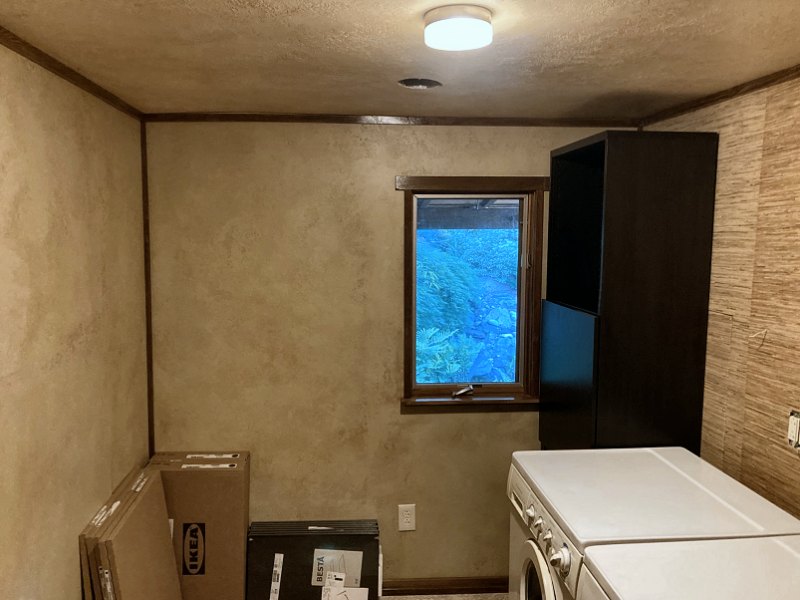
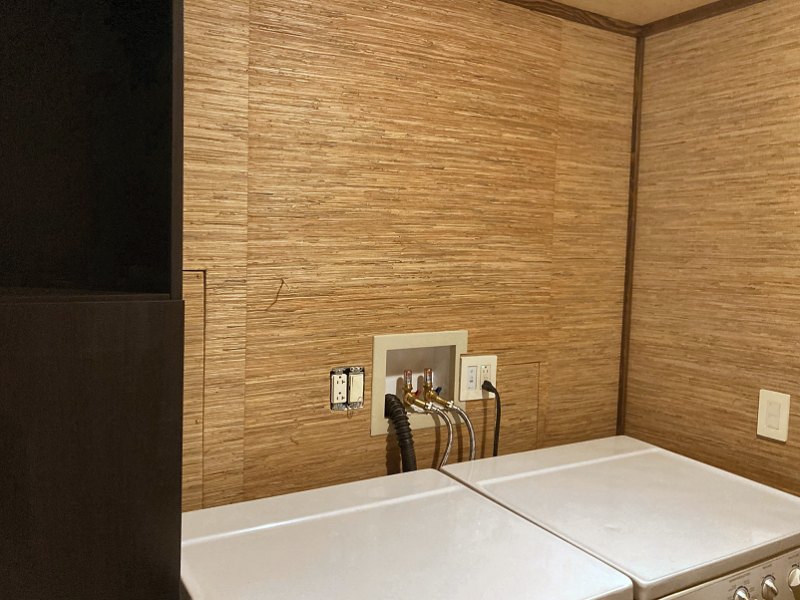
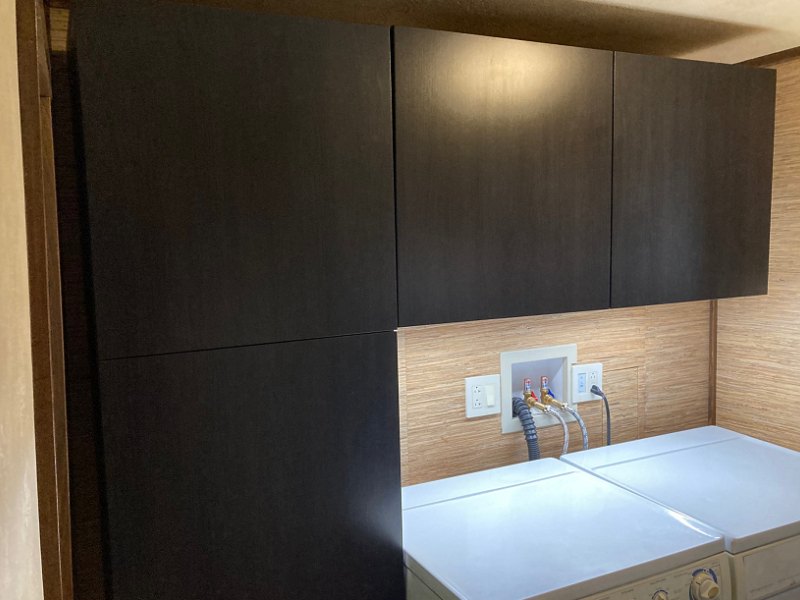
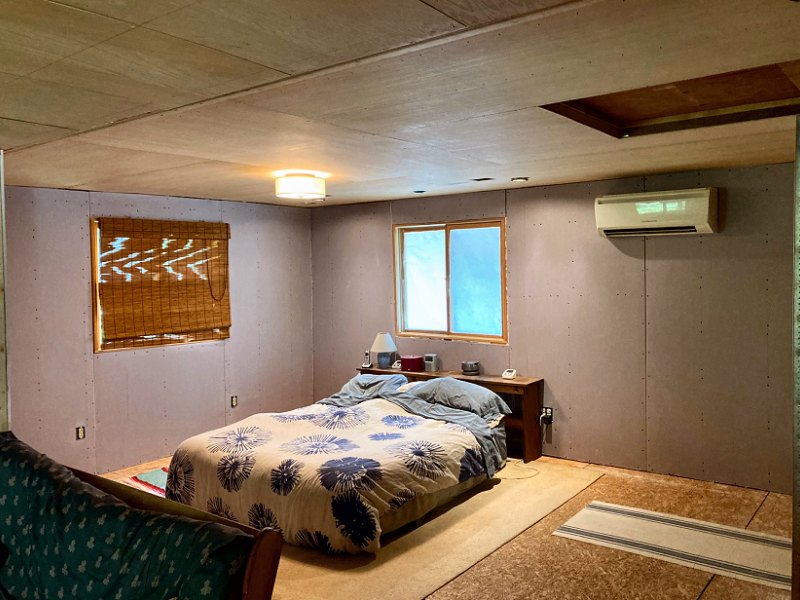
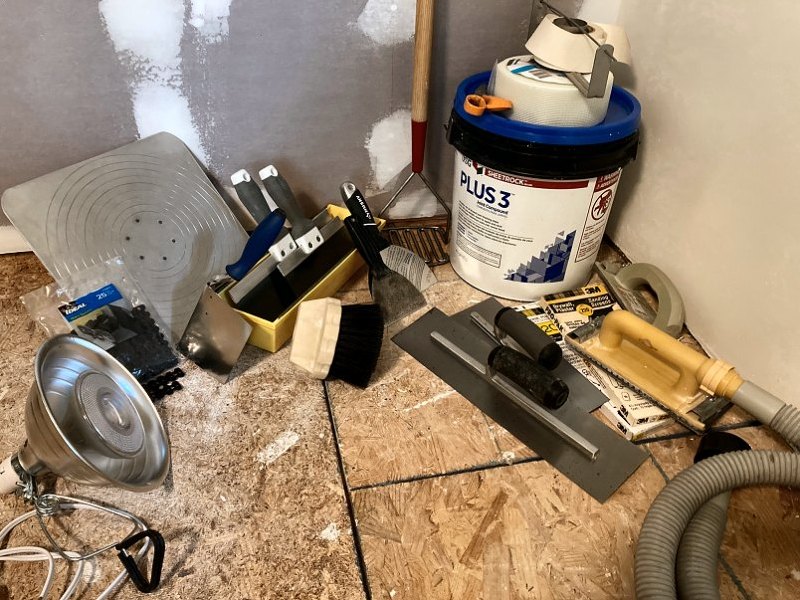
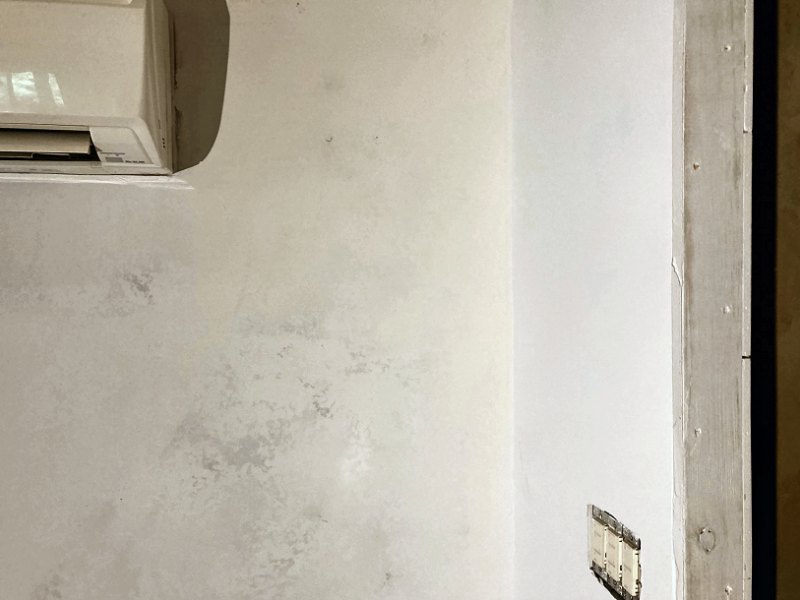
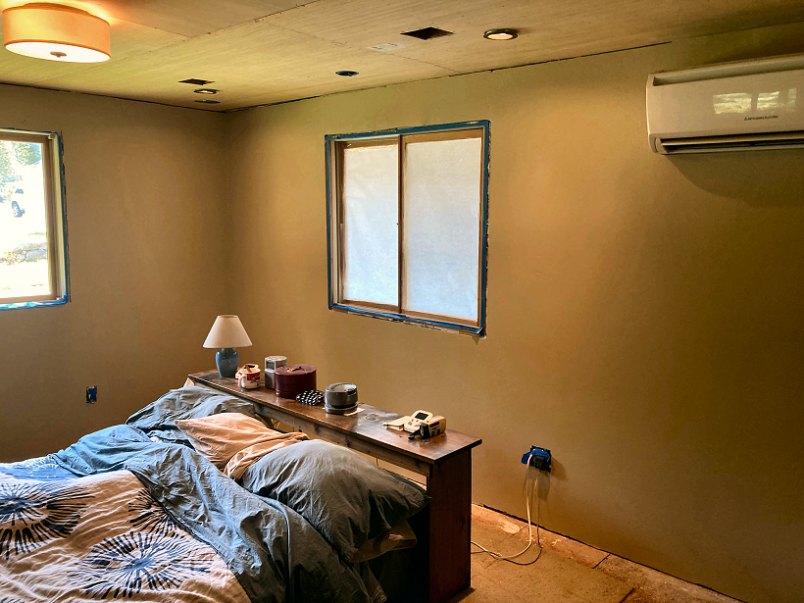
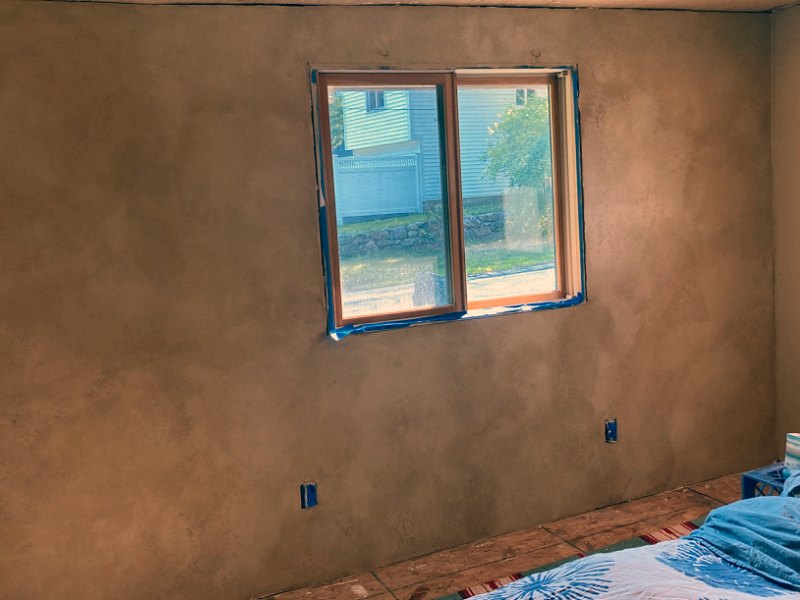
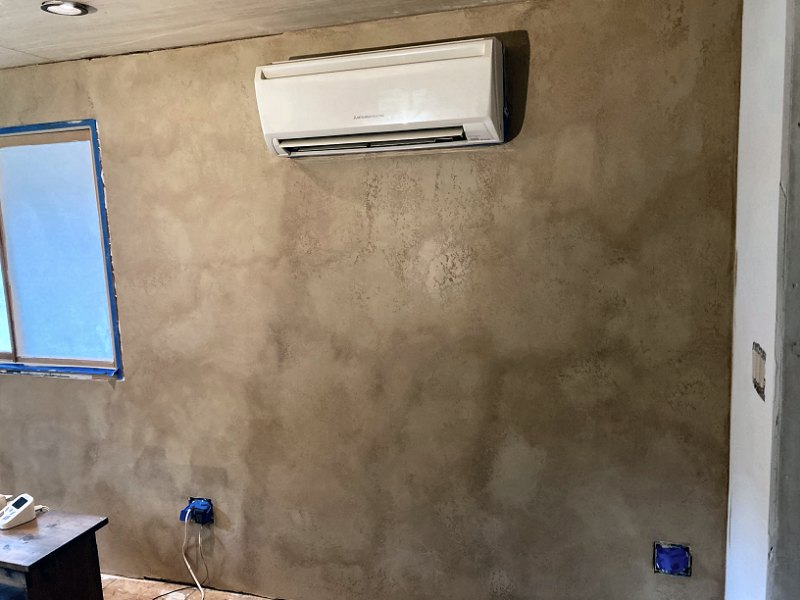
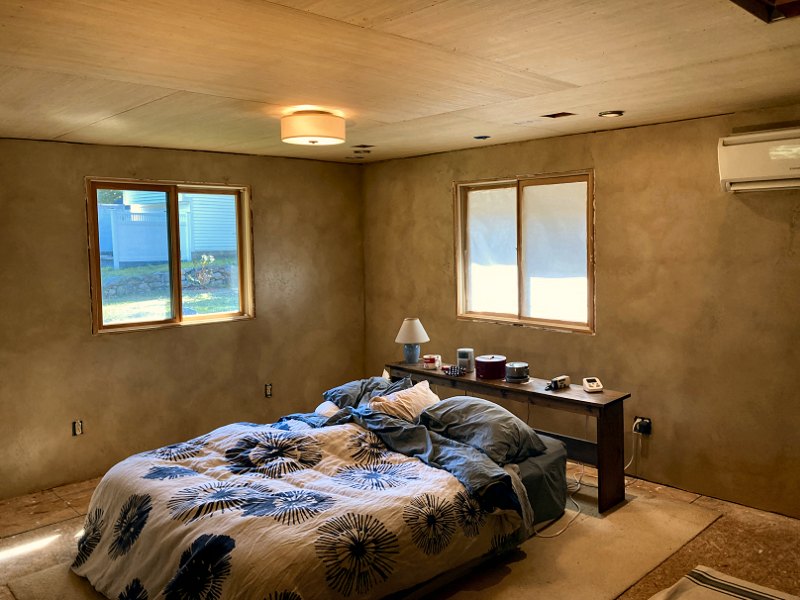
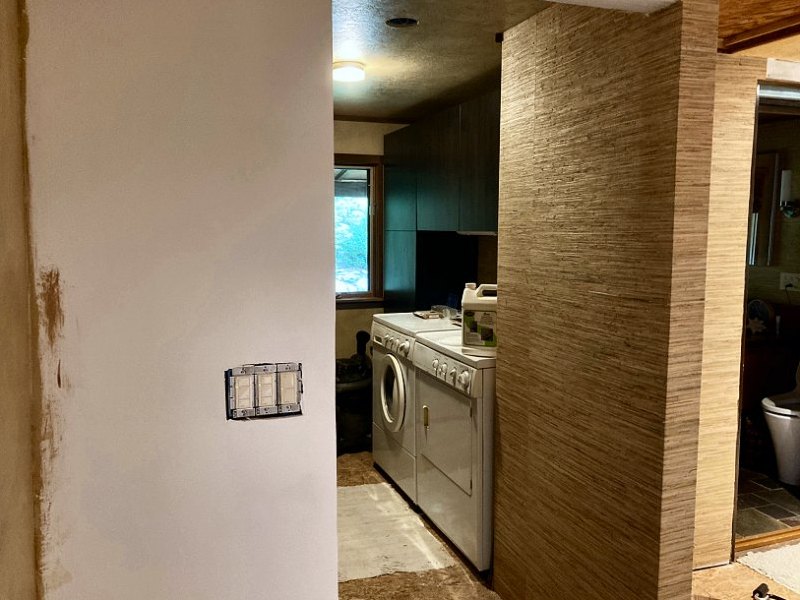
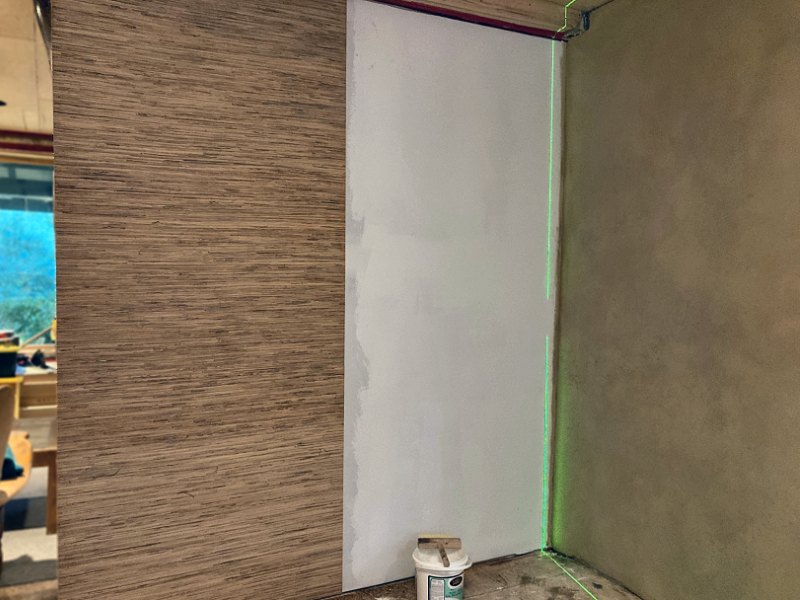
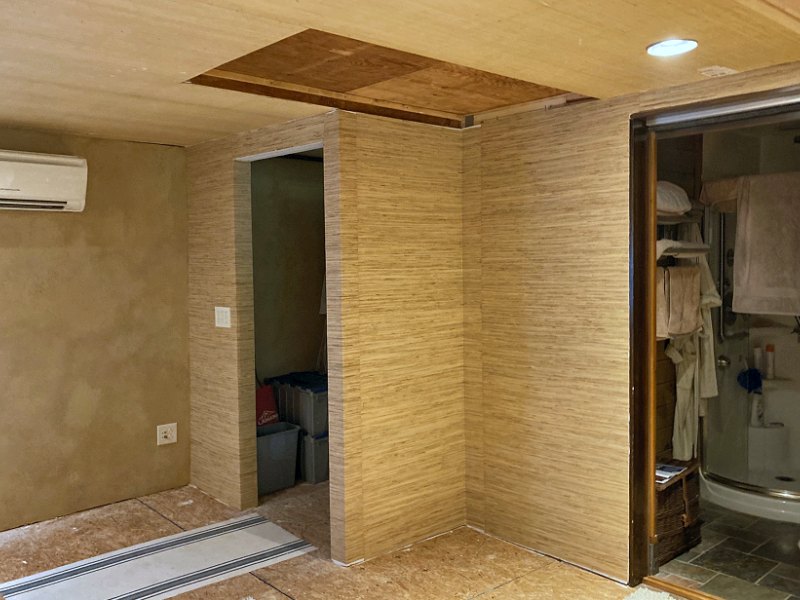
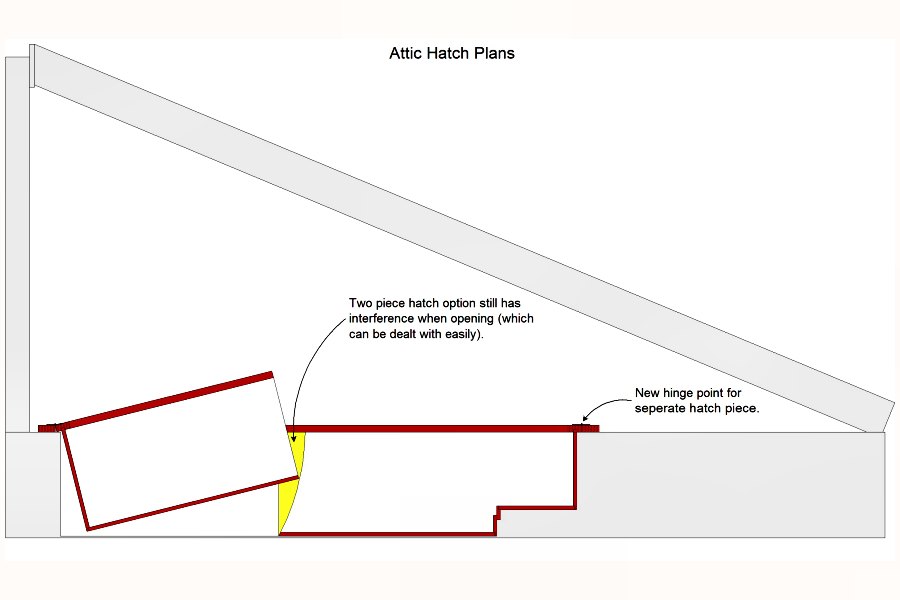
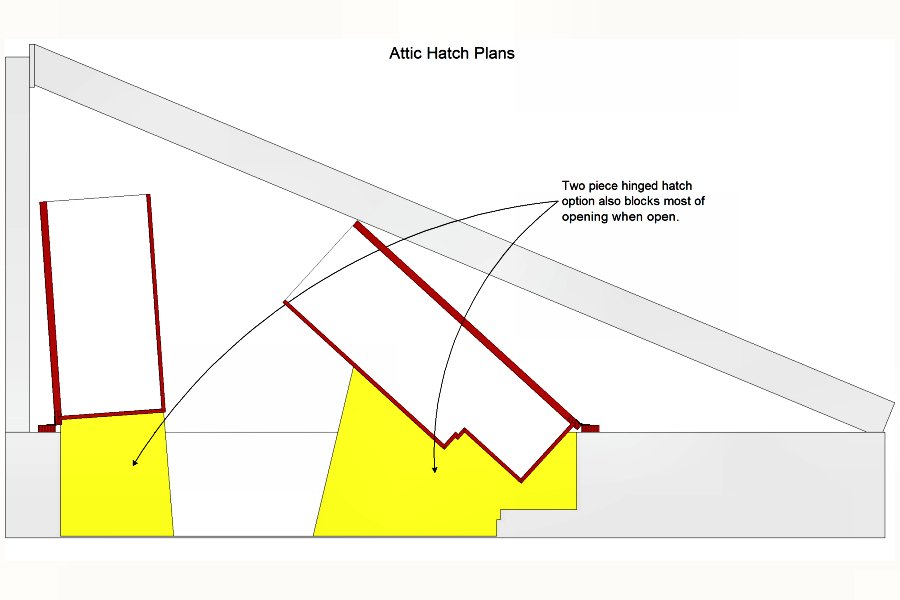
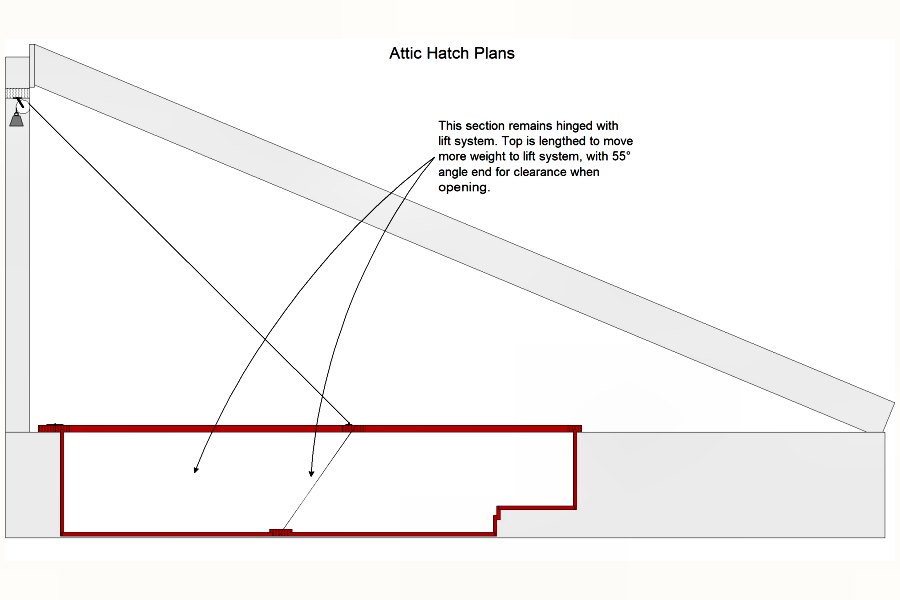
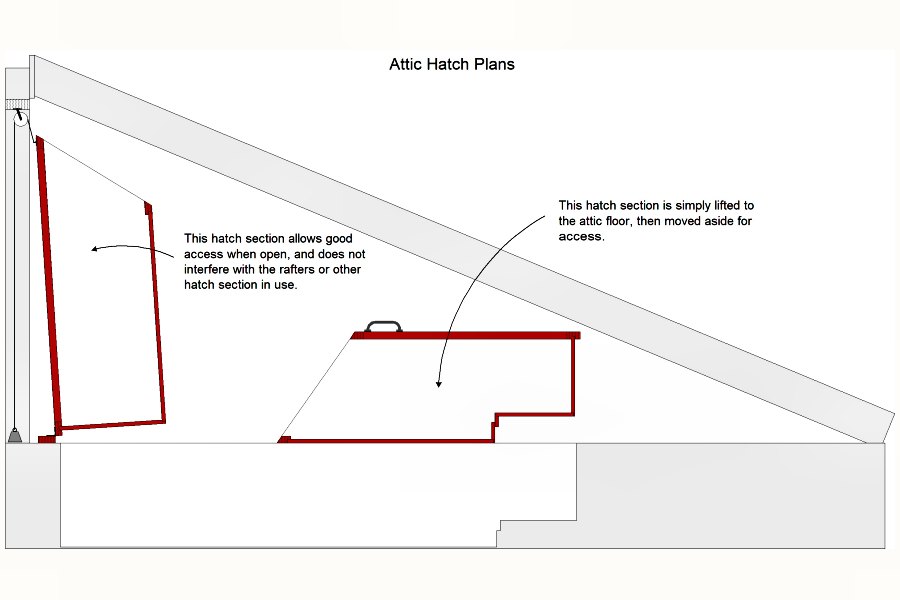
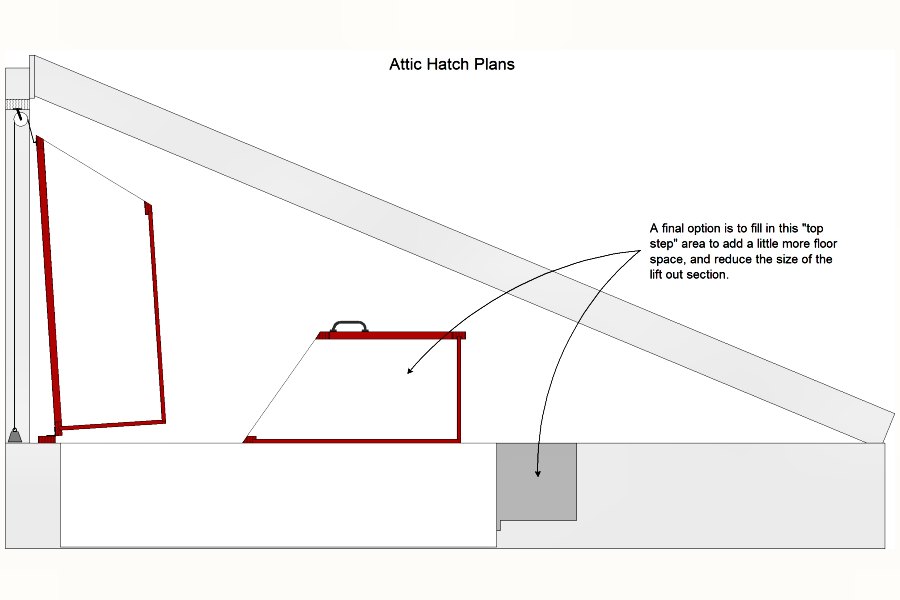
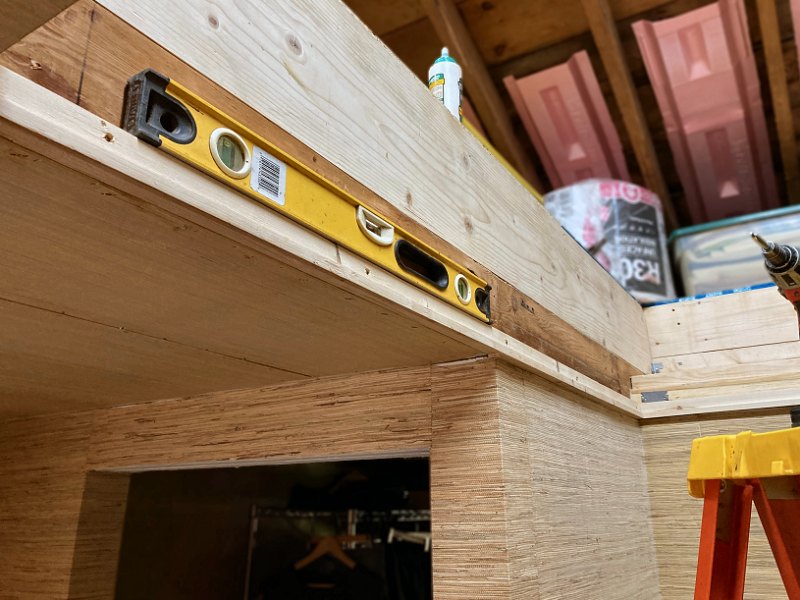
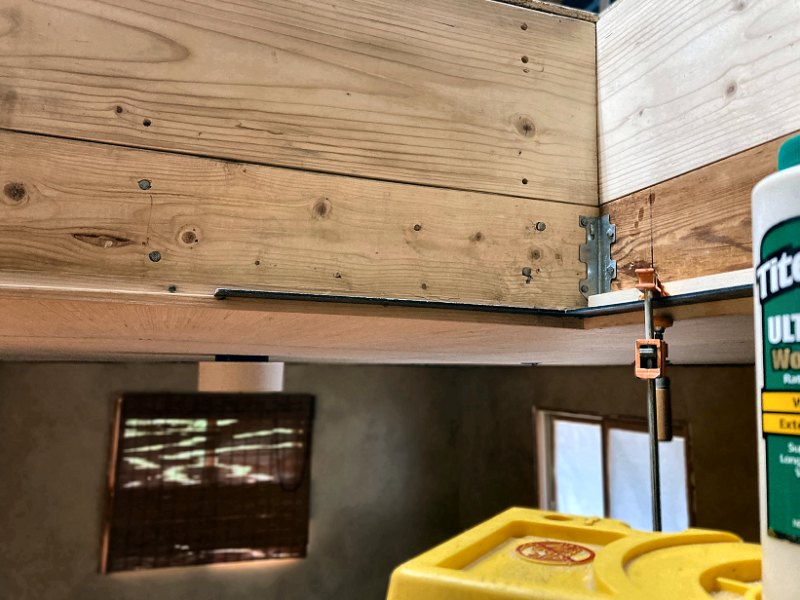
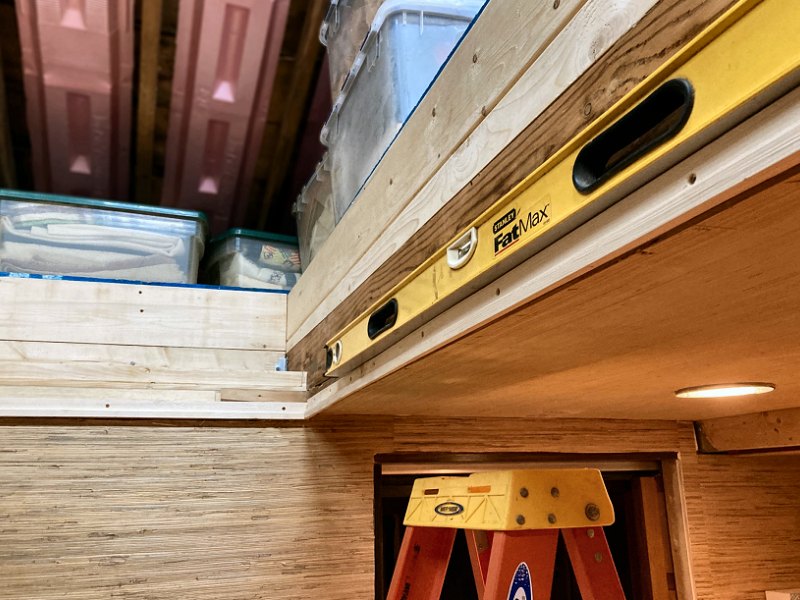
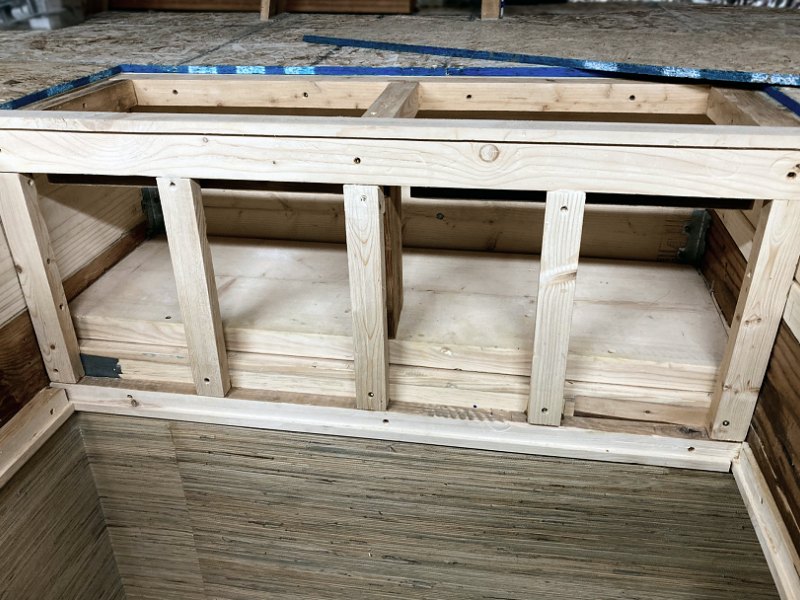
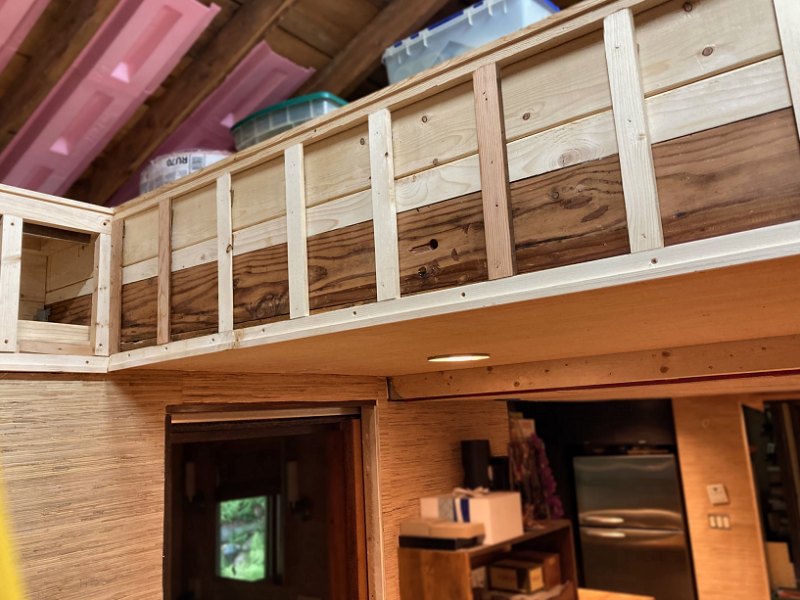
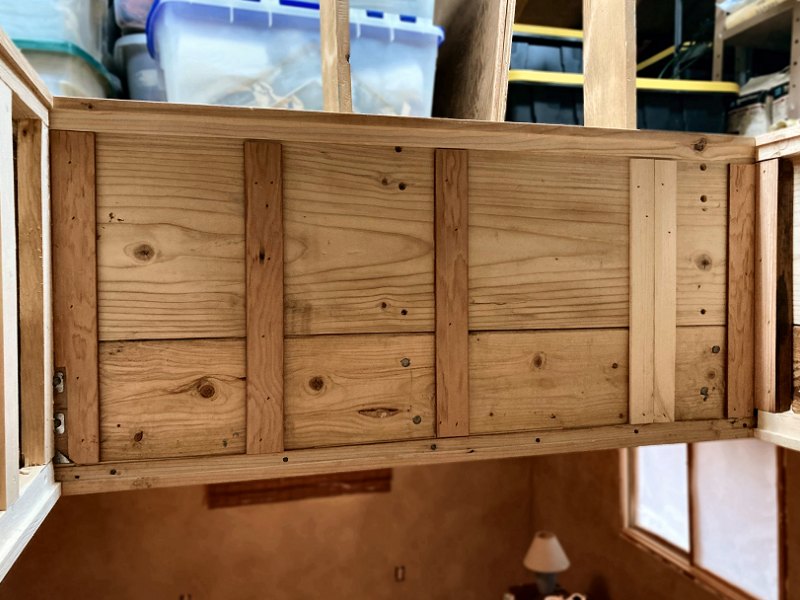
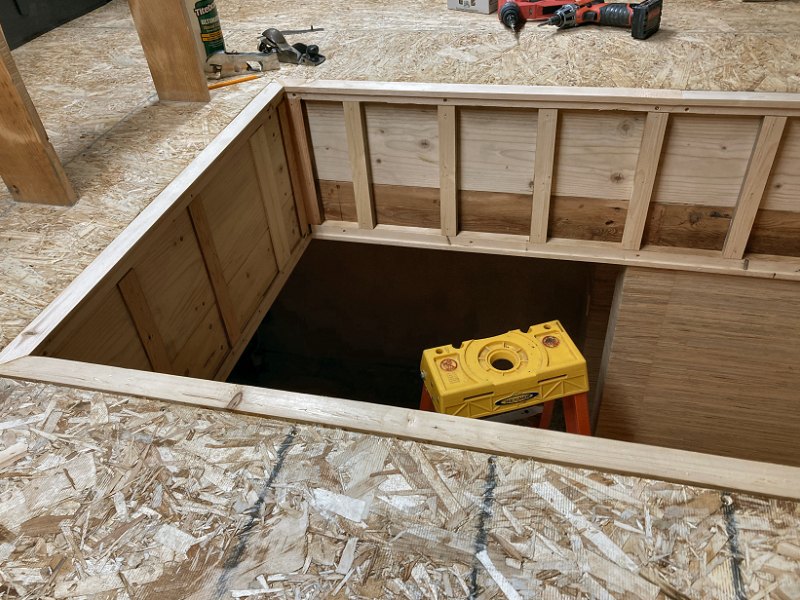
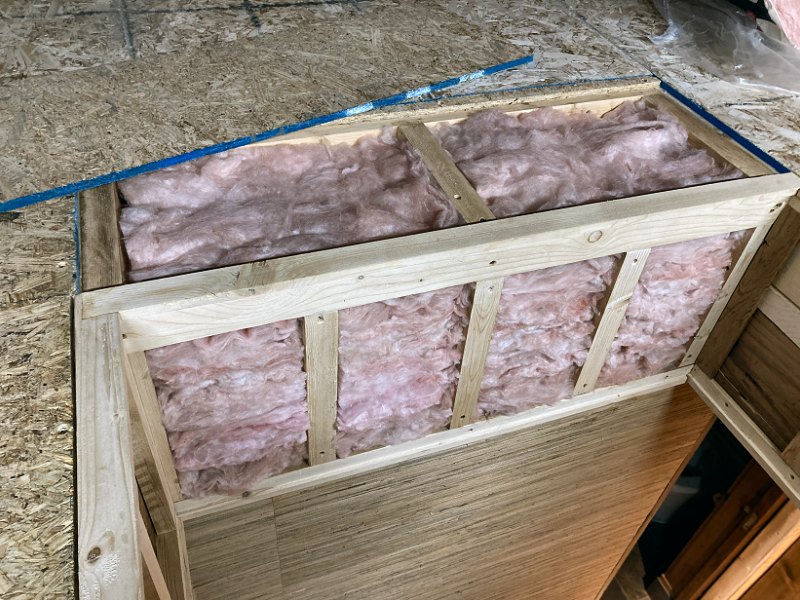
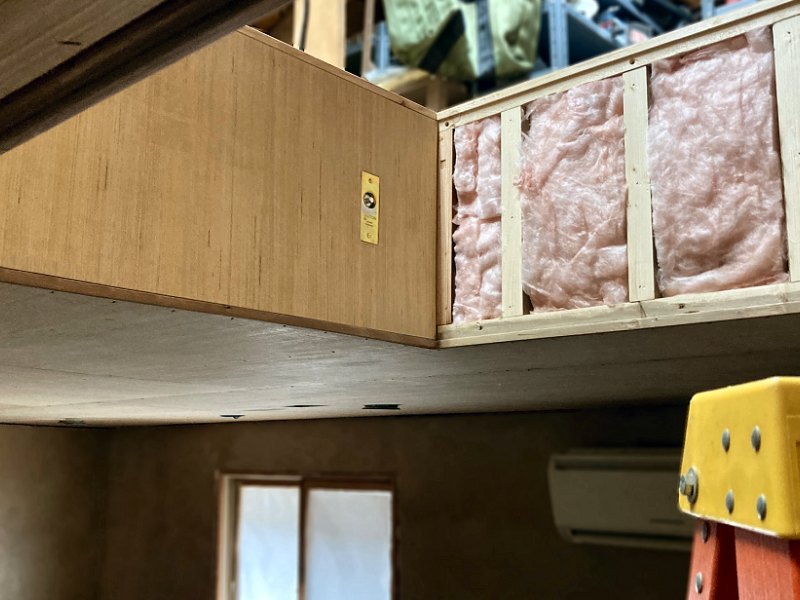
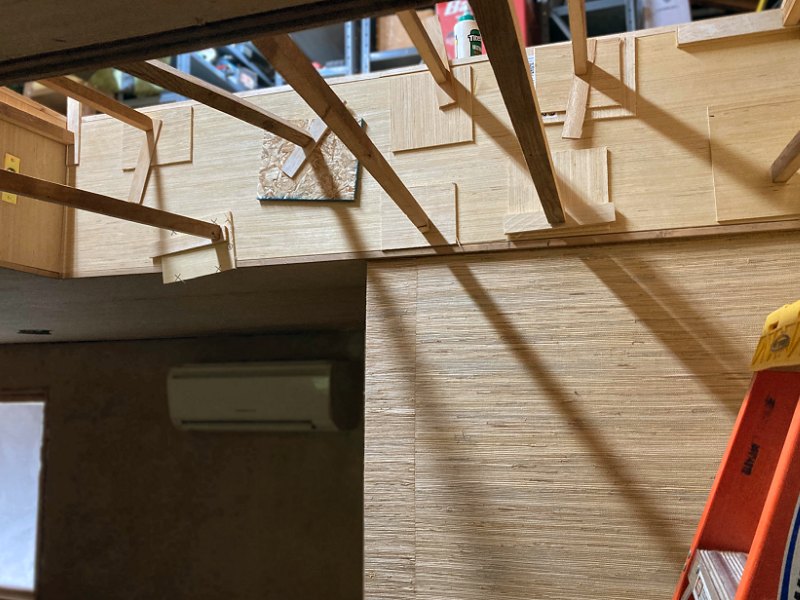
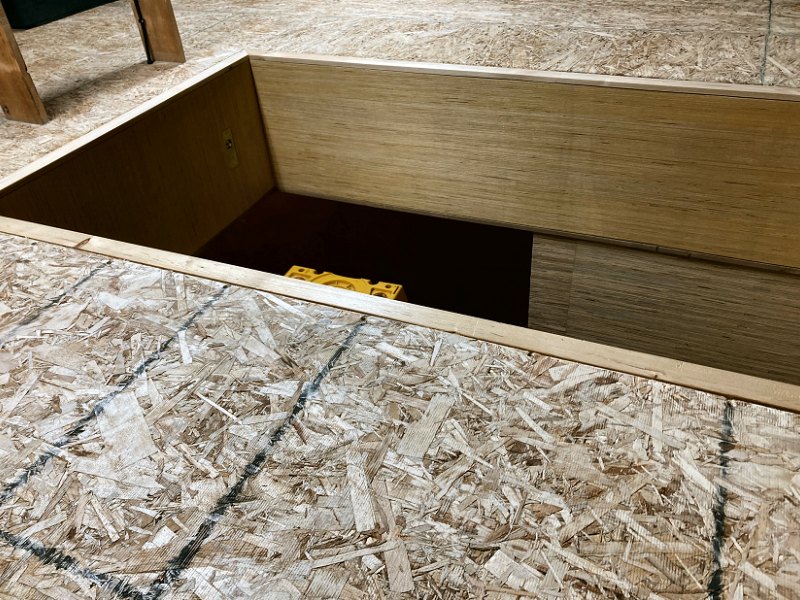
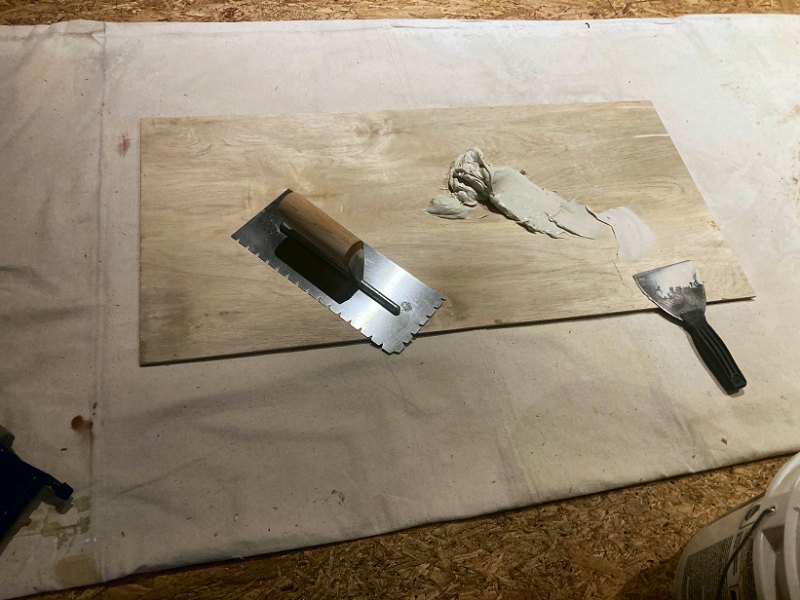
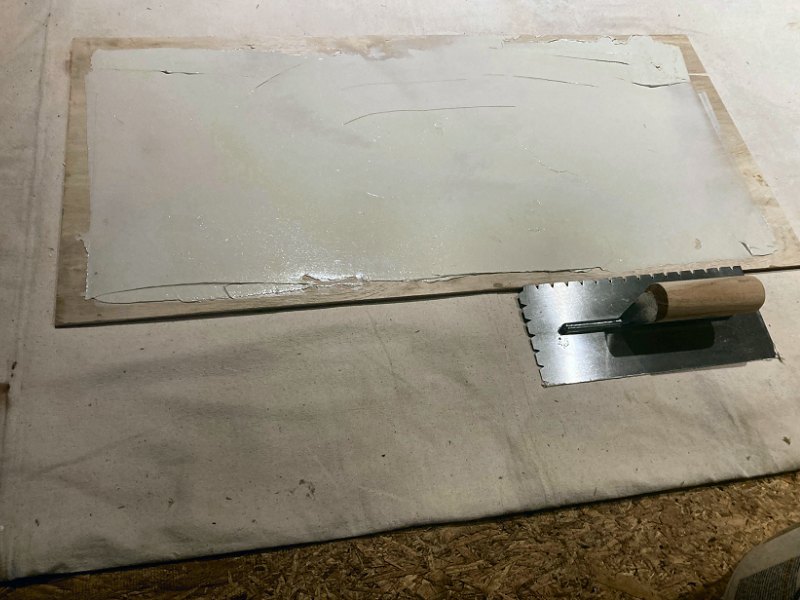
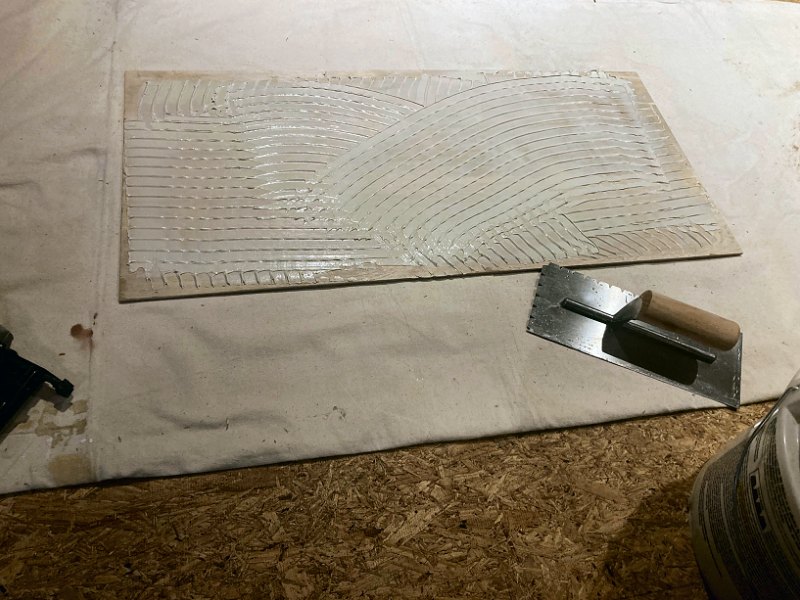
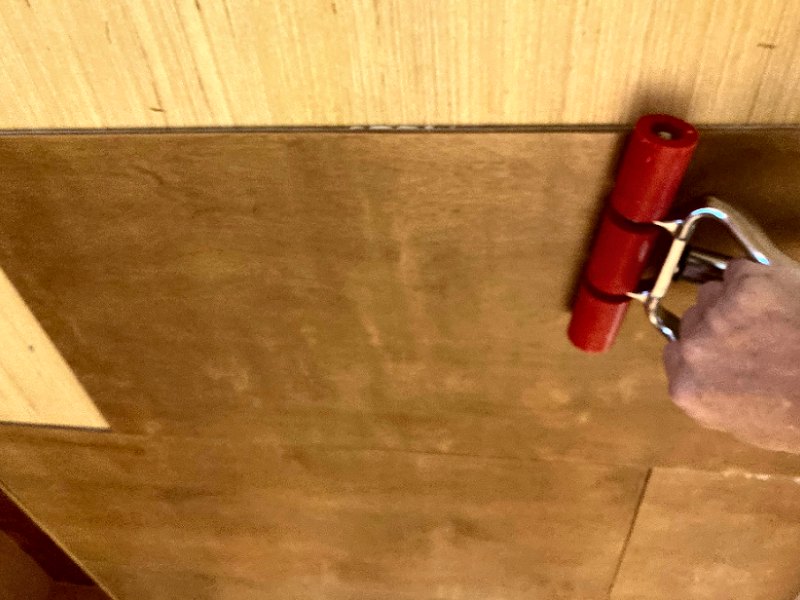
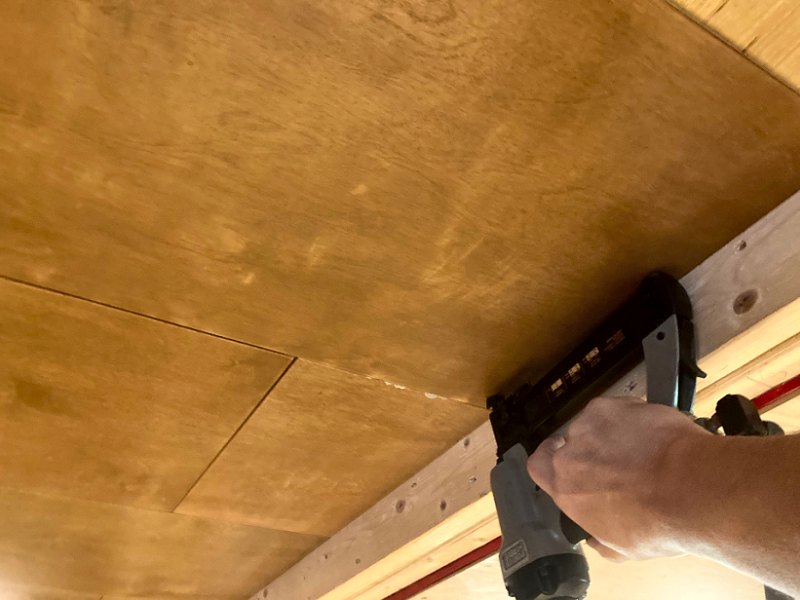
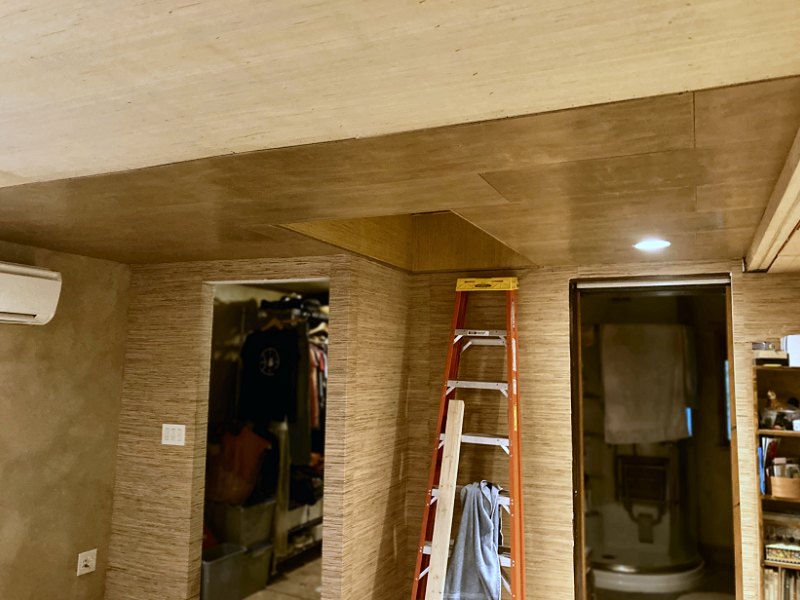
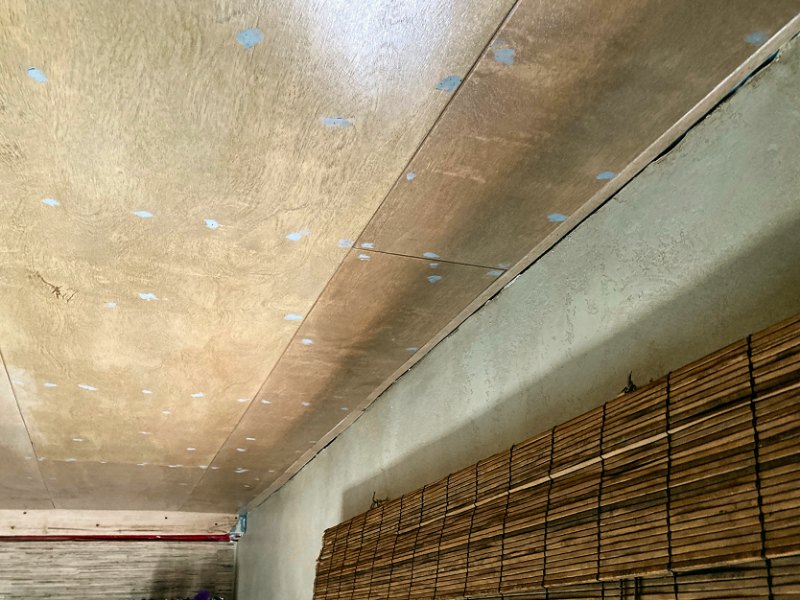
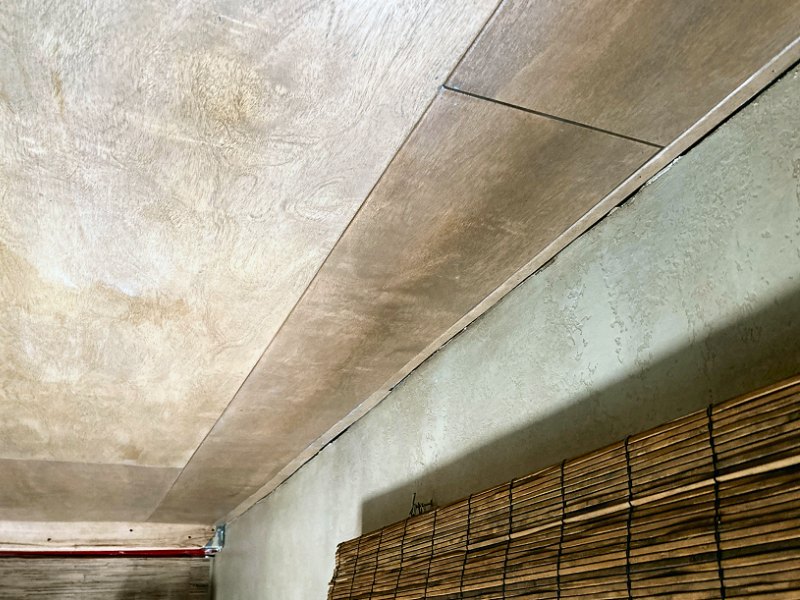
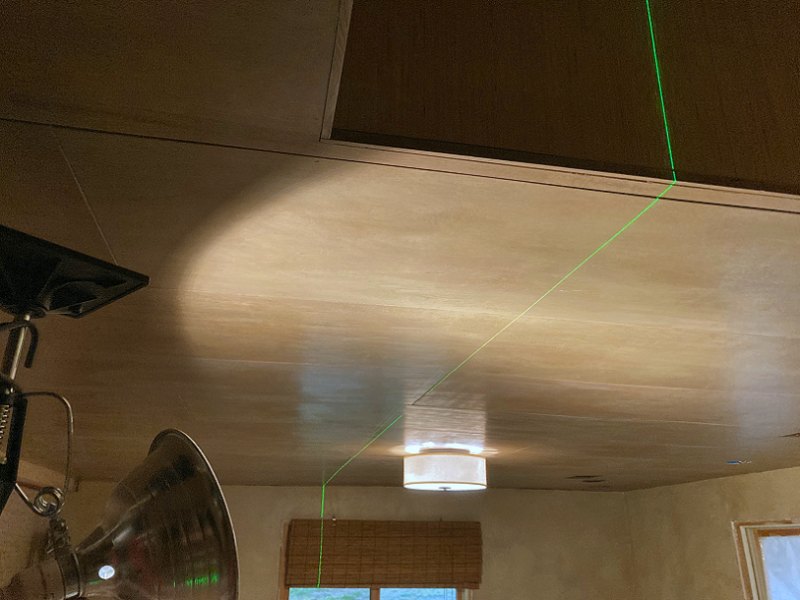
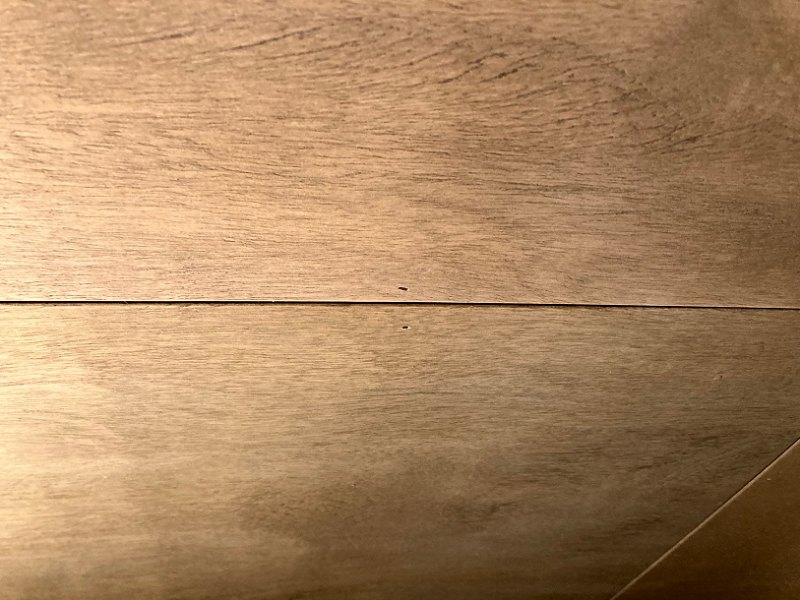
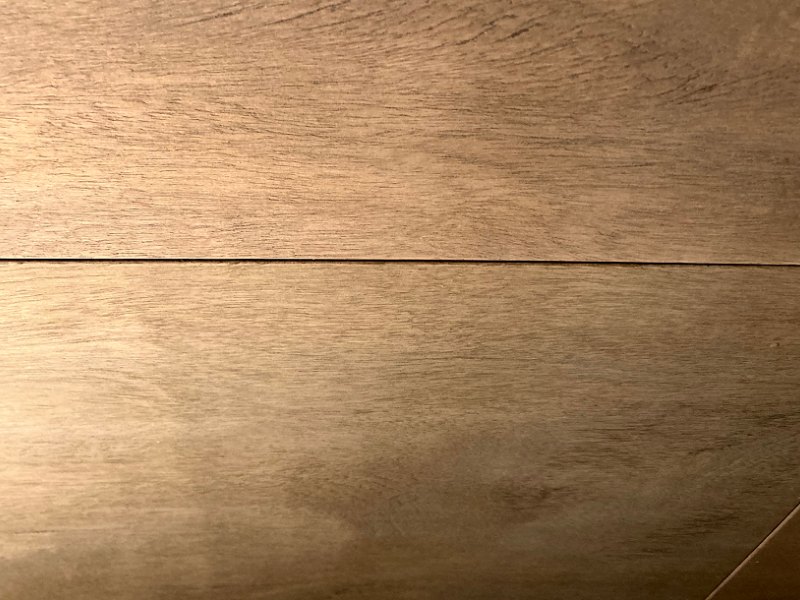
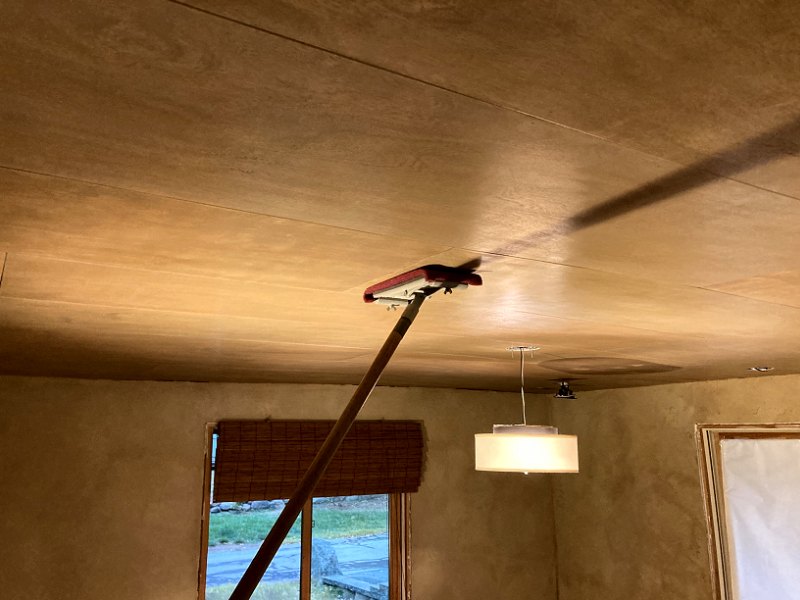
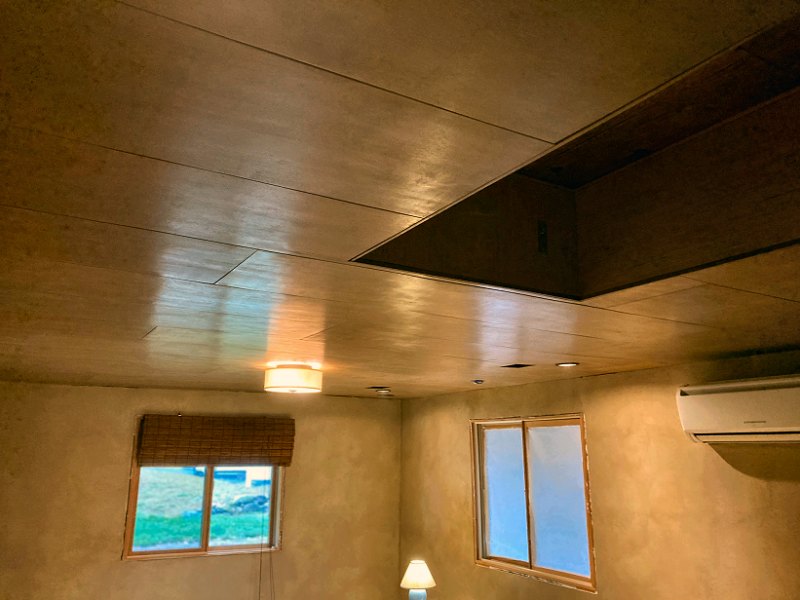
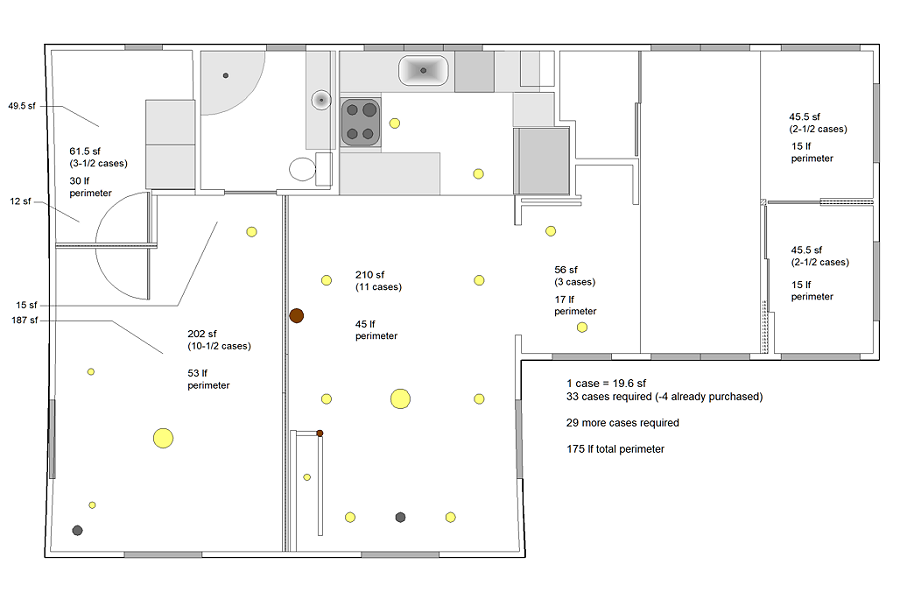
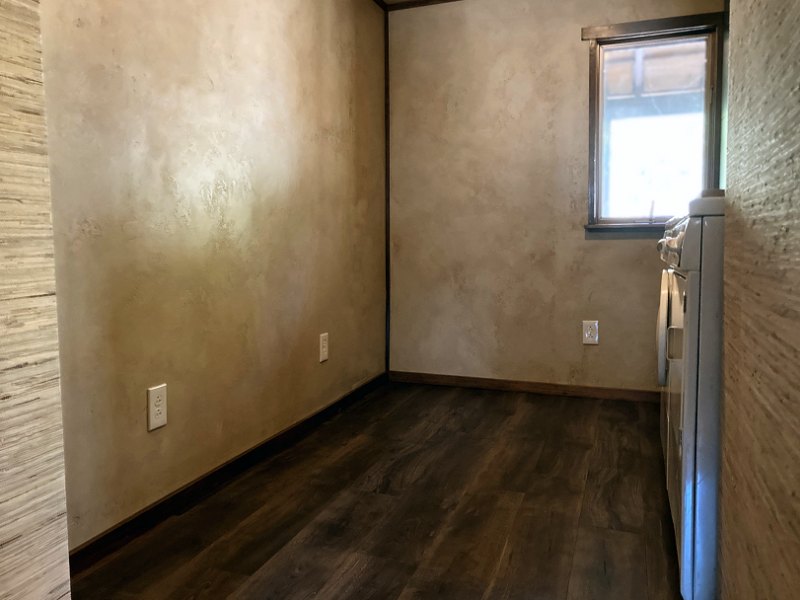
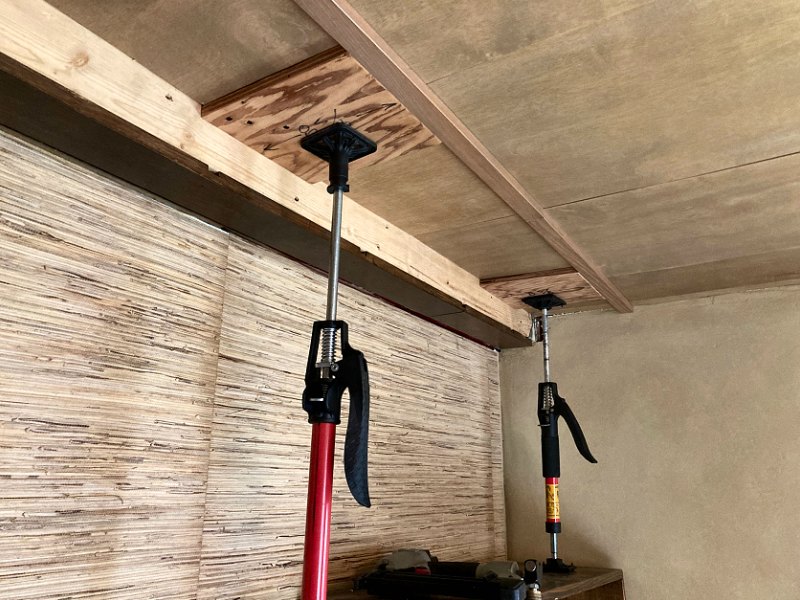
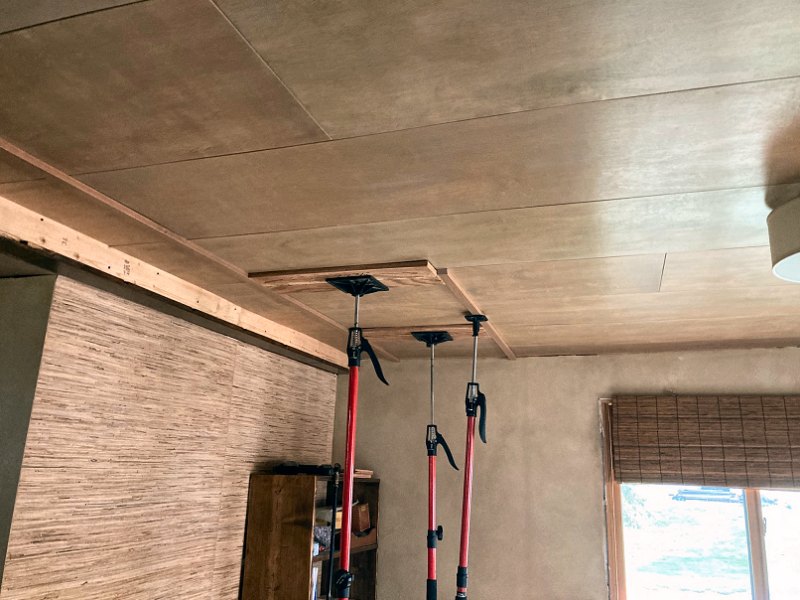
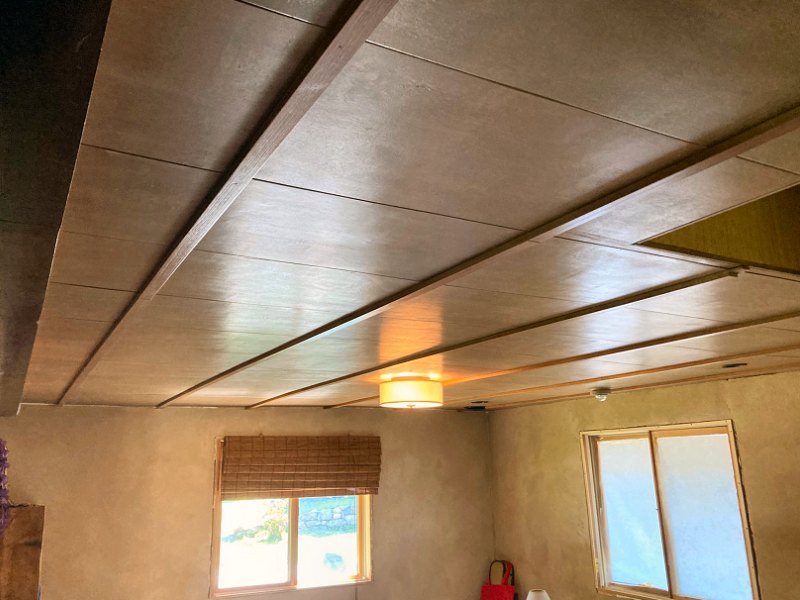
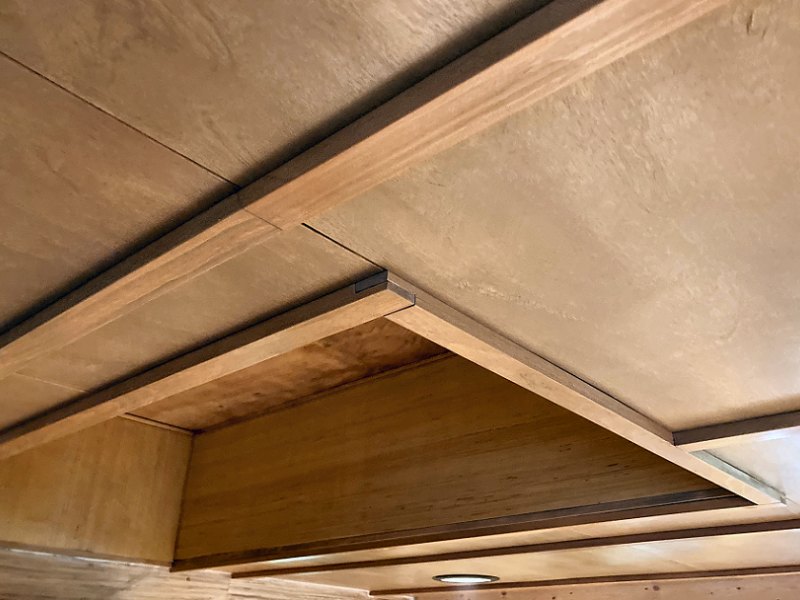
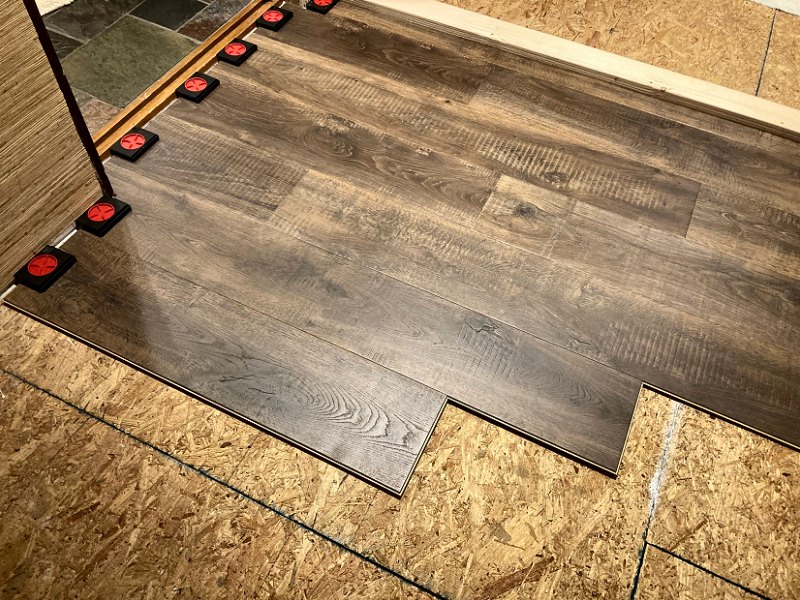
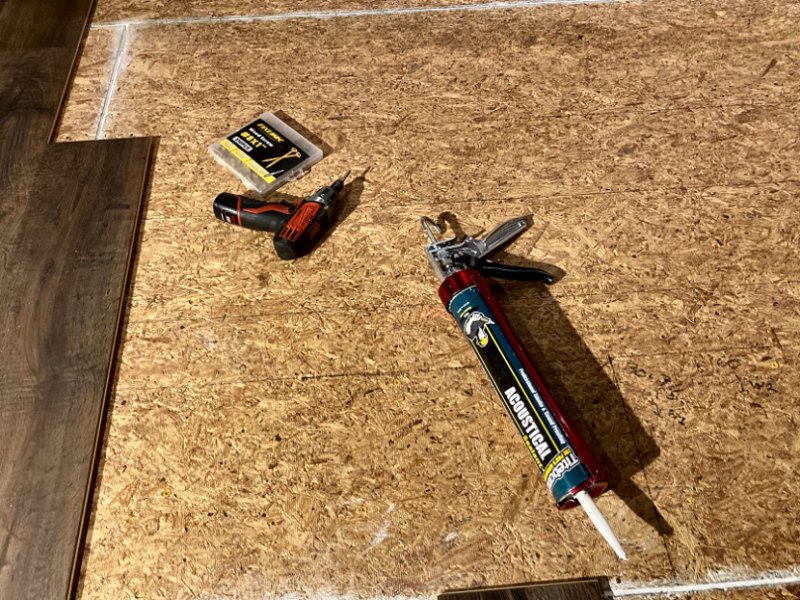